The fab kits were designed by Maria Cottingham, a DT member on the Daisy’s team.
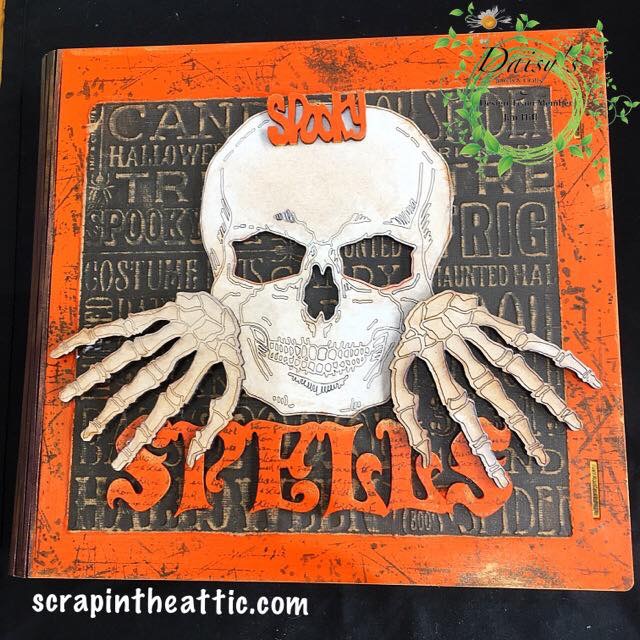
This book box of spells is very easy to put together using Daisy’s mdf glue. I painted the back and spine with Prima metallic Blackberry and Decoart Gold.
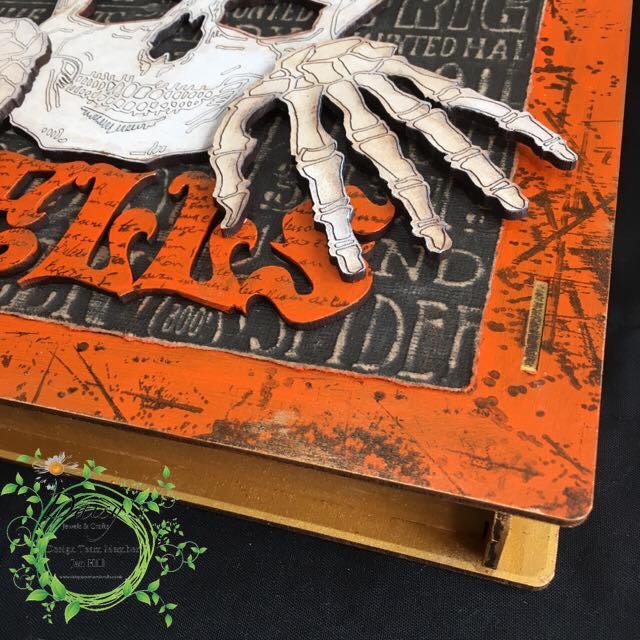
The front had a border of Primary Orange which was then stamped with black archival using a splatter stamp. I used this technique for the Spells word.
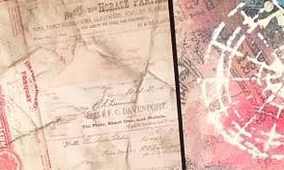
I tore a sheet of Tim Holtz cordinations seasonal theme, sanded the embossed areas and glued onto the front.
The skull and hands were given a coat of Translucent white and glued on.
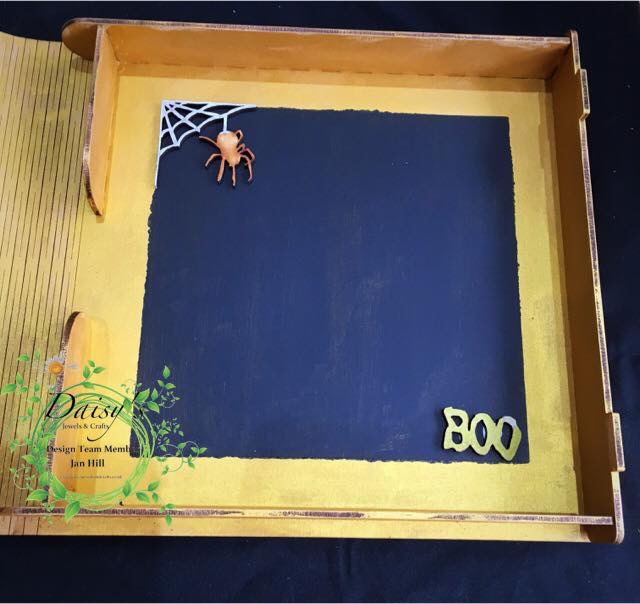
The inside had a coat of acrylic gold and the I masked an area for the Blackboard paint, although it looks blue in the photo!
I used the Bookbox , Grab Bag and Skulls kits available from Daisy’s
Hope you enjoyed looking at my creations
Have a spooky Halloween
Jan x
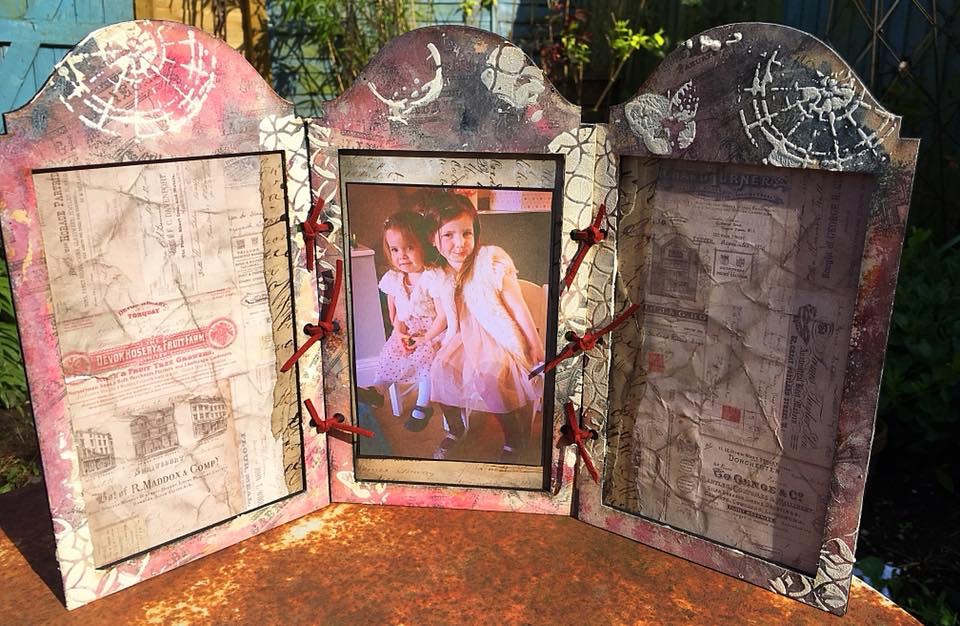
This triple frame was perfect for my granddaughters photo! They were ready to go to a party.The frame is a Daisy and Jewels kit.
I was actually in a hotel room when I created it so very little required to complete the look!
The frames were smooshed through watery paint. I used DecoArt acrylic paint, Quin Magenta, Paynes Grey and Titan Buff. I squeezed a little of each on a craft mat, sprayed with water and dragged the mdf through.
Butterflies and text were stamped on with Archival Potting Soil.
I used an old stencil from my stash with White Crackle paint.
Each frame was covered with TH papers, scrunched and inked. A strip of DecoArt tissue paper finished the look.

I joined the frames with strips of maroon suede.
Hope you like it x
]]>
I love the Scrapberry papers in this set and wanted to use my favourite for the box lid, to match the storage box I have made previously.
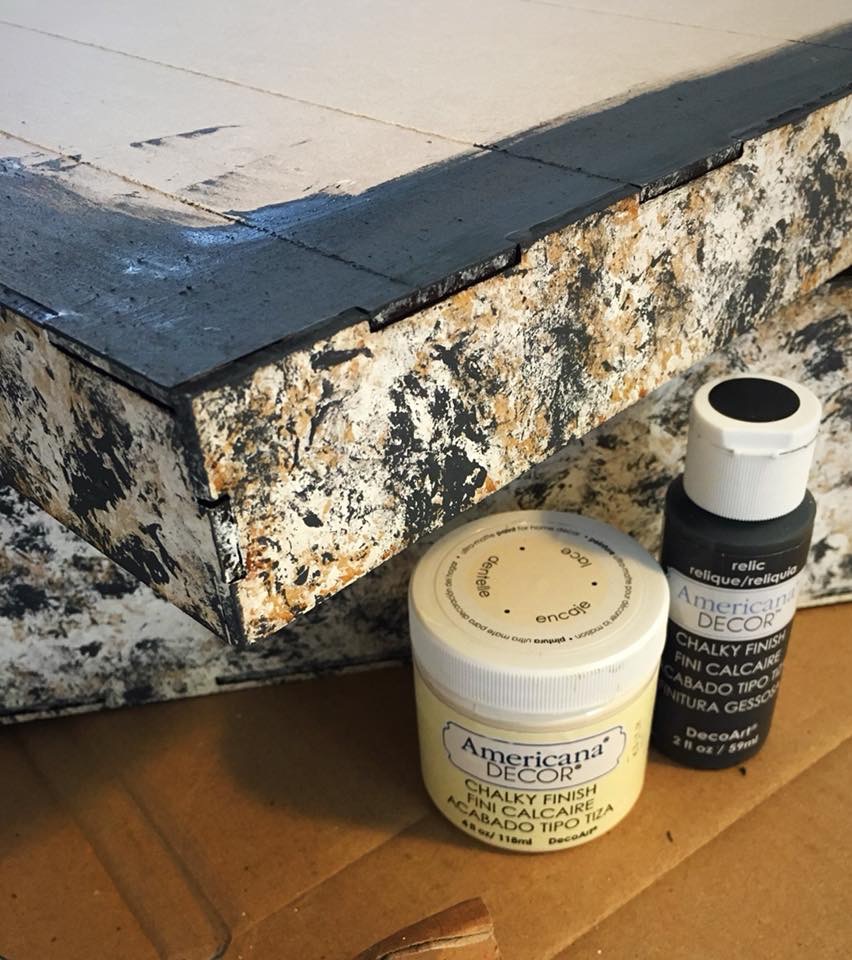
The mdf colour works well with the paper so I used Decoart chalk paint Relic and Lace.
I “scrambled” the paint on with scrunched kitchen towel to get the effect I wanted. I painted a border of Relic to set off the paper on the lid.
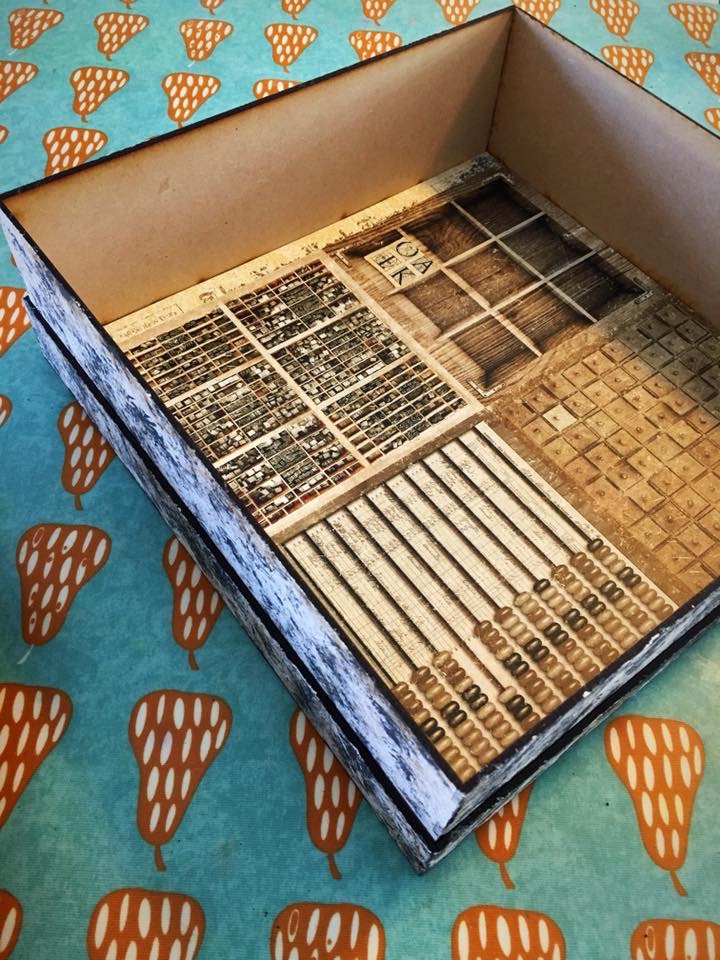
Perfect to fit papers inside!
hope you like this quick and easy project
Jan x
]]>
I really enjoyed making this cupboard with two shelves inside. The front is hinged to open.
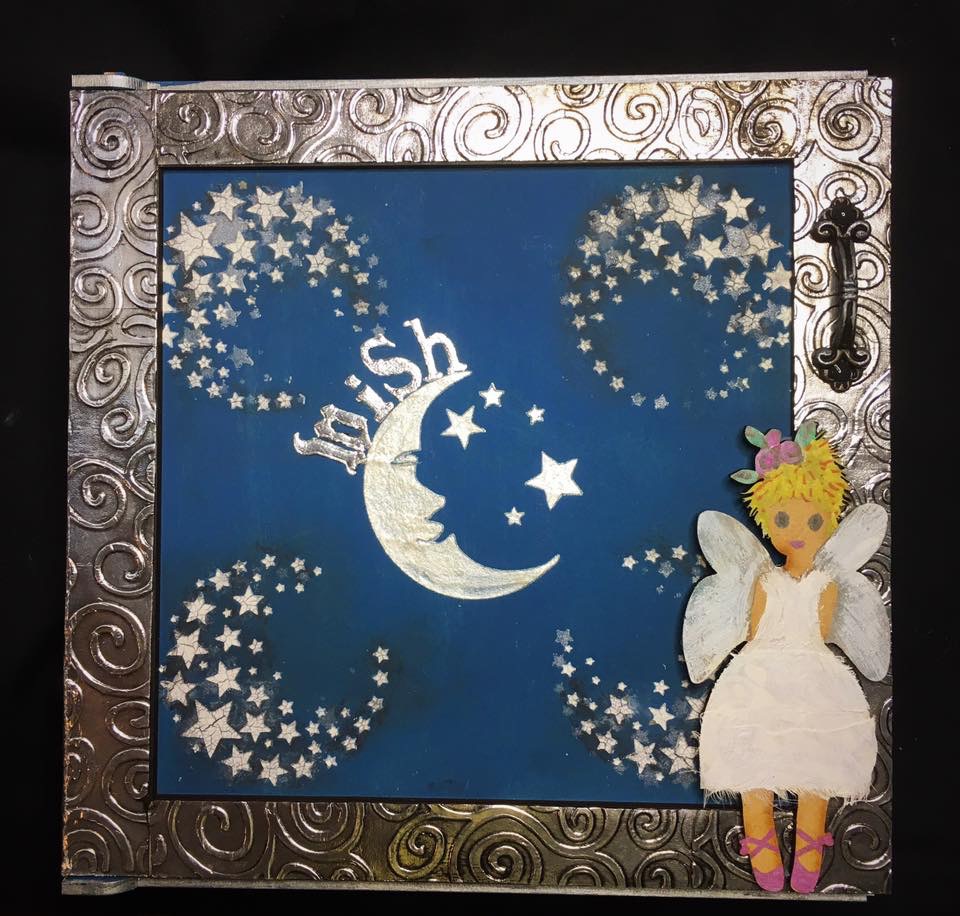
i played with the new Daisy stencils, moon and stars using silver paint, Crackle paste and Pearlescent Texture Paste.
the frame was covered in embossed silver duck tape.
The mdf fairy was coloured with alcohol pens and sari silk on her dress.
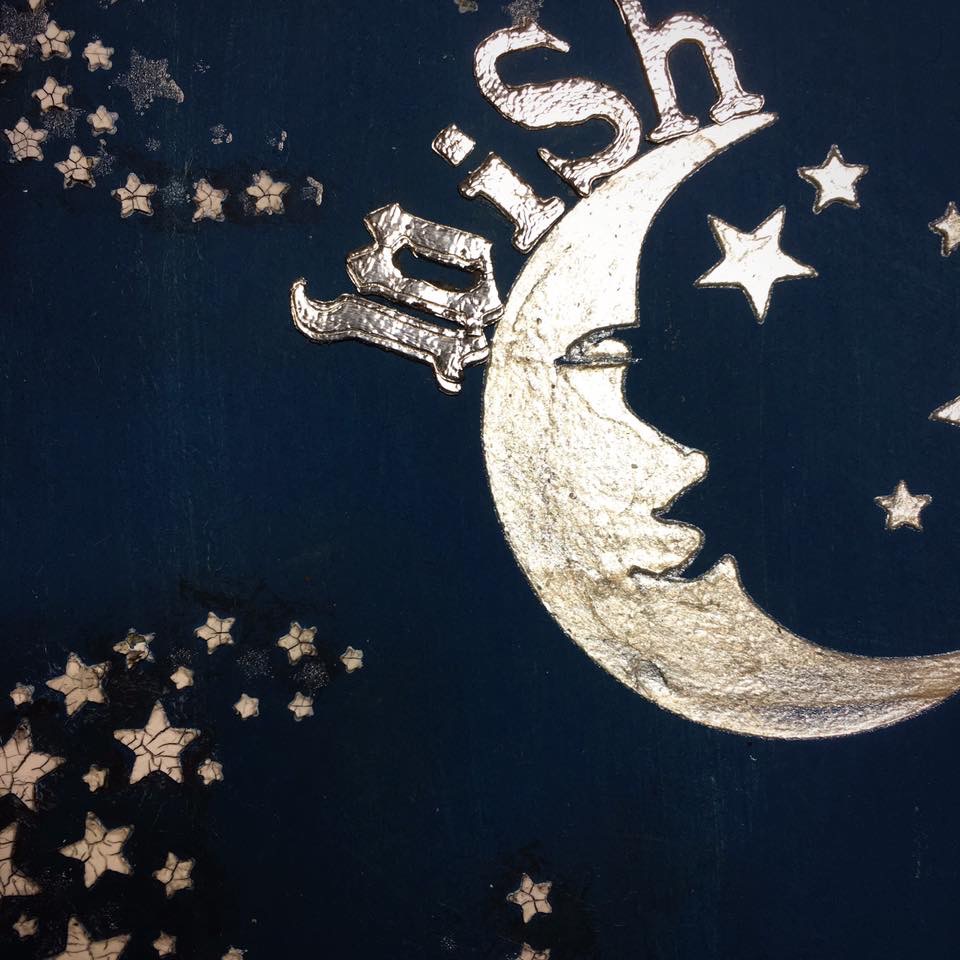
A close up of the stencilling.
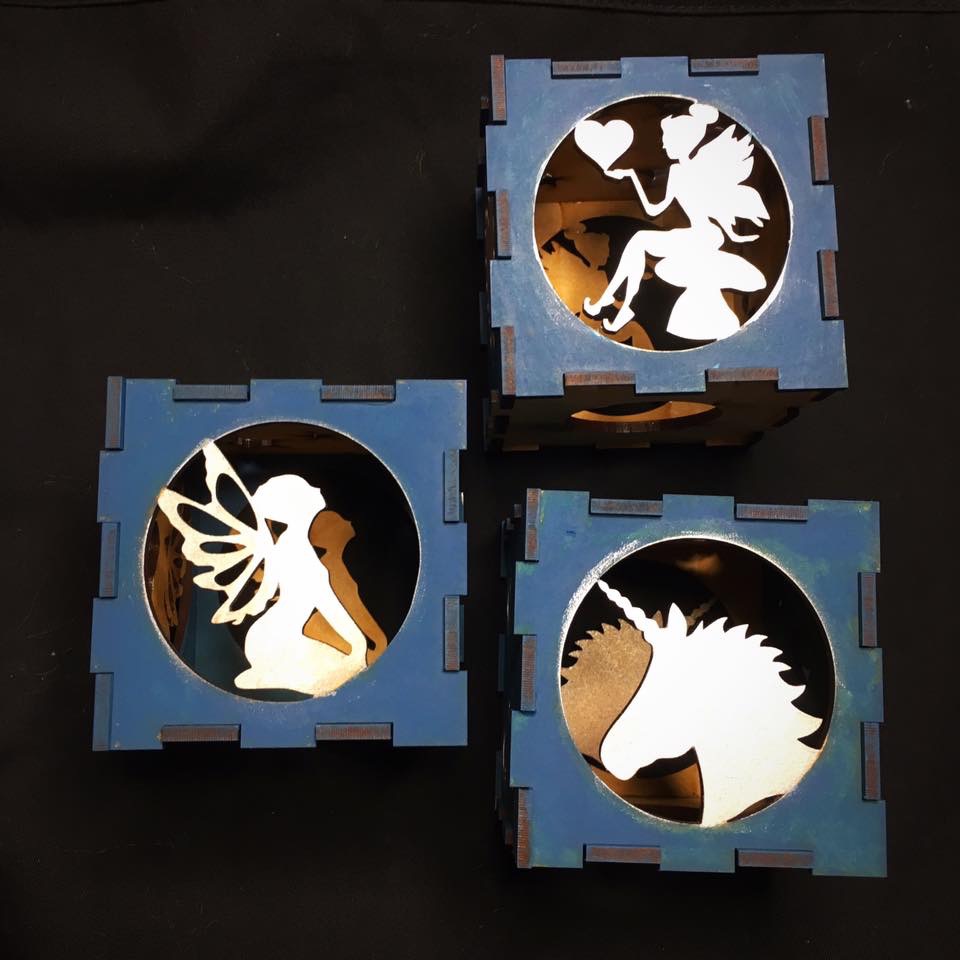
I painted with metallics the cute nightlight holders. I know who wants these for Christmas!
enjoy the show x
]]>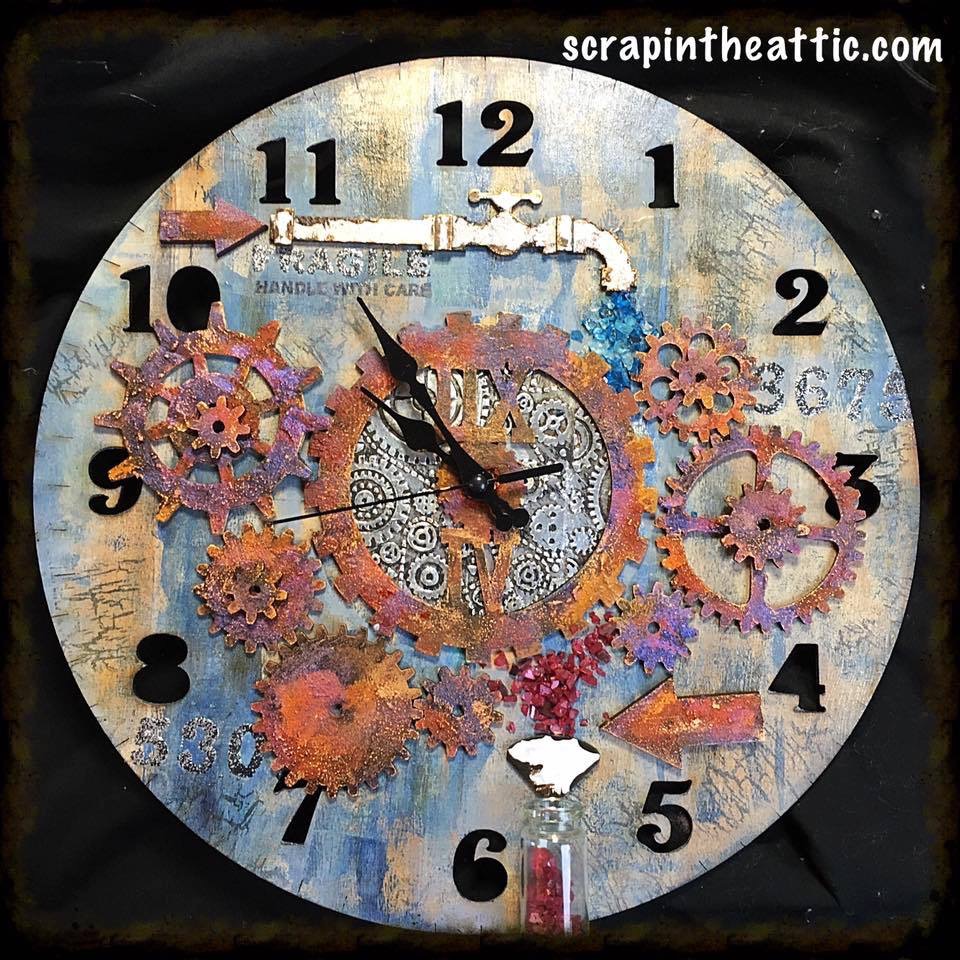
I was so excited to get this mdf clock from Daisy’s. Perfect for my craftroom.
Steampunk was the obvious choice for a theme. I wanted to create an idea of movement with the cogs so the idea of a dripping tap evolved. The water changed colour due to alchemy!
I brayered the clock face with Titan Buff, Prussian Blue, Paynes Grey and Quin Gold DecoArt fluid acrylics.
I used archival black to stamp Crackle. I heat embossed Andy Skinner numbers and works using Tarnished Silver powder.
The centre was made with embossed duct tape and black paint. The cogs and arrows had rust treatment. The pipe and funnel were distressed with white and burnt umber paints to look like chipped old paintwork.
The water is crushed glass.
Phew!
Daisy’s now has a fan club, check it out on face book. Please apply to join, it’s a closed group for sharing our projects.
I hope you like it
Jan x
]]>
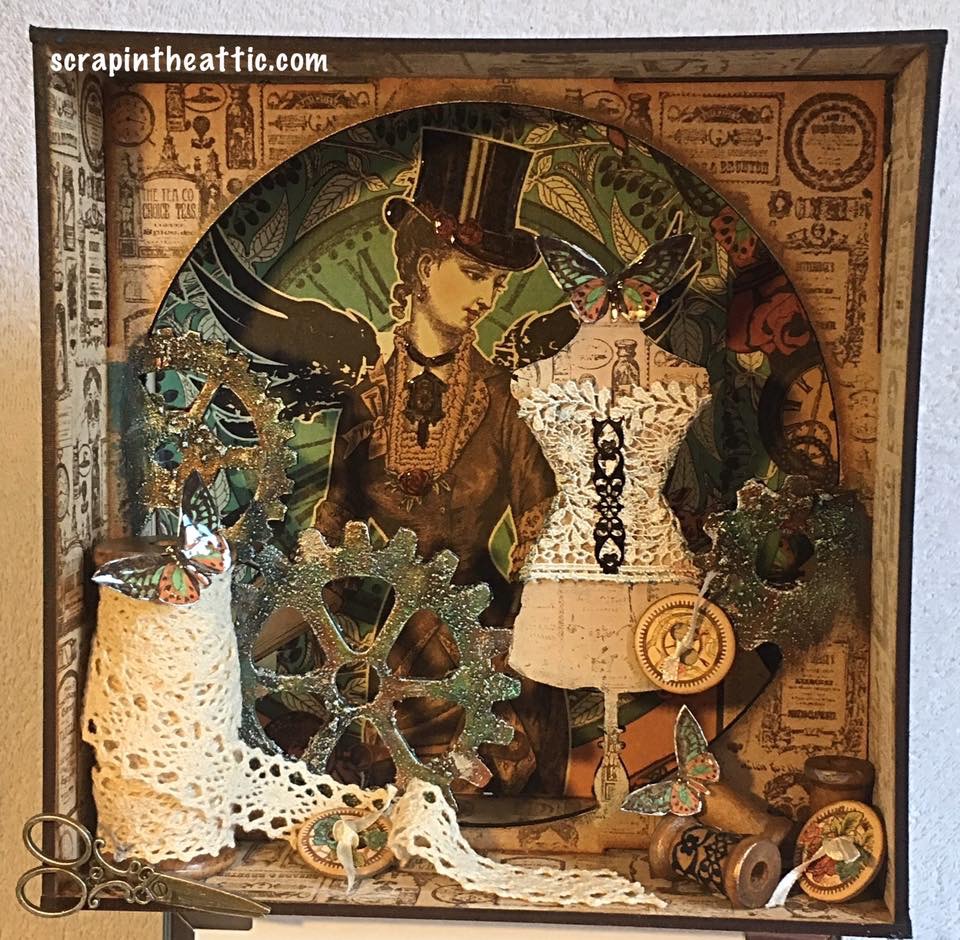
I was so excited to get the MDF kit from Daisy’s that was my own design. Amazing from paper to 3D, thank you Kerry and Wendy!
The kit was how I imagined it, with depth and layers to play with.
I had Steampunk in mind and covered the back with G45 Steampunk Debutante paper with Glossy Accents to highlight the wings.
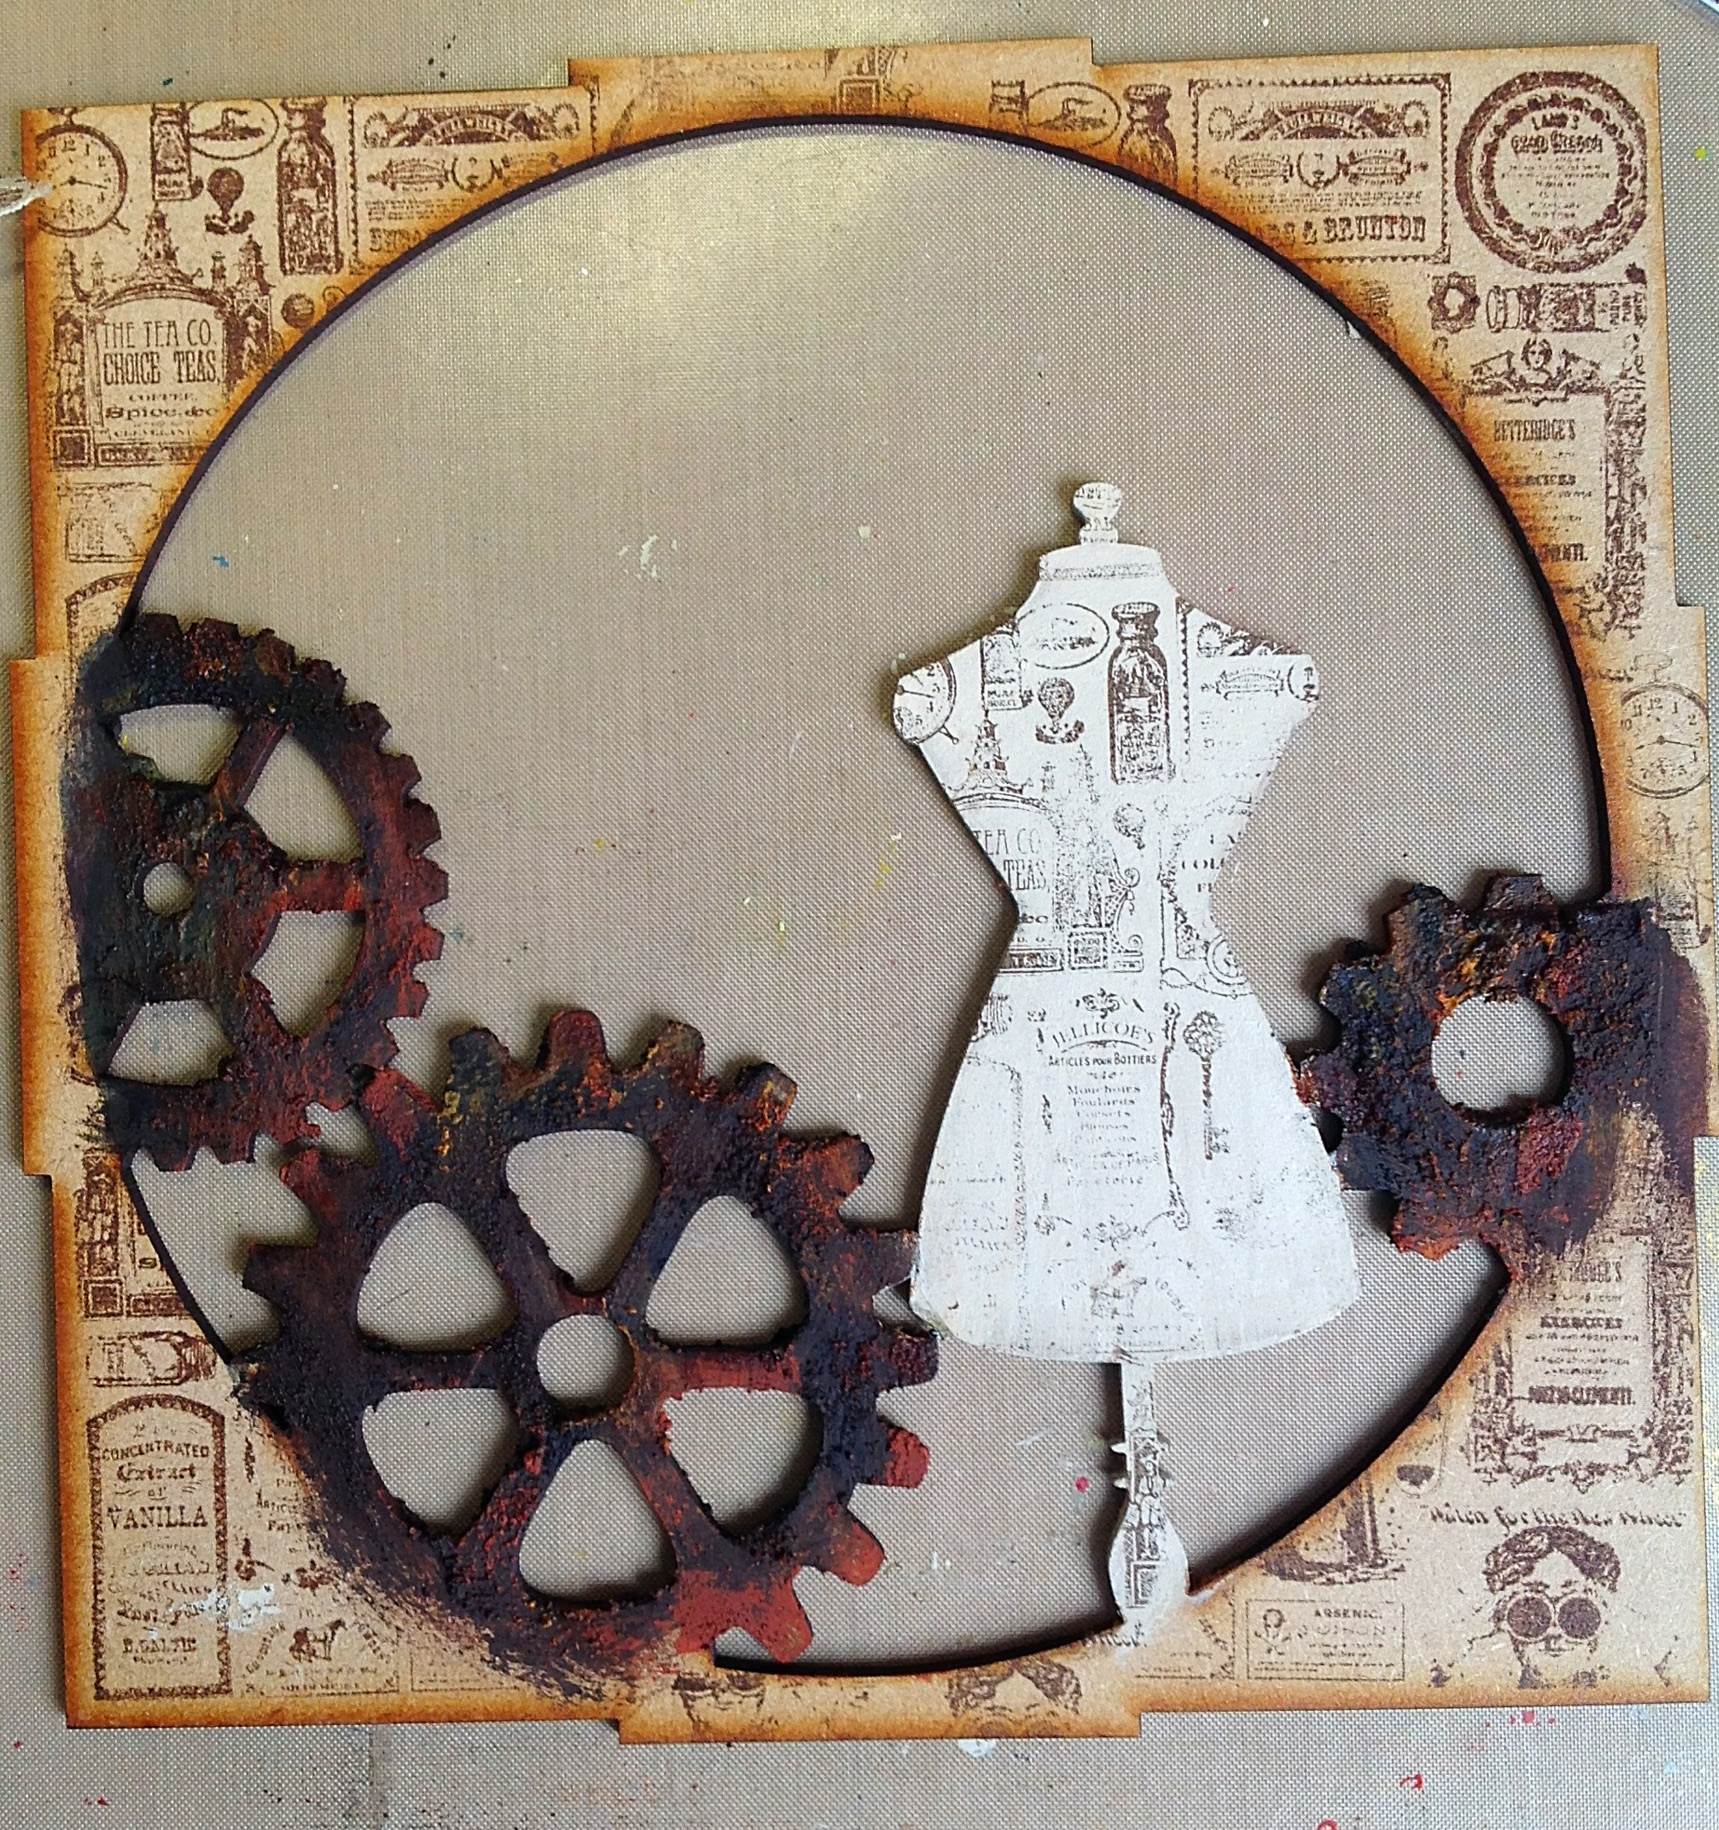
The middle layer had the rust treatment on the cogs. DecoArt sand texture then layers of Paynes Grey, Quin Gold, Oxide Yellow and Blue Hue.

The inner sides and middle layer were stamped straight onto the MDF, I love the burn marks from the cutting process!
The dress form had a coat of Translucent white paint then the same stamp. I cut lace and bits from my stash to create a bodice.
When the box was assembled, tab and slot with Daisy’s MDF glue I added ephemera to enhance the scene.
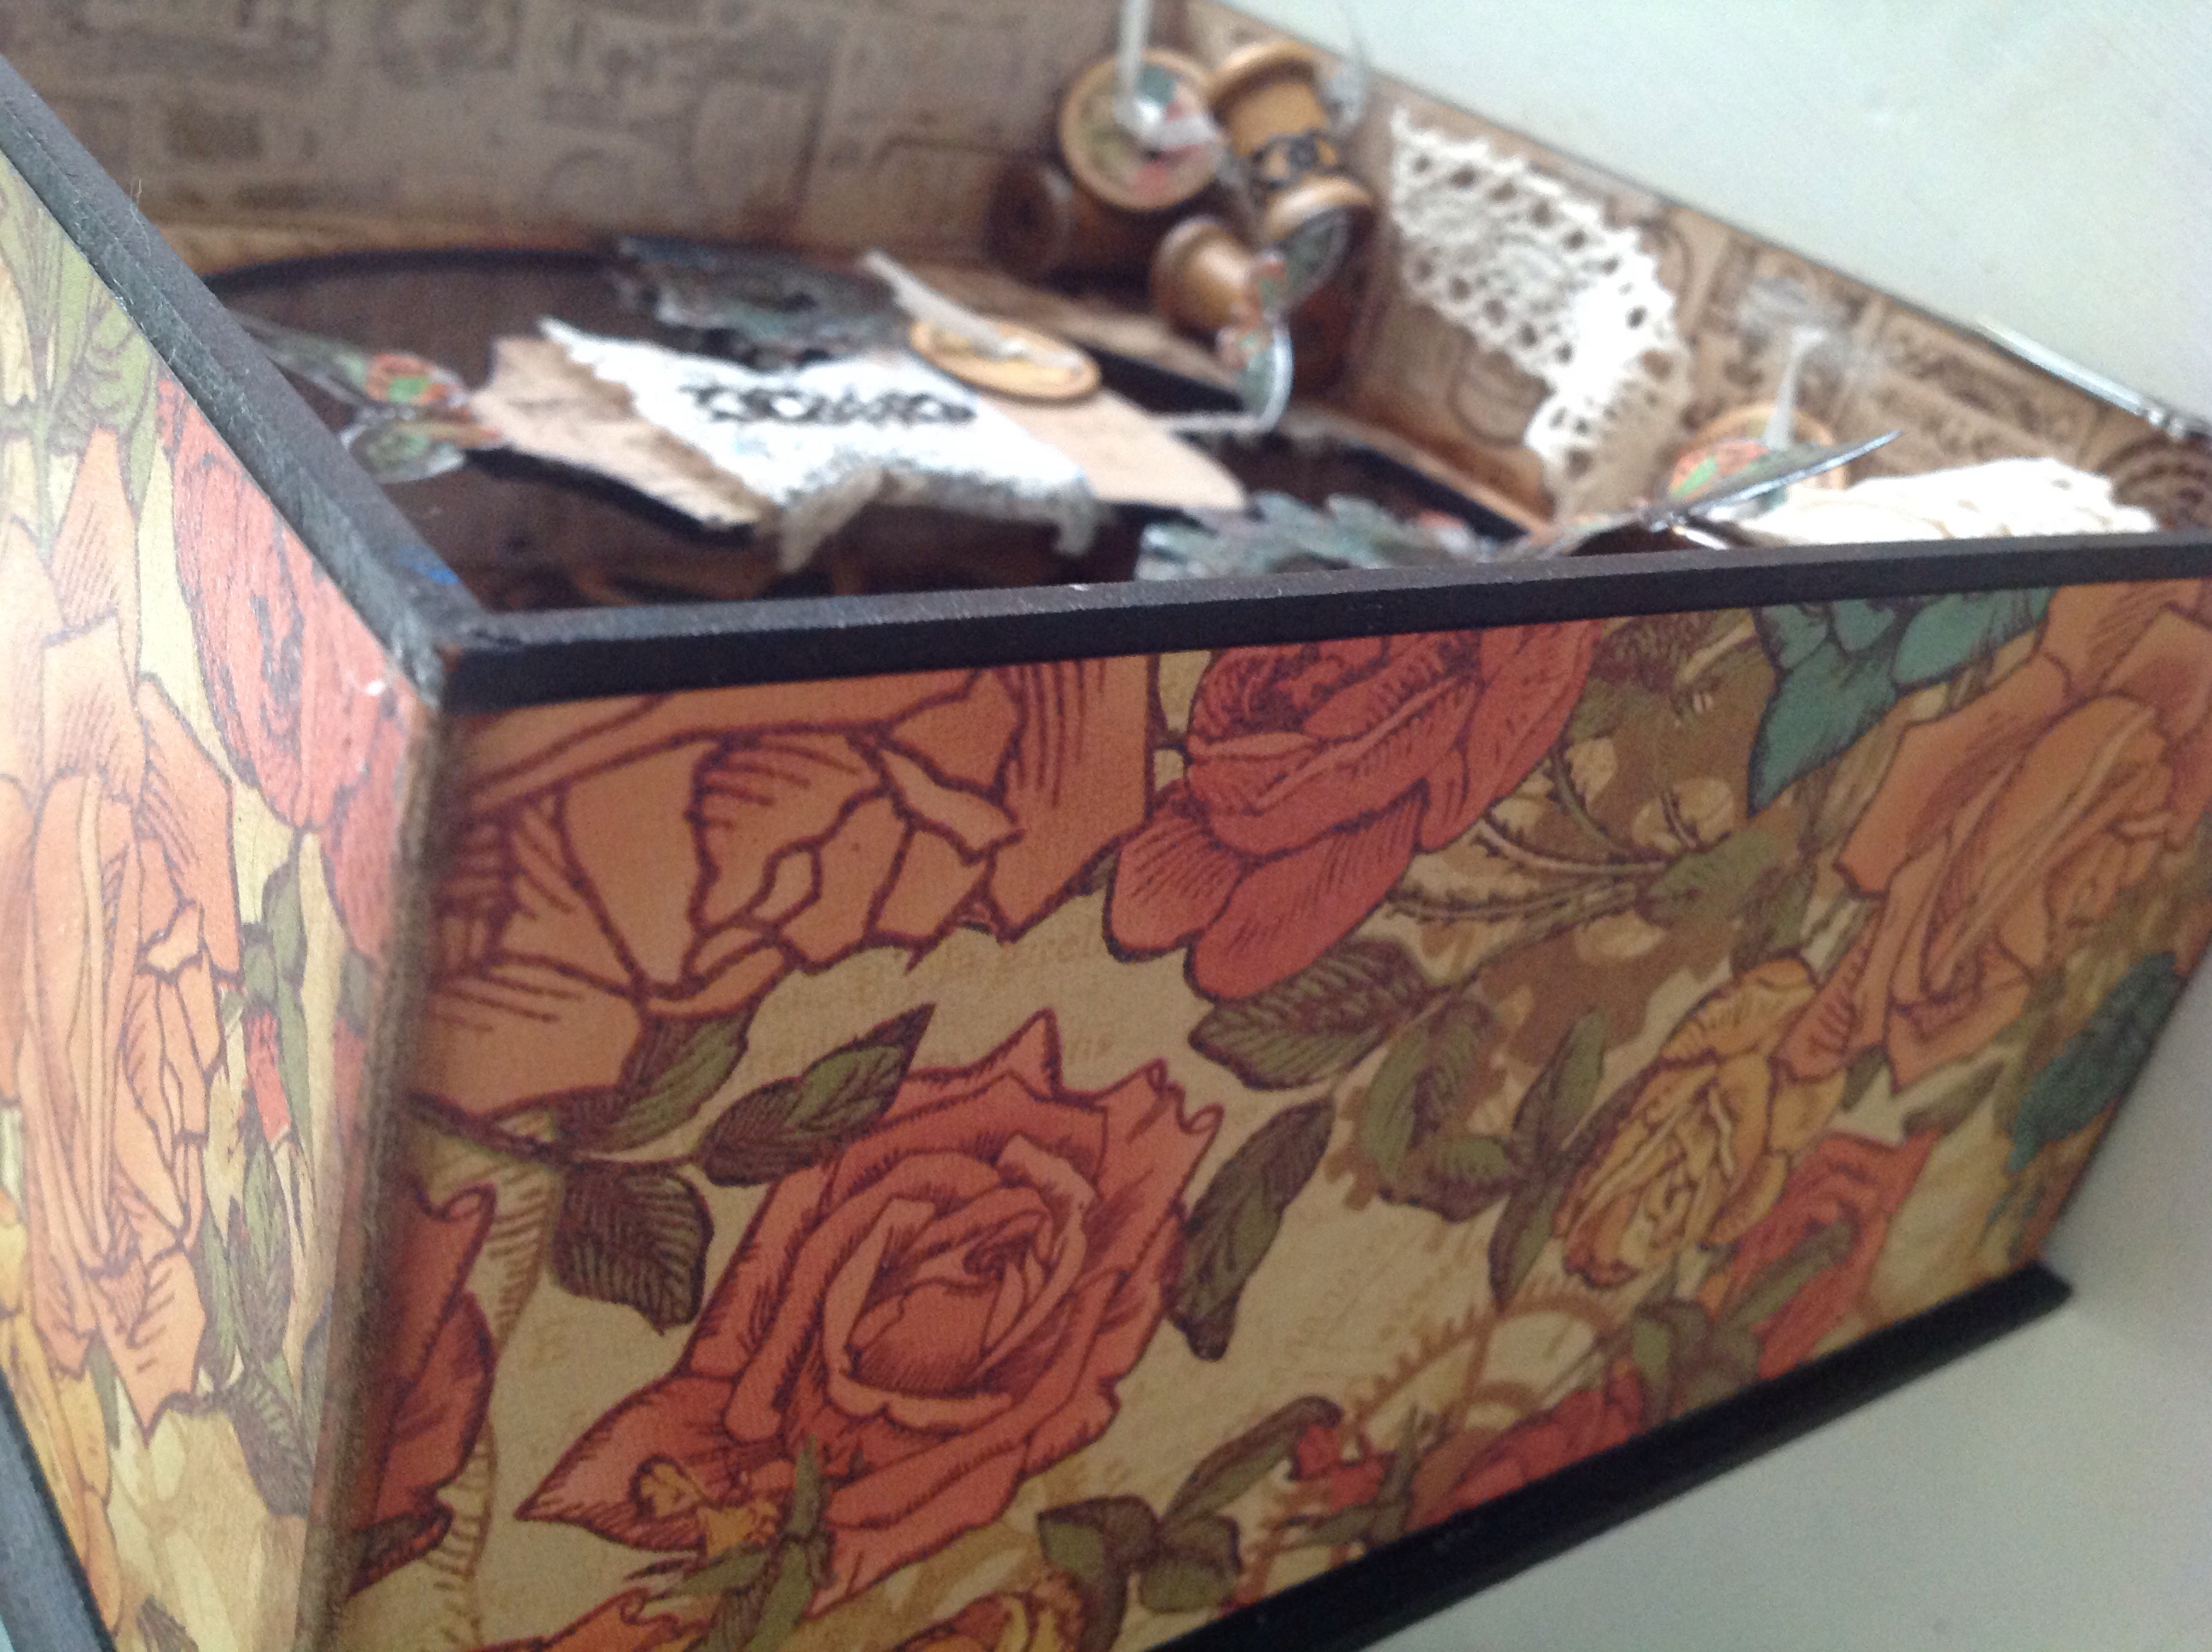
I painted the edges black and covered them with the roses paper from the same collection. The corner edges were sanded and inked.
This was such a fun project, I hope you like it.
hugs
Jan x
]]>
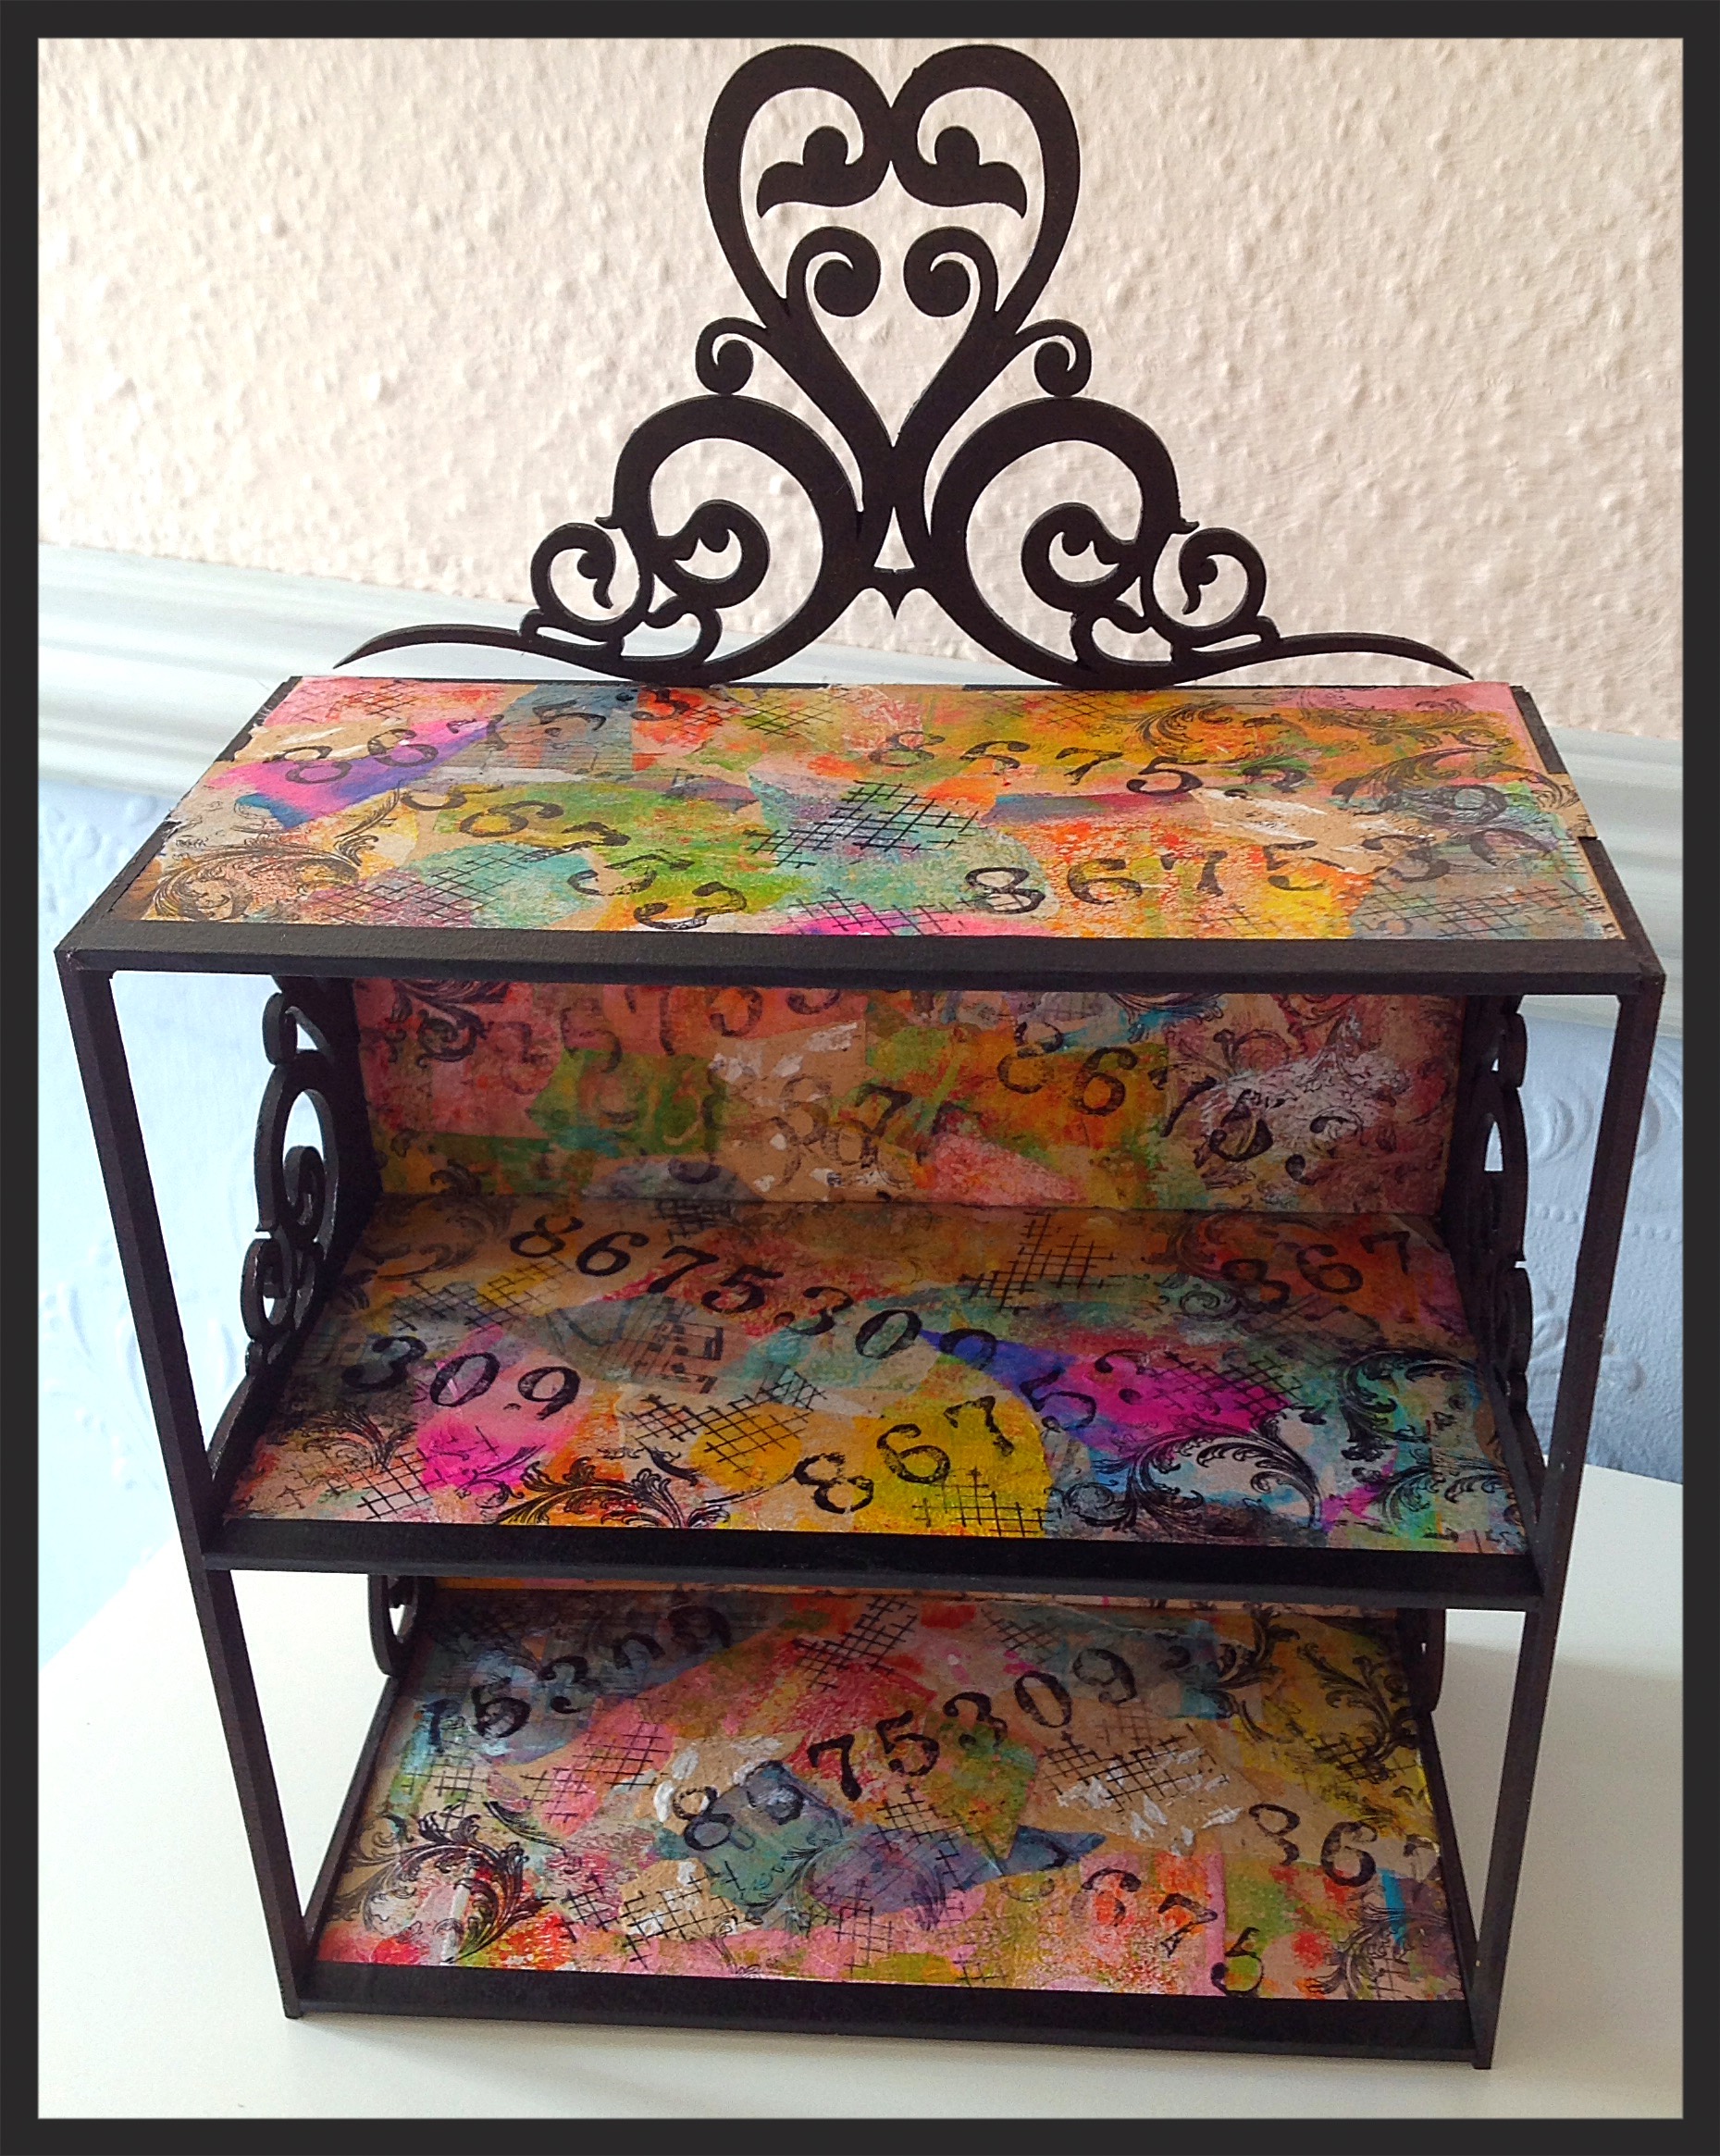
I had made lots of Gelli plate mono prints on white tissue paper and used these to collage onto the shelves before assembling the unit. Heavy gel stuck the pieces, the tissue edges became invisible and allowed the golden glow from the mdf to add to the colour.
I added stamping with Andy Skinner numbers and a swirl stamp to enhance the filigree.
The sides and back were painted Matt black.
Its a great size to hold my growing collection of passport journals!
hugs
Jan x
]]>
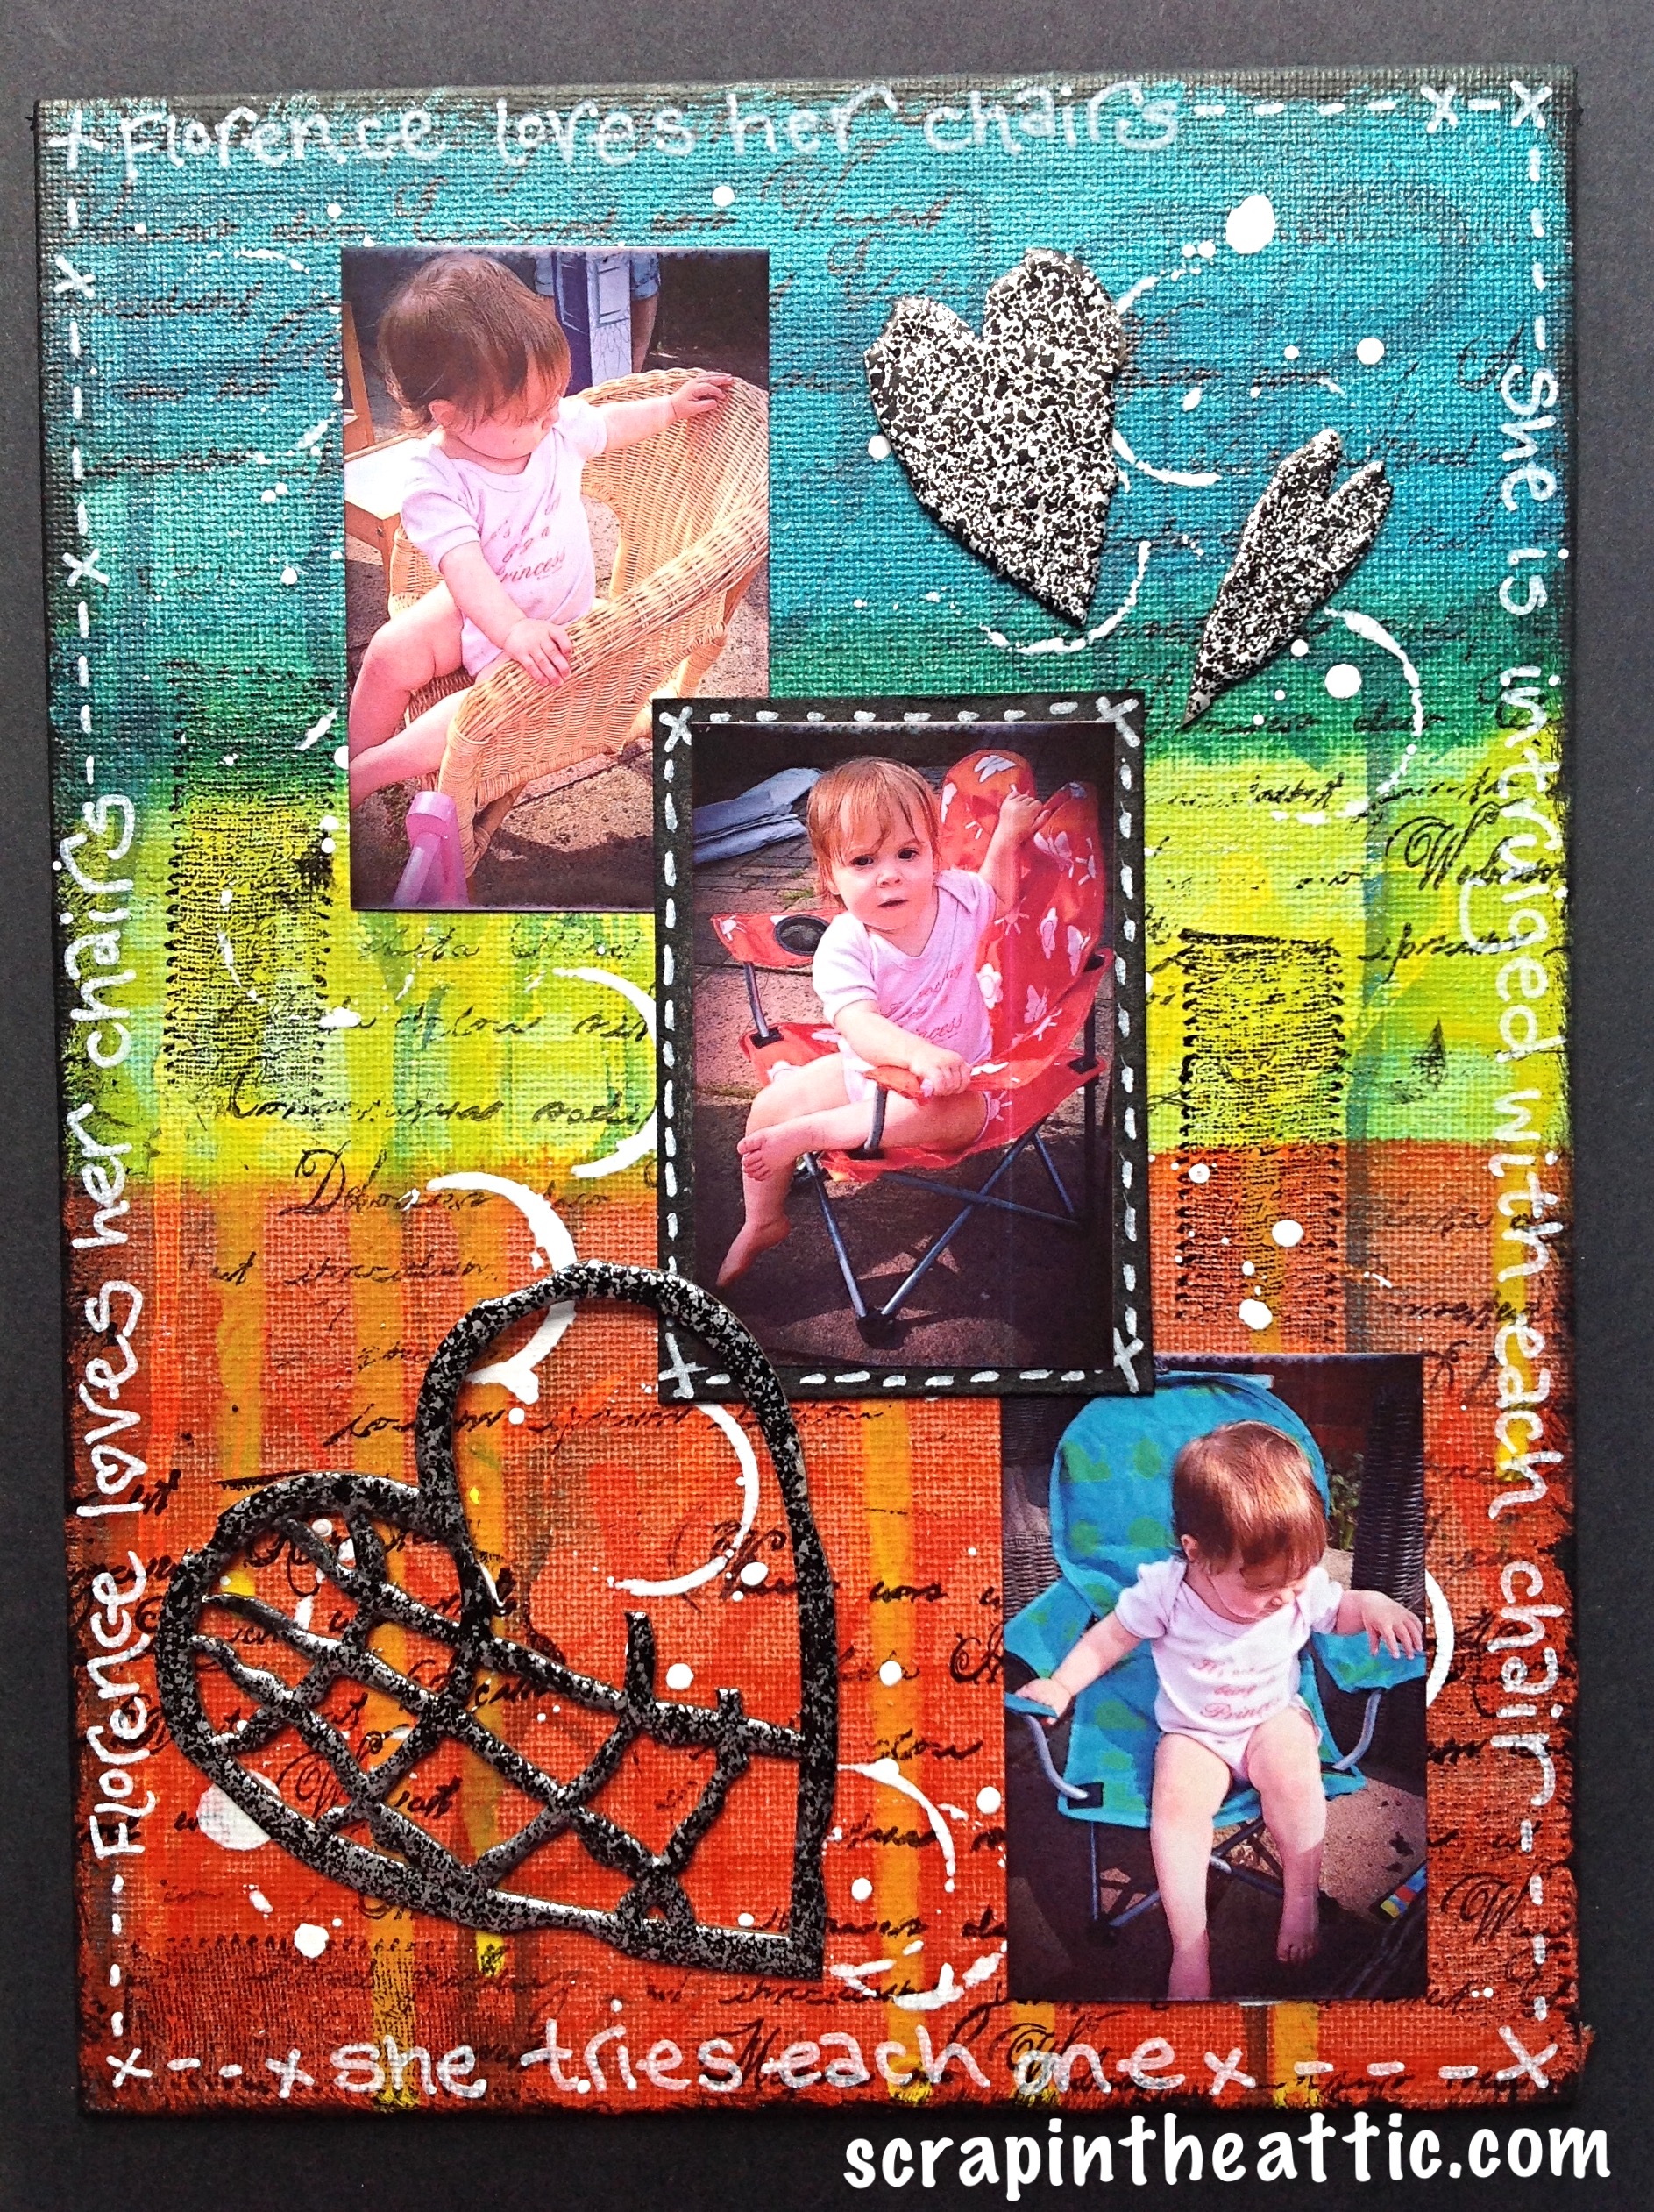
I began using India Ink and writing her name with the bottle dropper in each of the tree colours. I chose colours to correspond to the chairs. I let the colours dry a little then washed Irredescent medium across, this gives a wash of colour but you can still see the letters underneath. I dribbled colours on top.
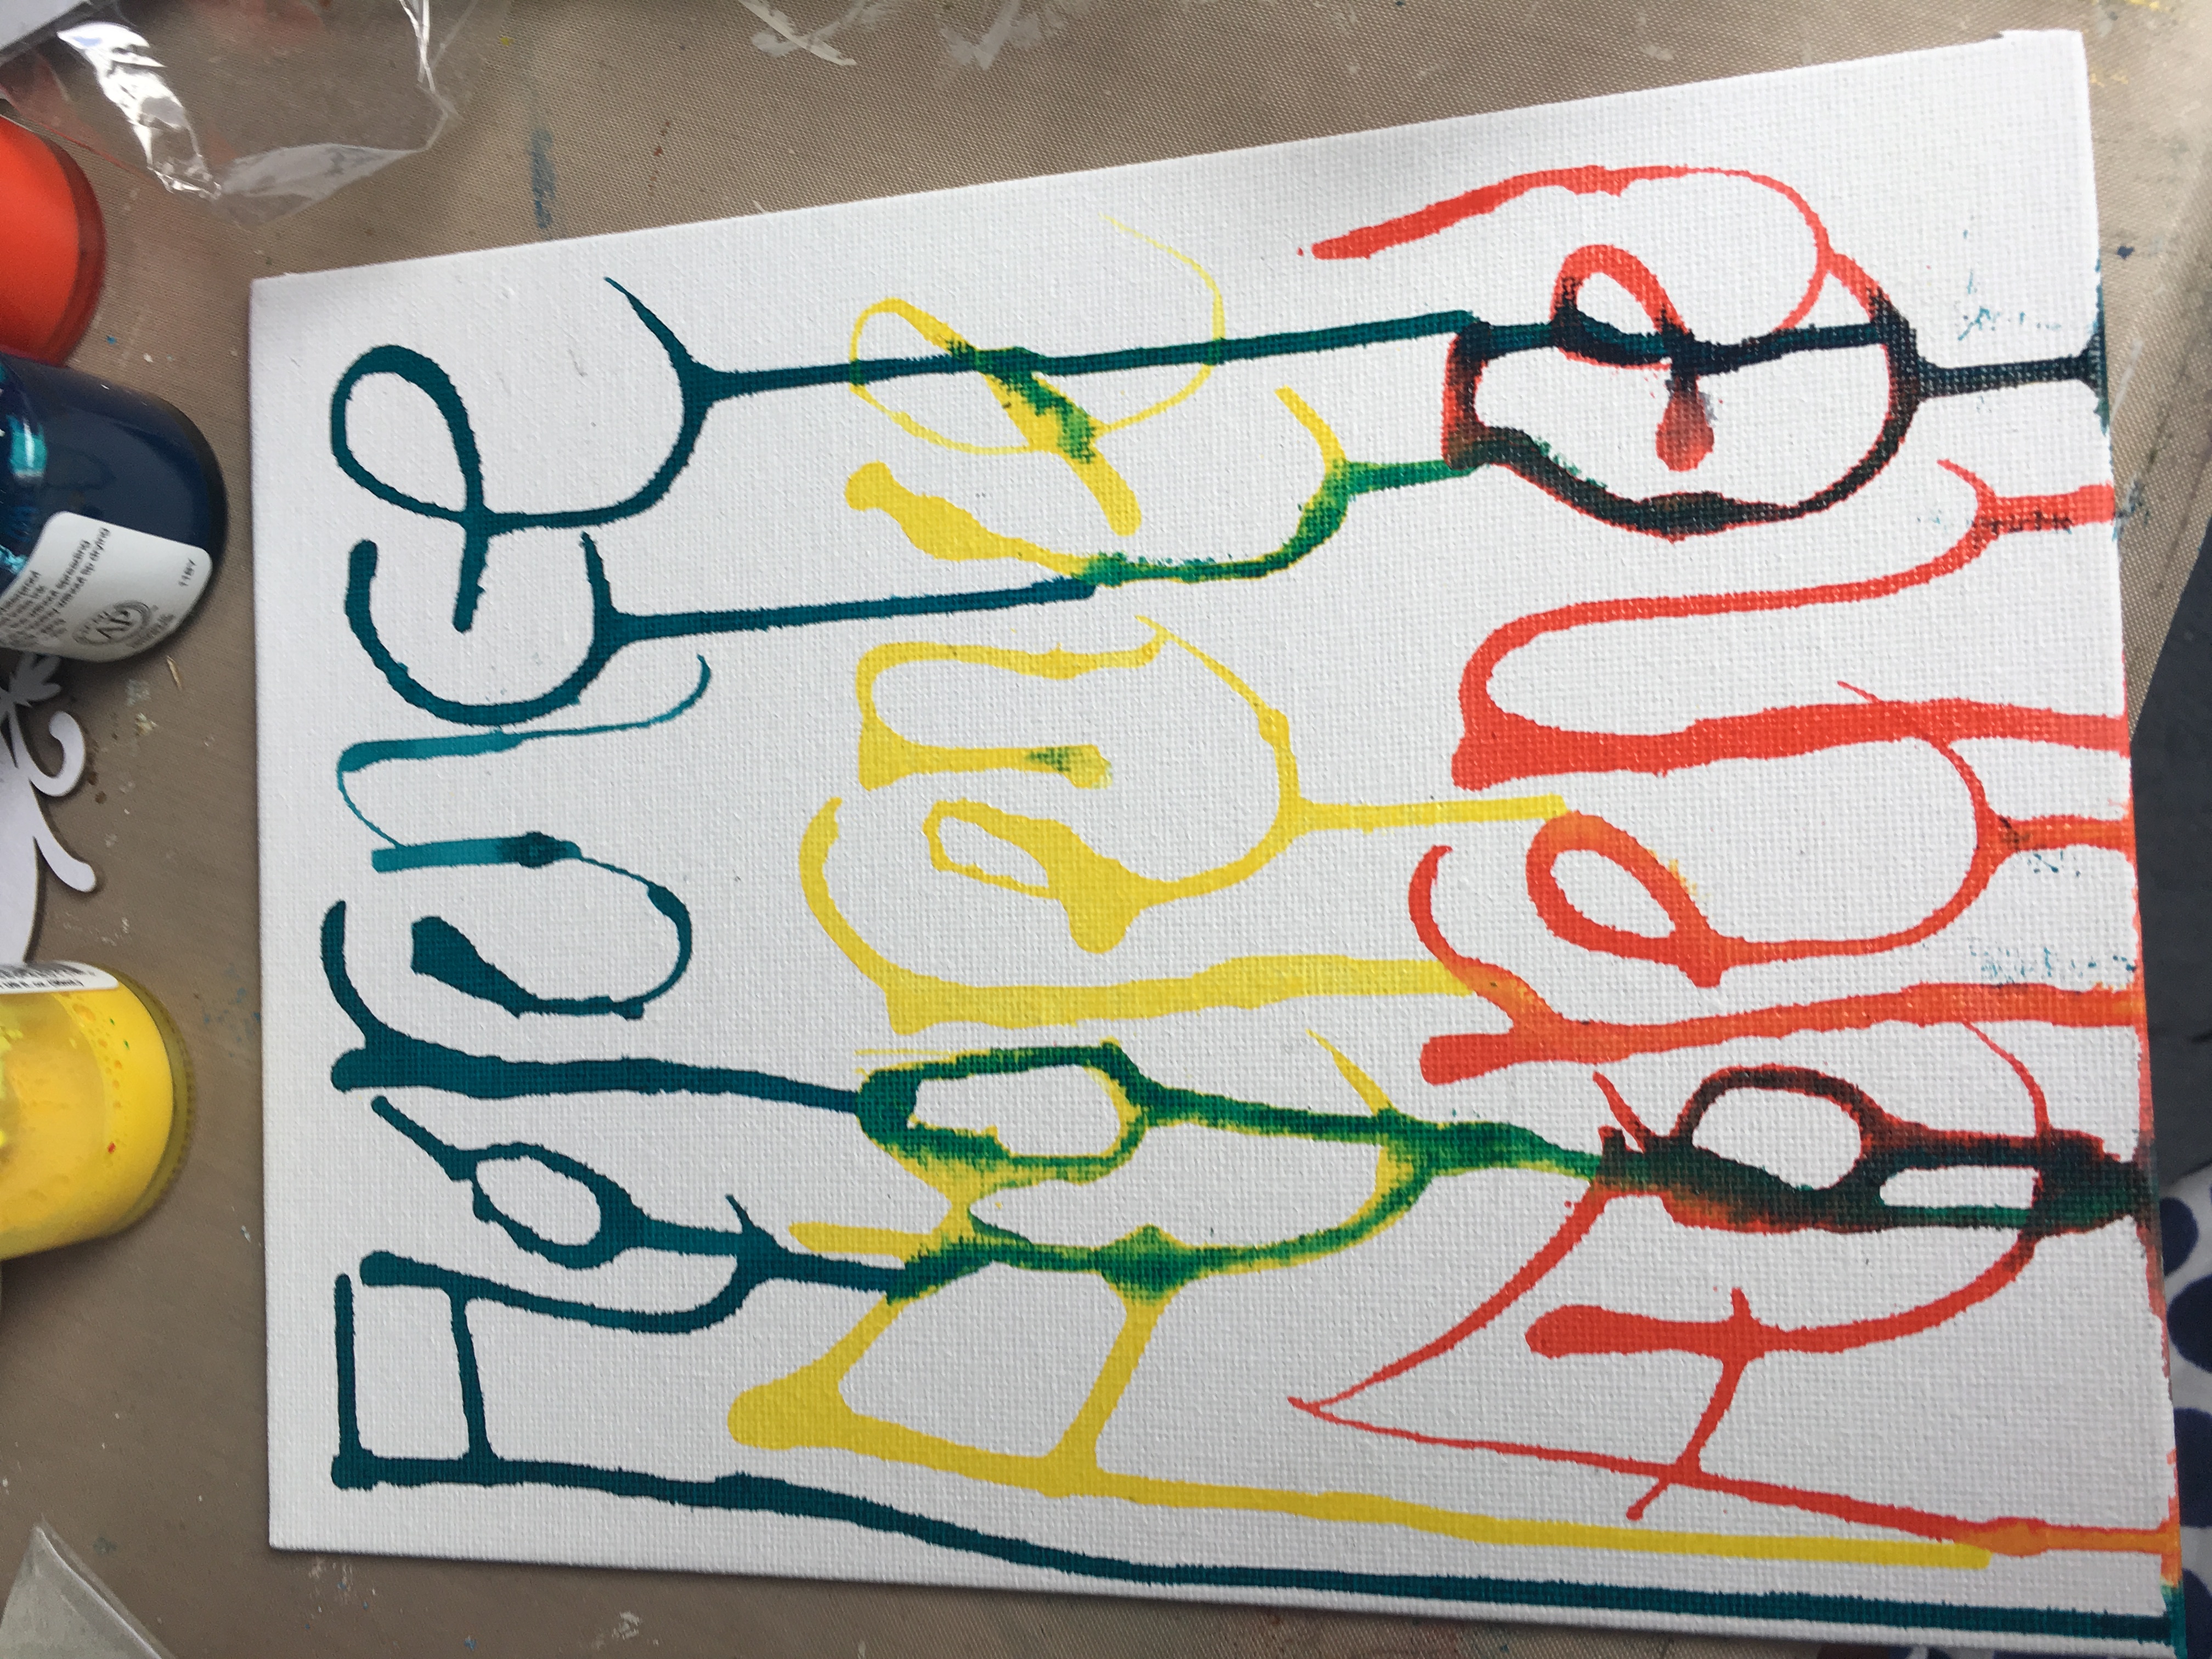
The Tando hearts were heat embossed with Tarnished Silver powder. I stencilled the text with black archival ink and stamped ribbon strips using Paperartsy stamp.

The central photo was mounted on black painted greyboard. I handwrote around the edges with a white Posca pen. I made a puddle and added bottle top prints and splashes.
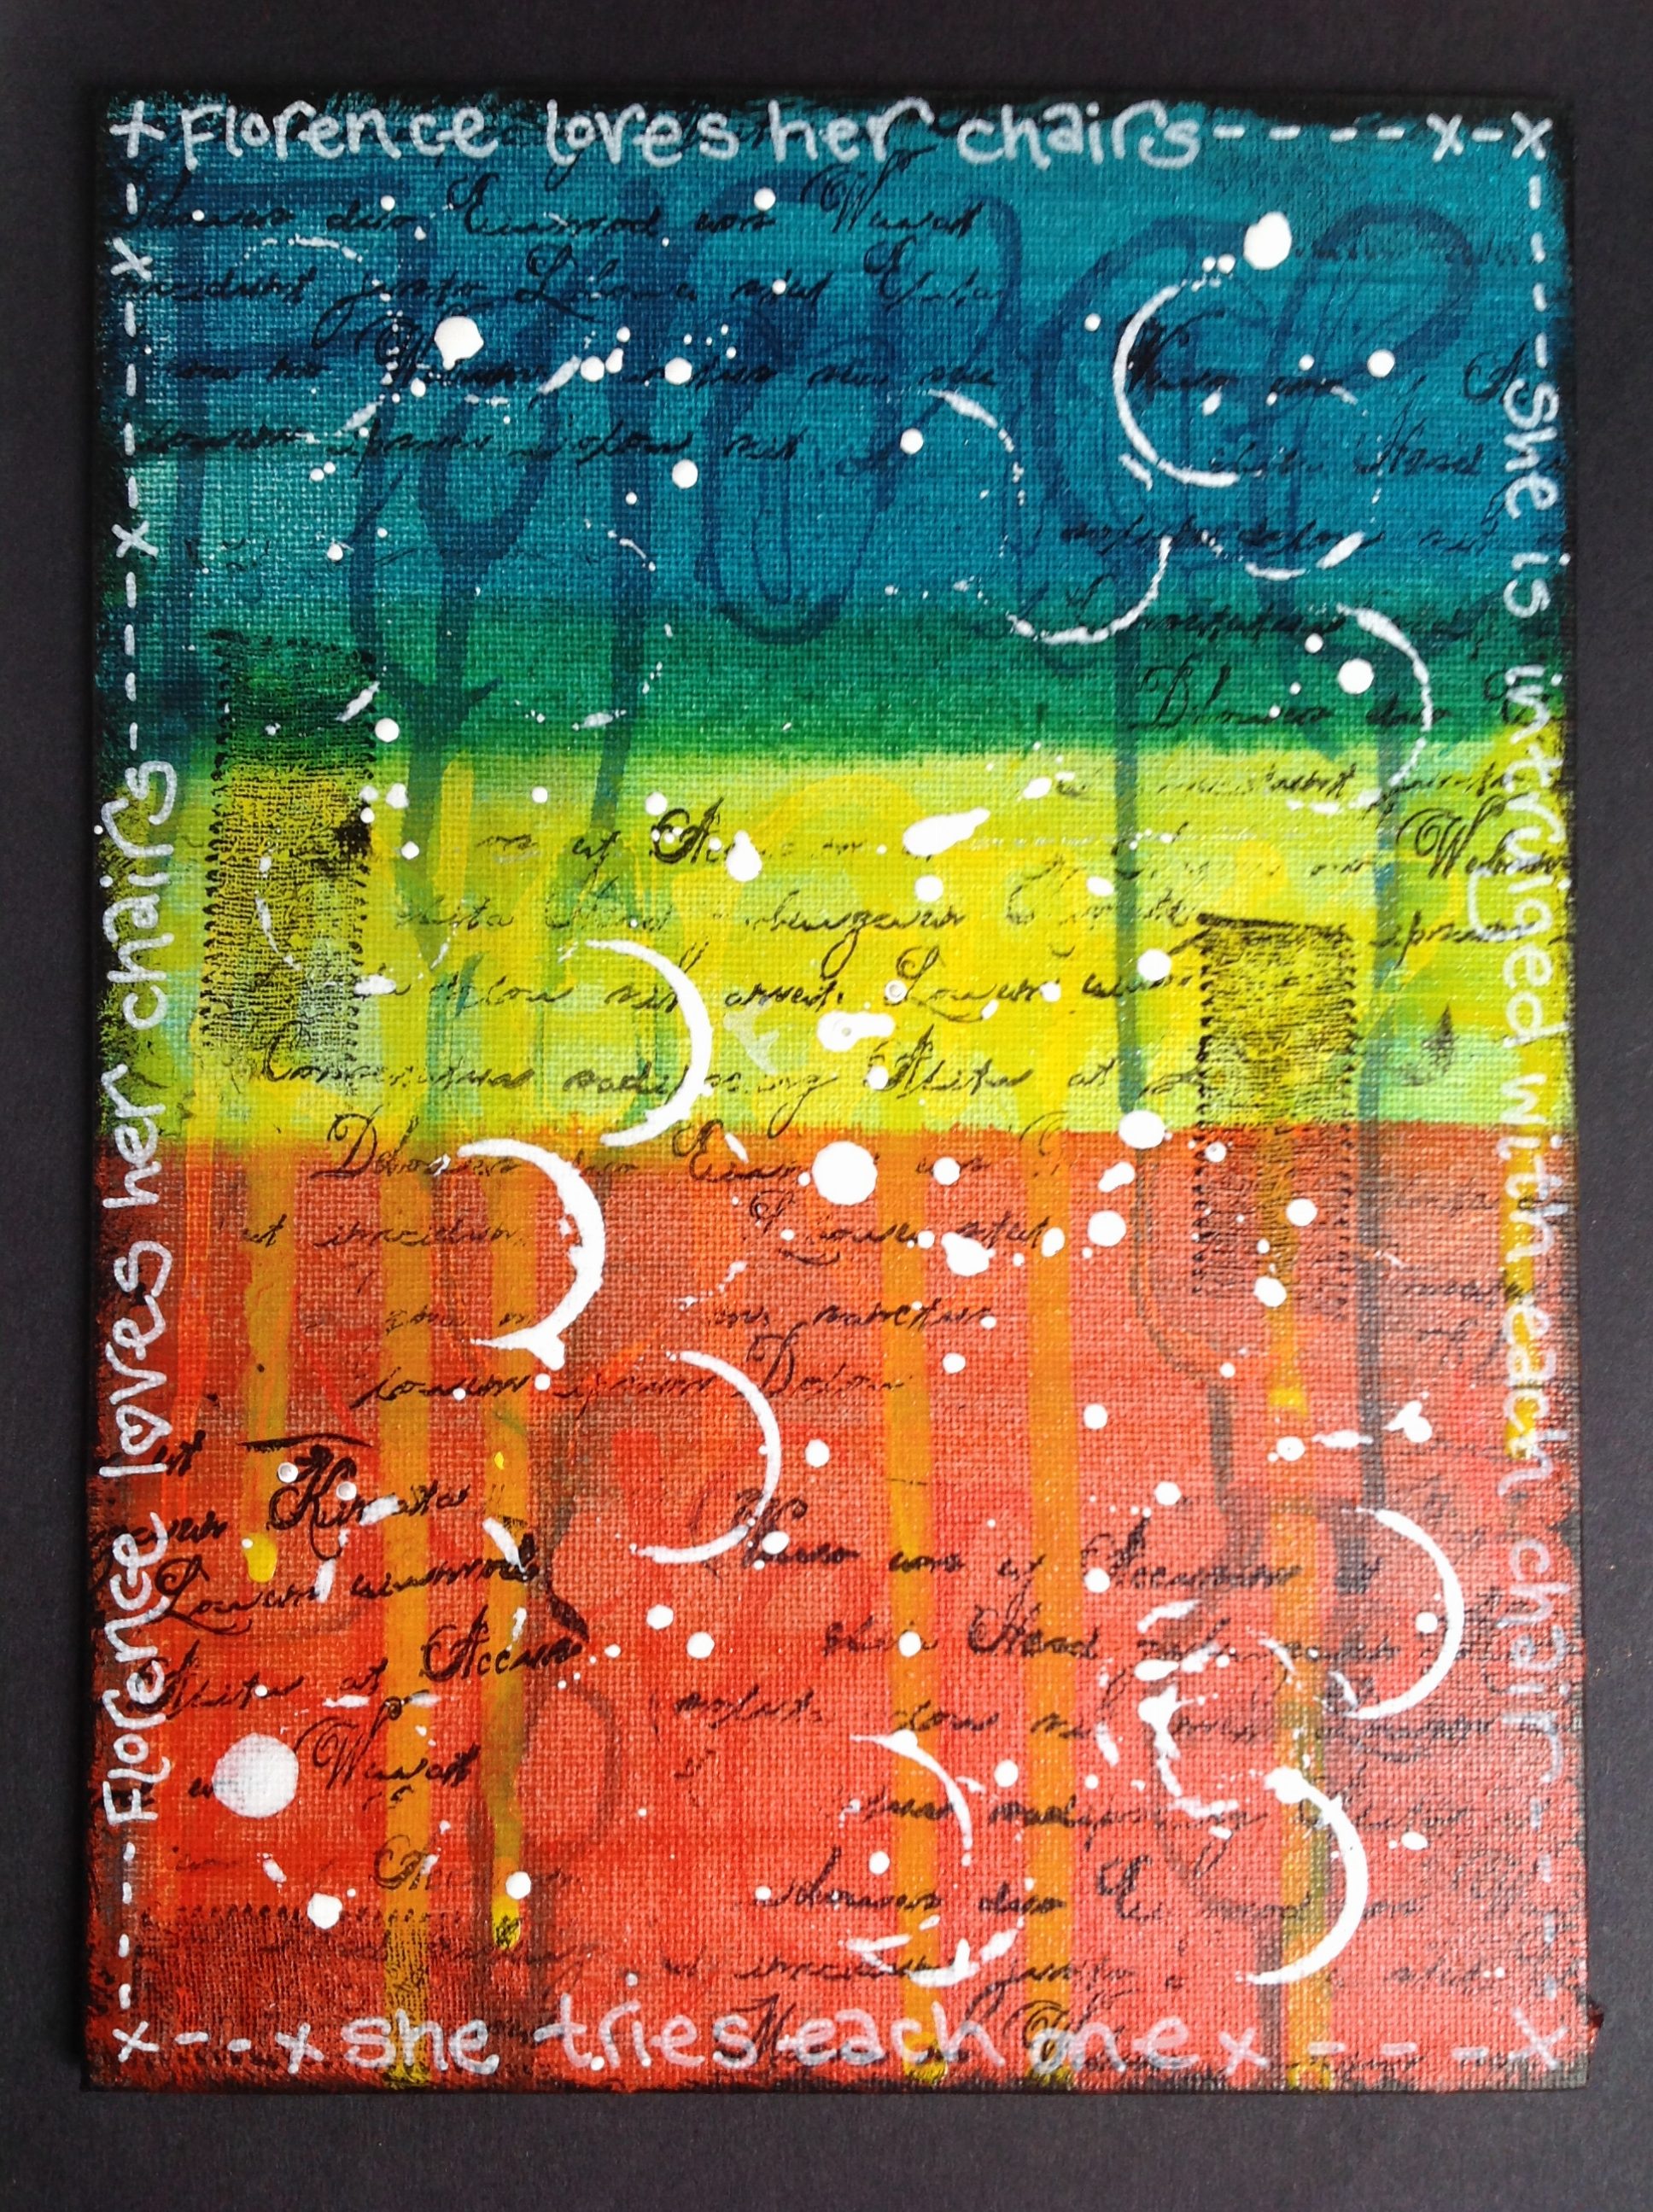
Hope you can see the concentration on her face deciding which chair to sit in!
Jan x
]]>Here are my samples
I made a passport journal using Eileen Hull Sizzix die. I used TH grungeboard for the covers, painted with DecoArt fluid acrylics. The MDF boat was painted then stamped. The title MDF shape was painted then the title stamped over. The charms are from Daisy’s, I stamped on paper then punched a circle to fit. I used the stamps from the range to decorate the pages.
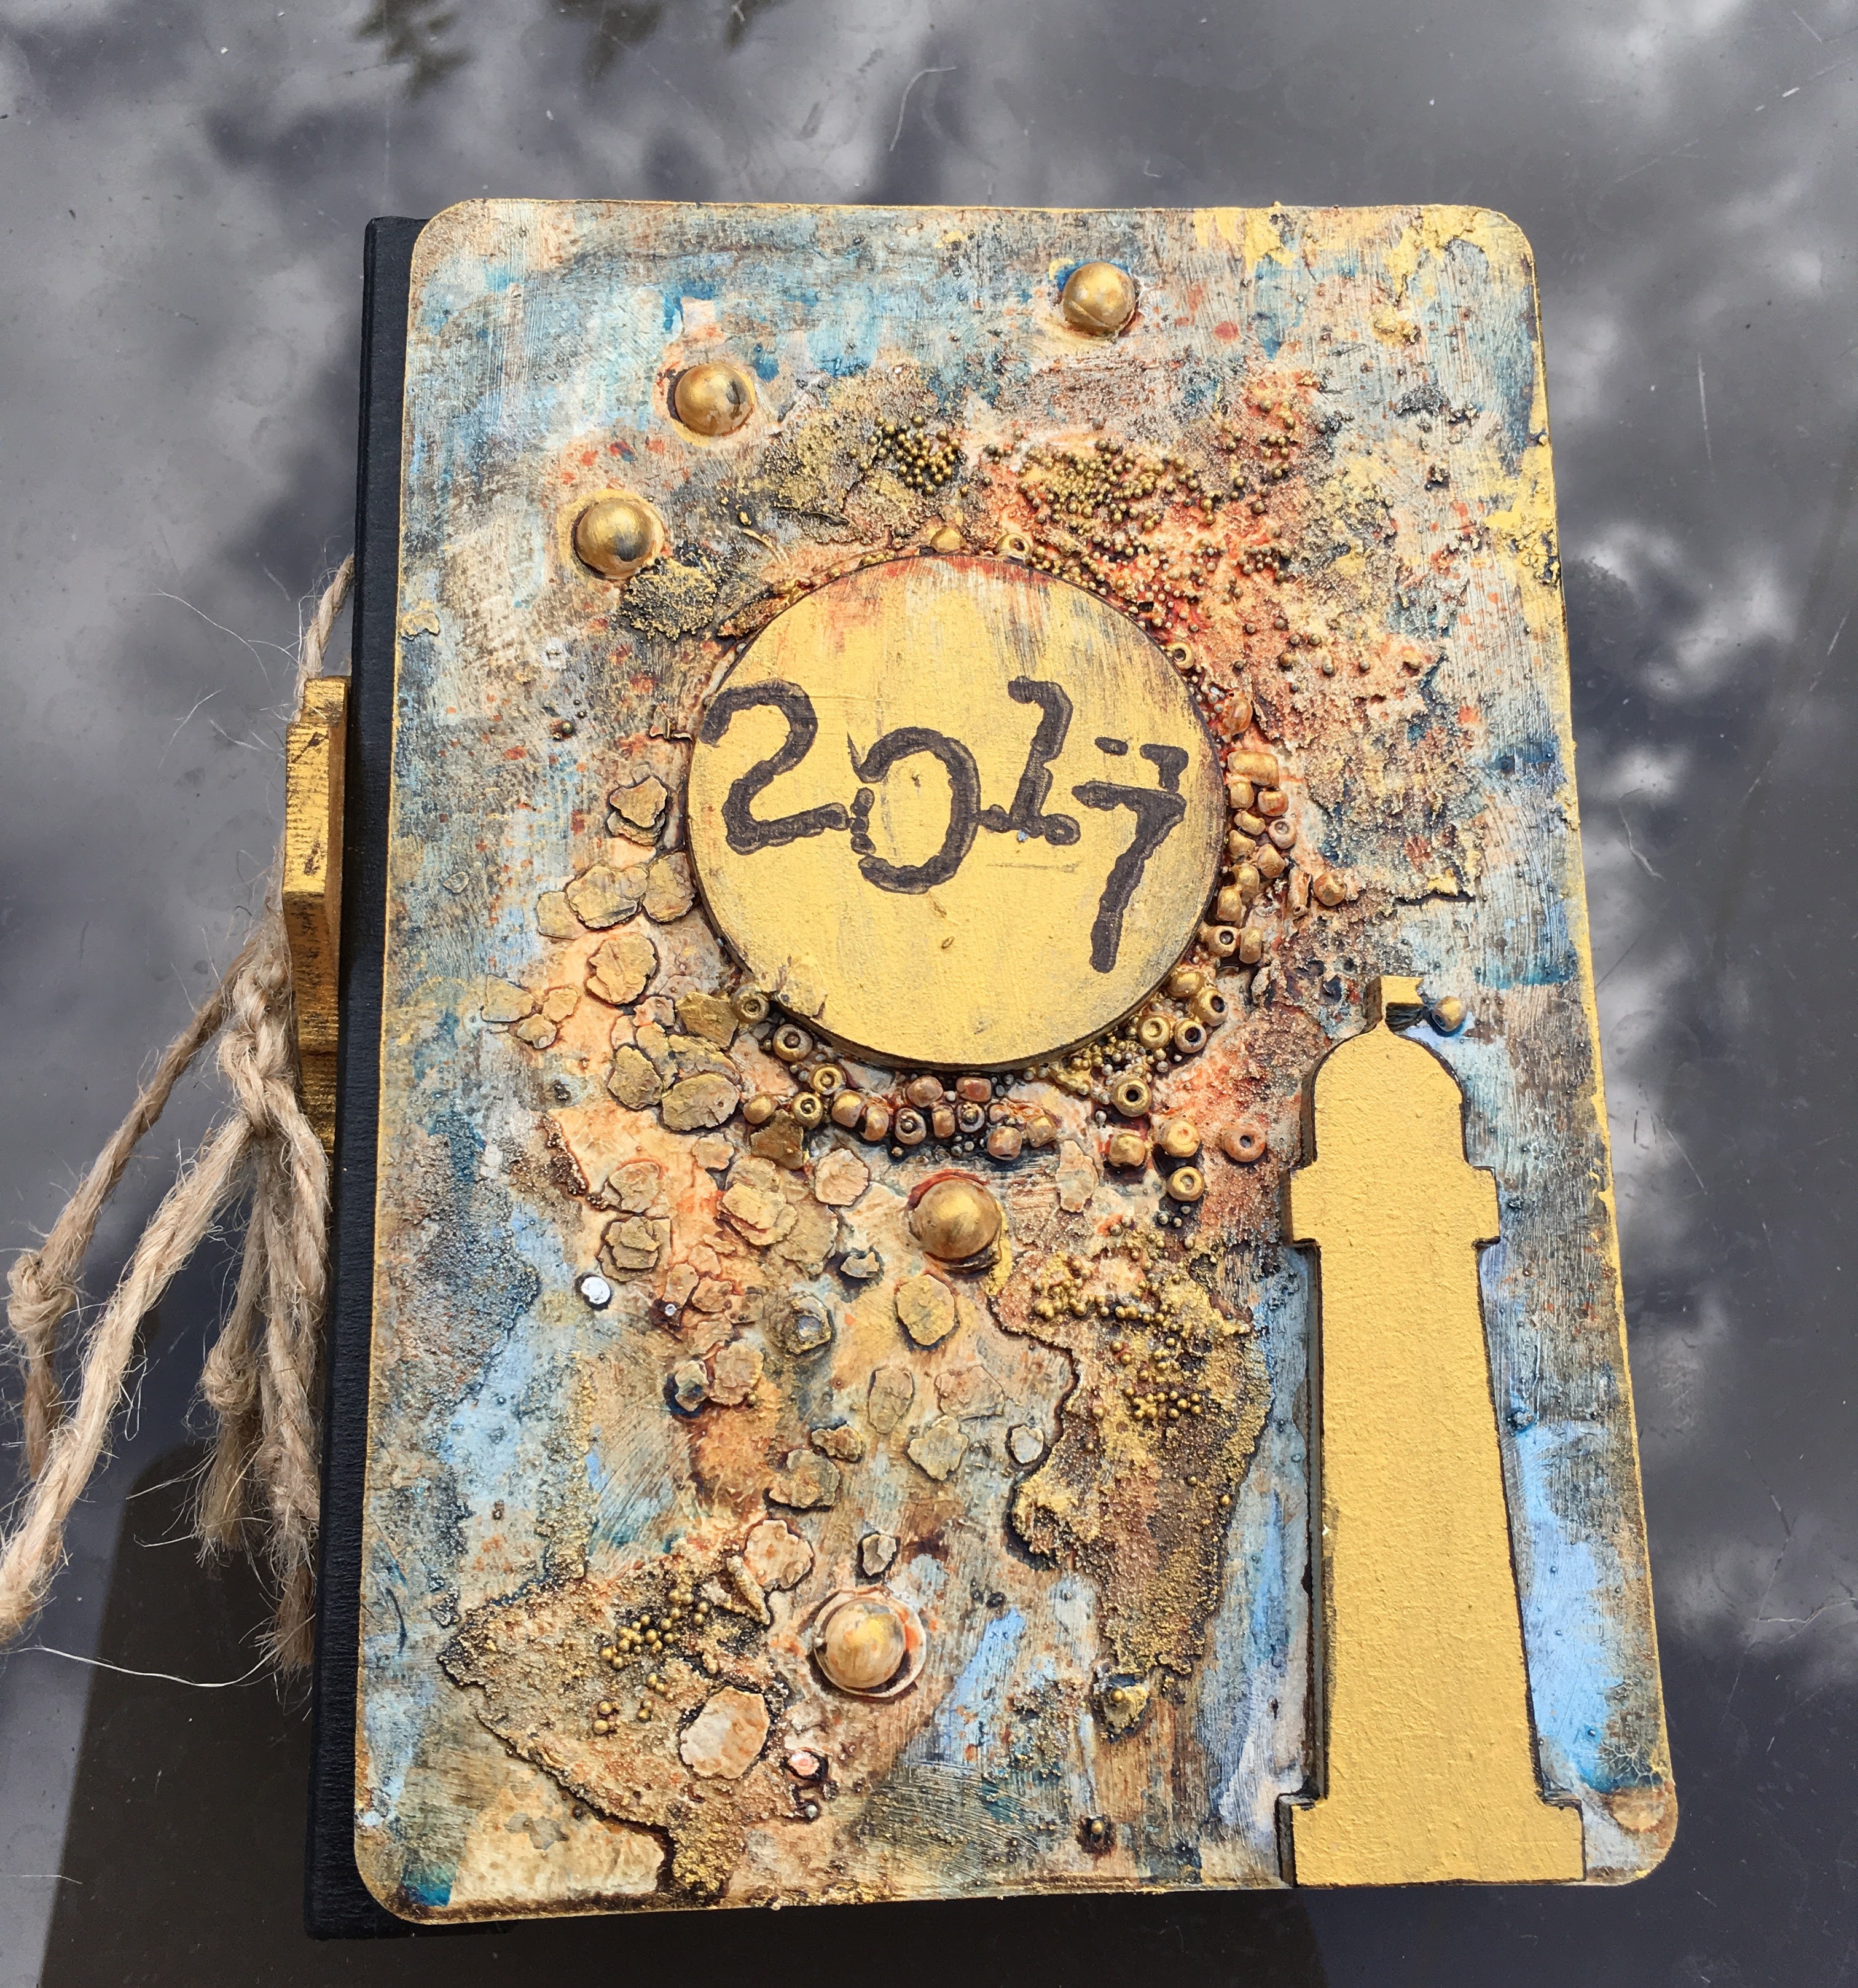
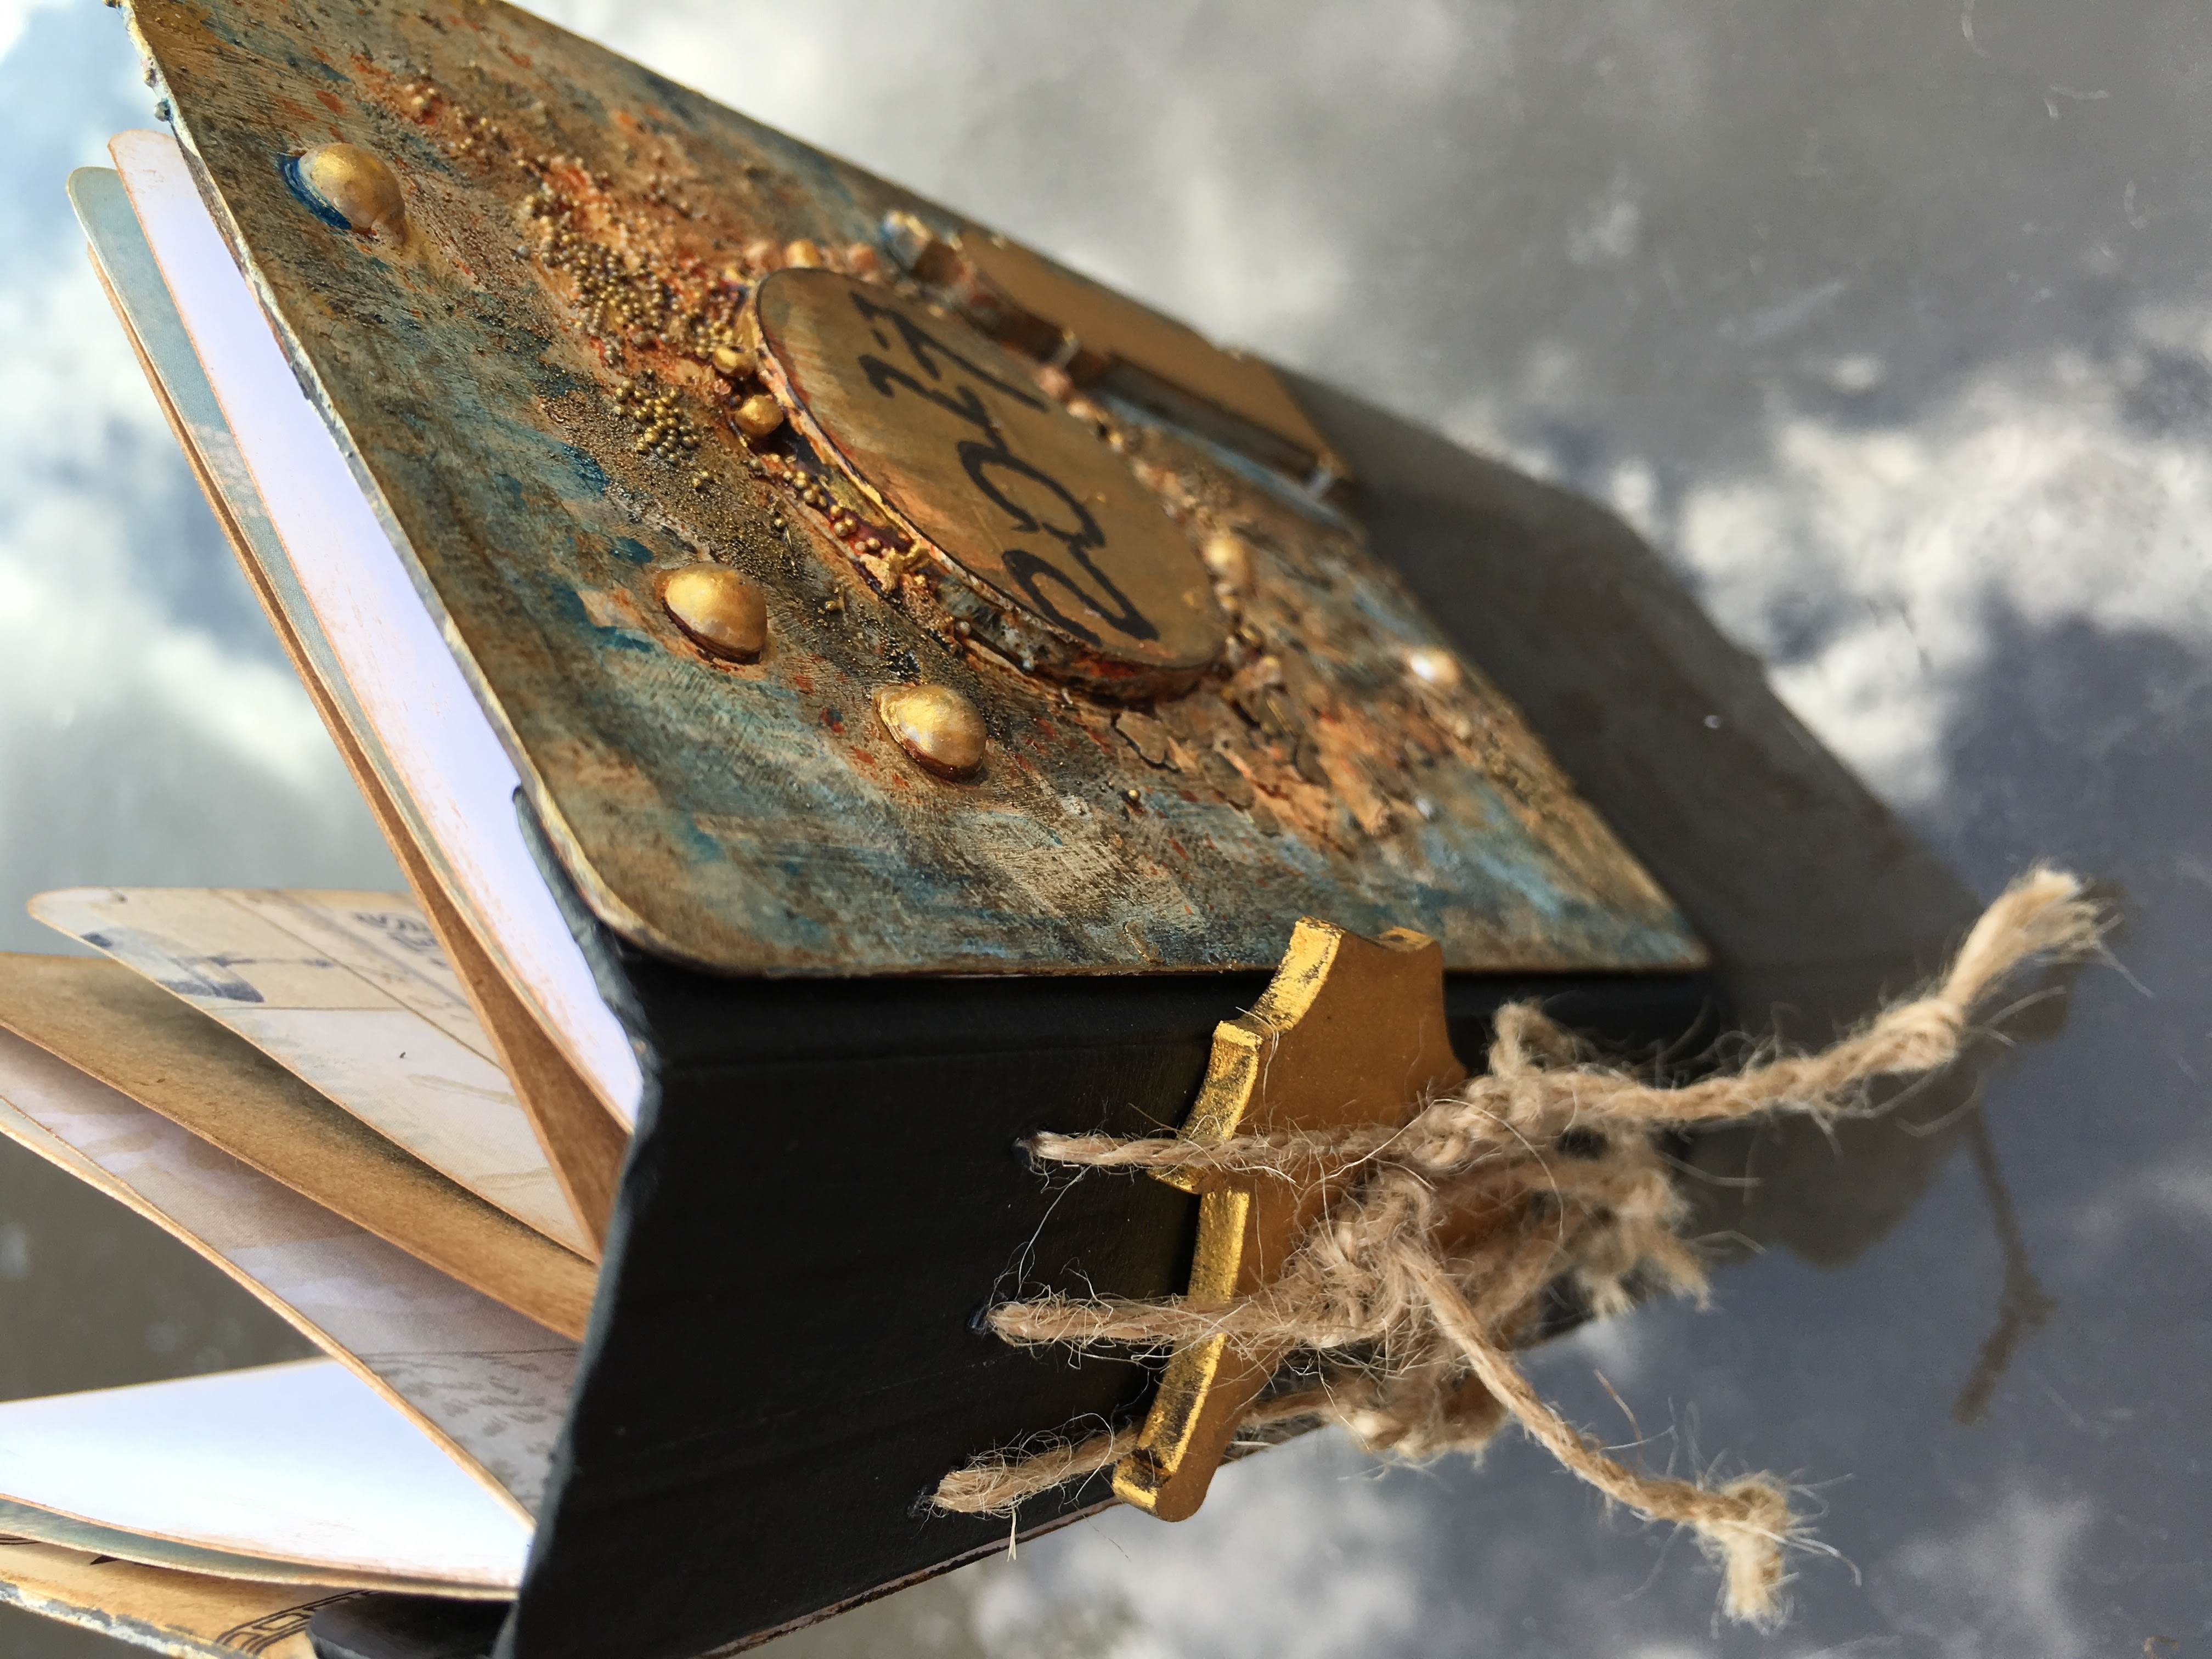
The second passport journal was made from greyboard. The MDF lighthouse, seahorse and circle were painted gold. The cover was painted and embossed with beads, mica flakes and pearls. It was sprayed and dry brushed.
The pages were made from a variety of different papers and again stamped with the Beside the Sea collection.
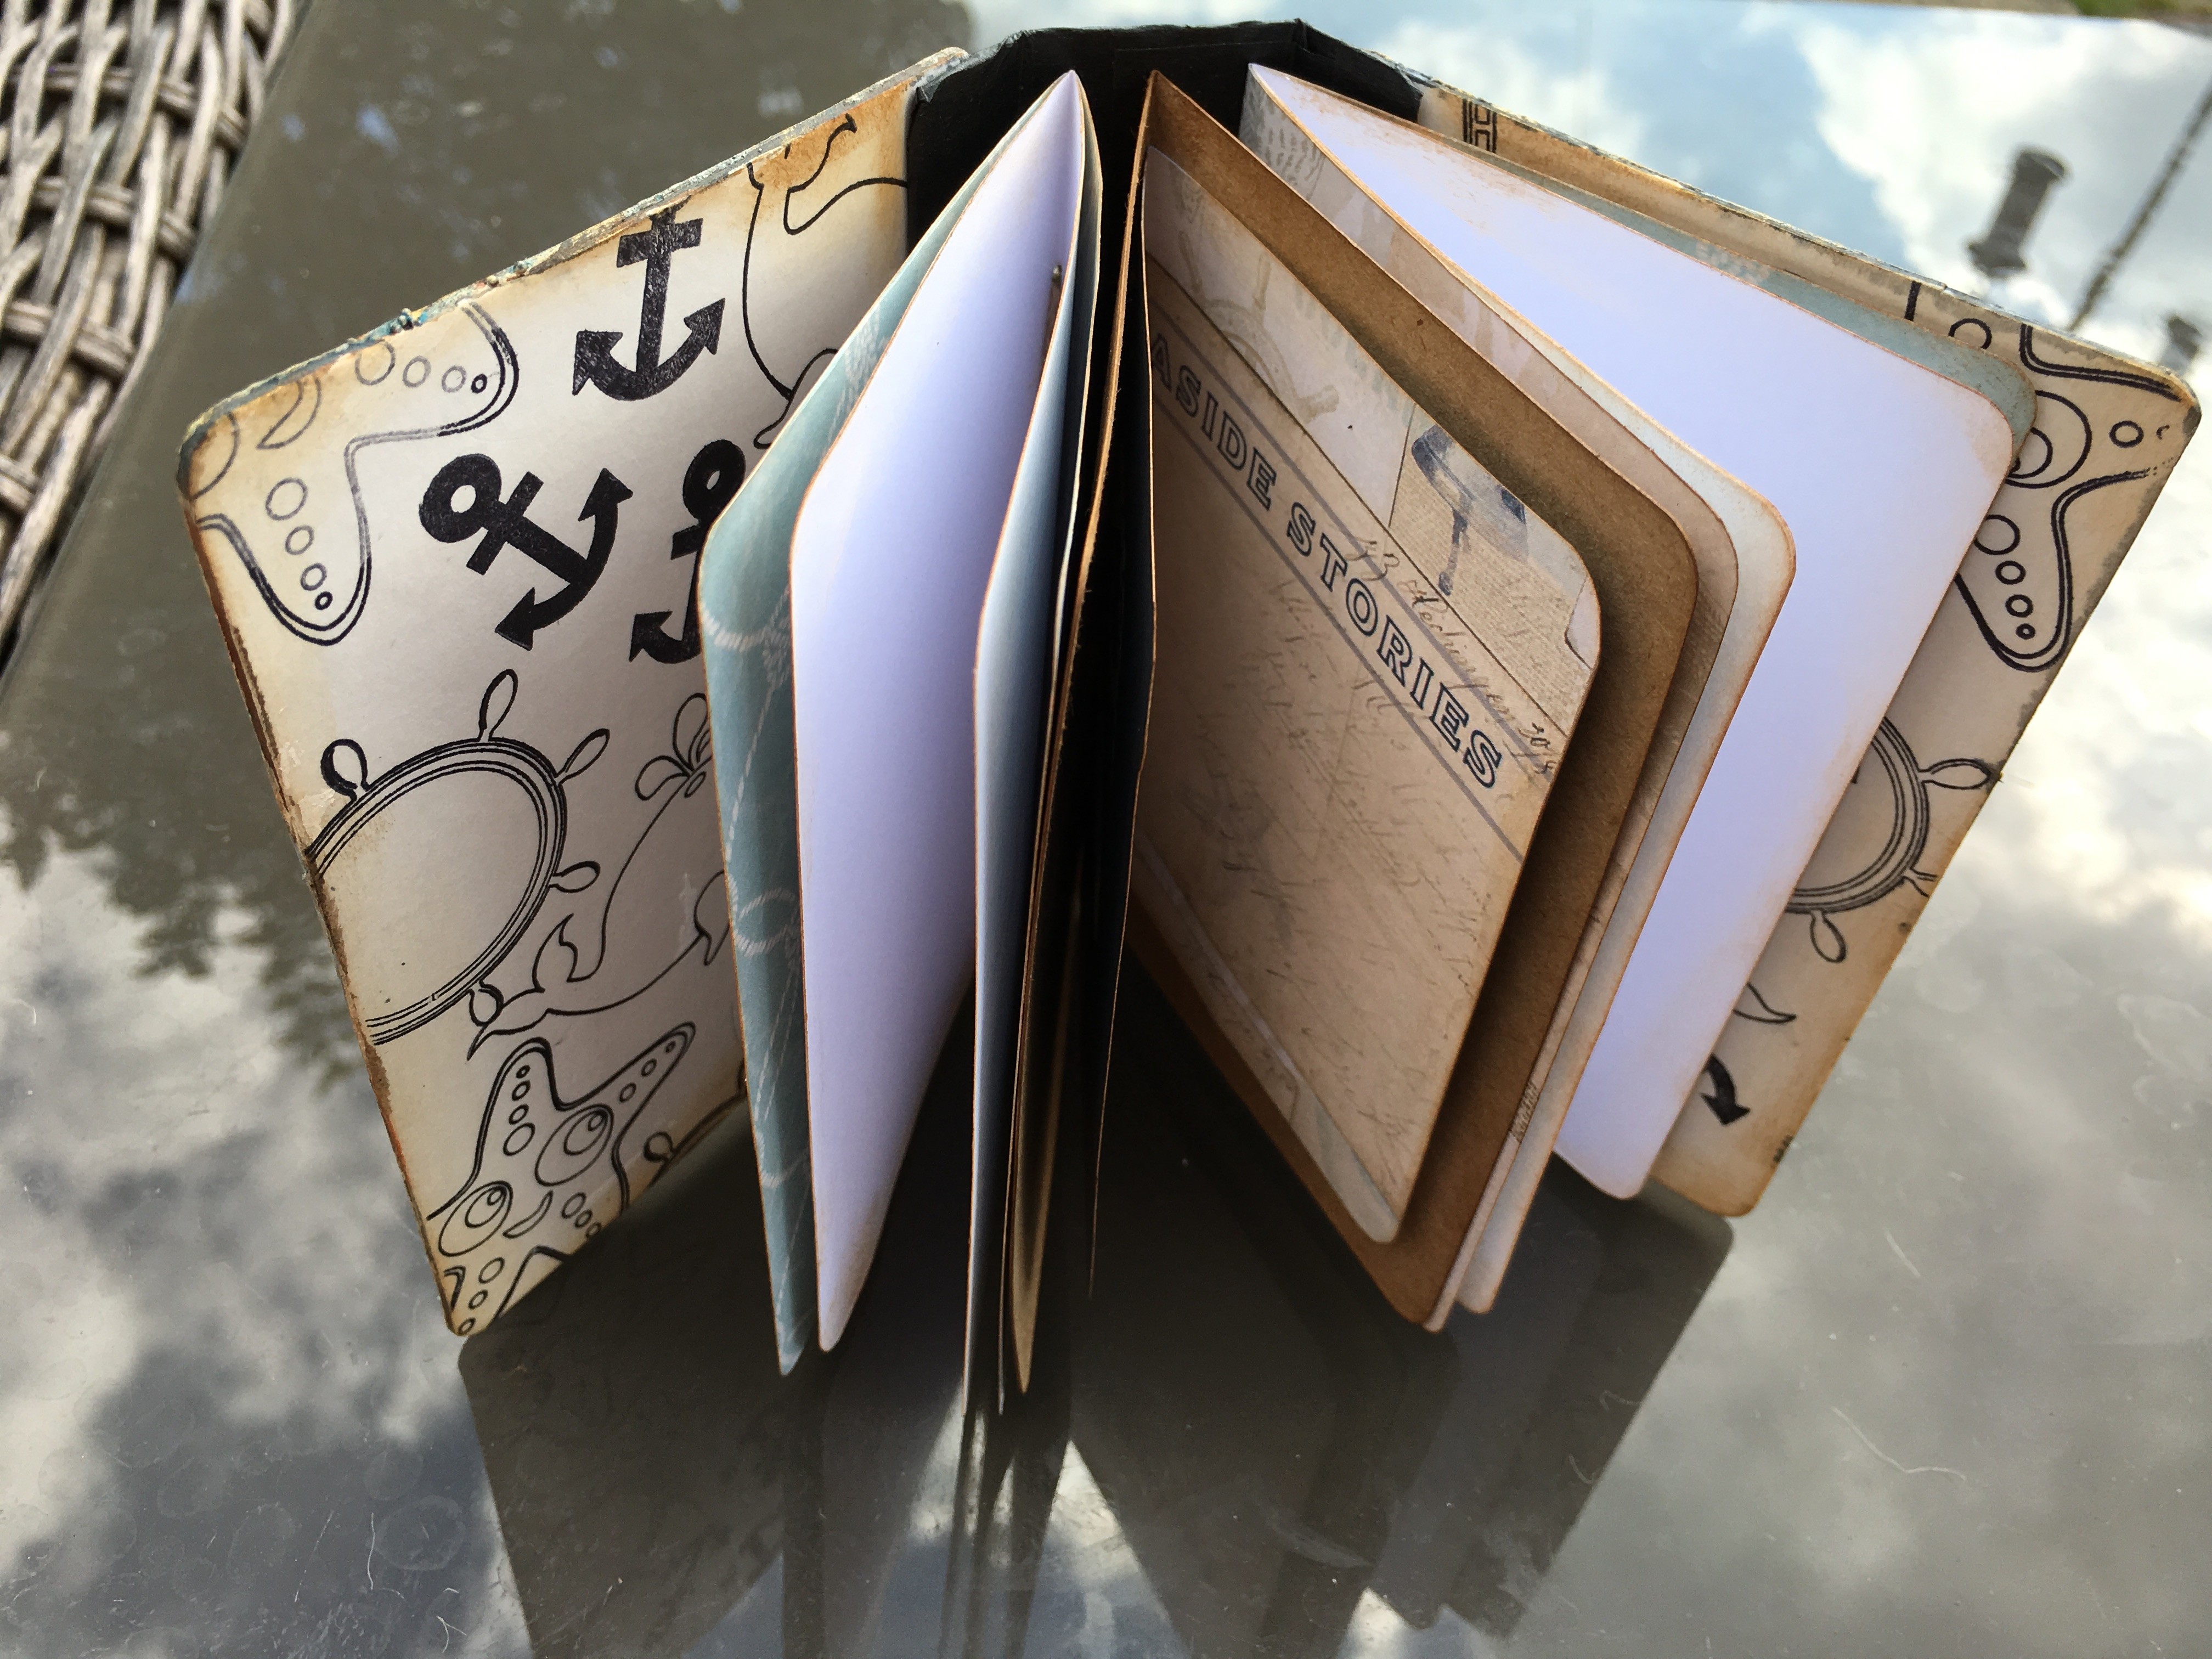
The seahorse was entangled in the strings from the signatures.
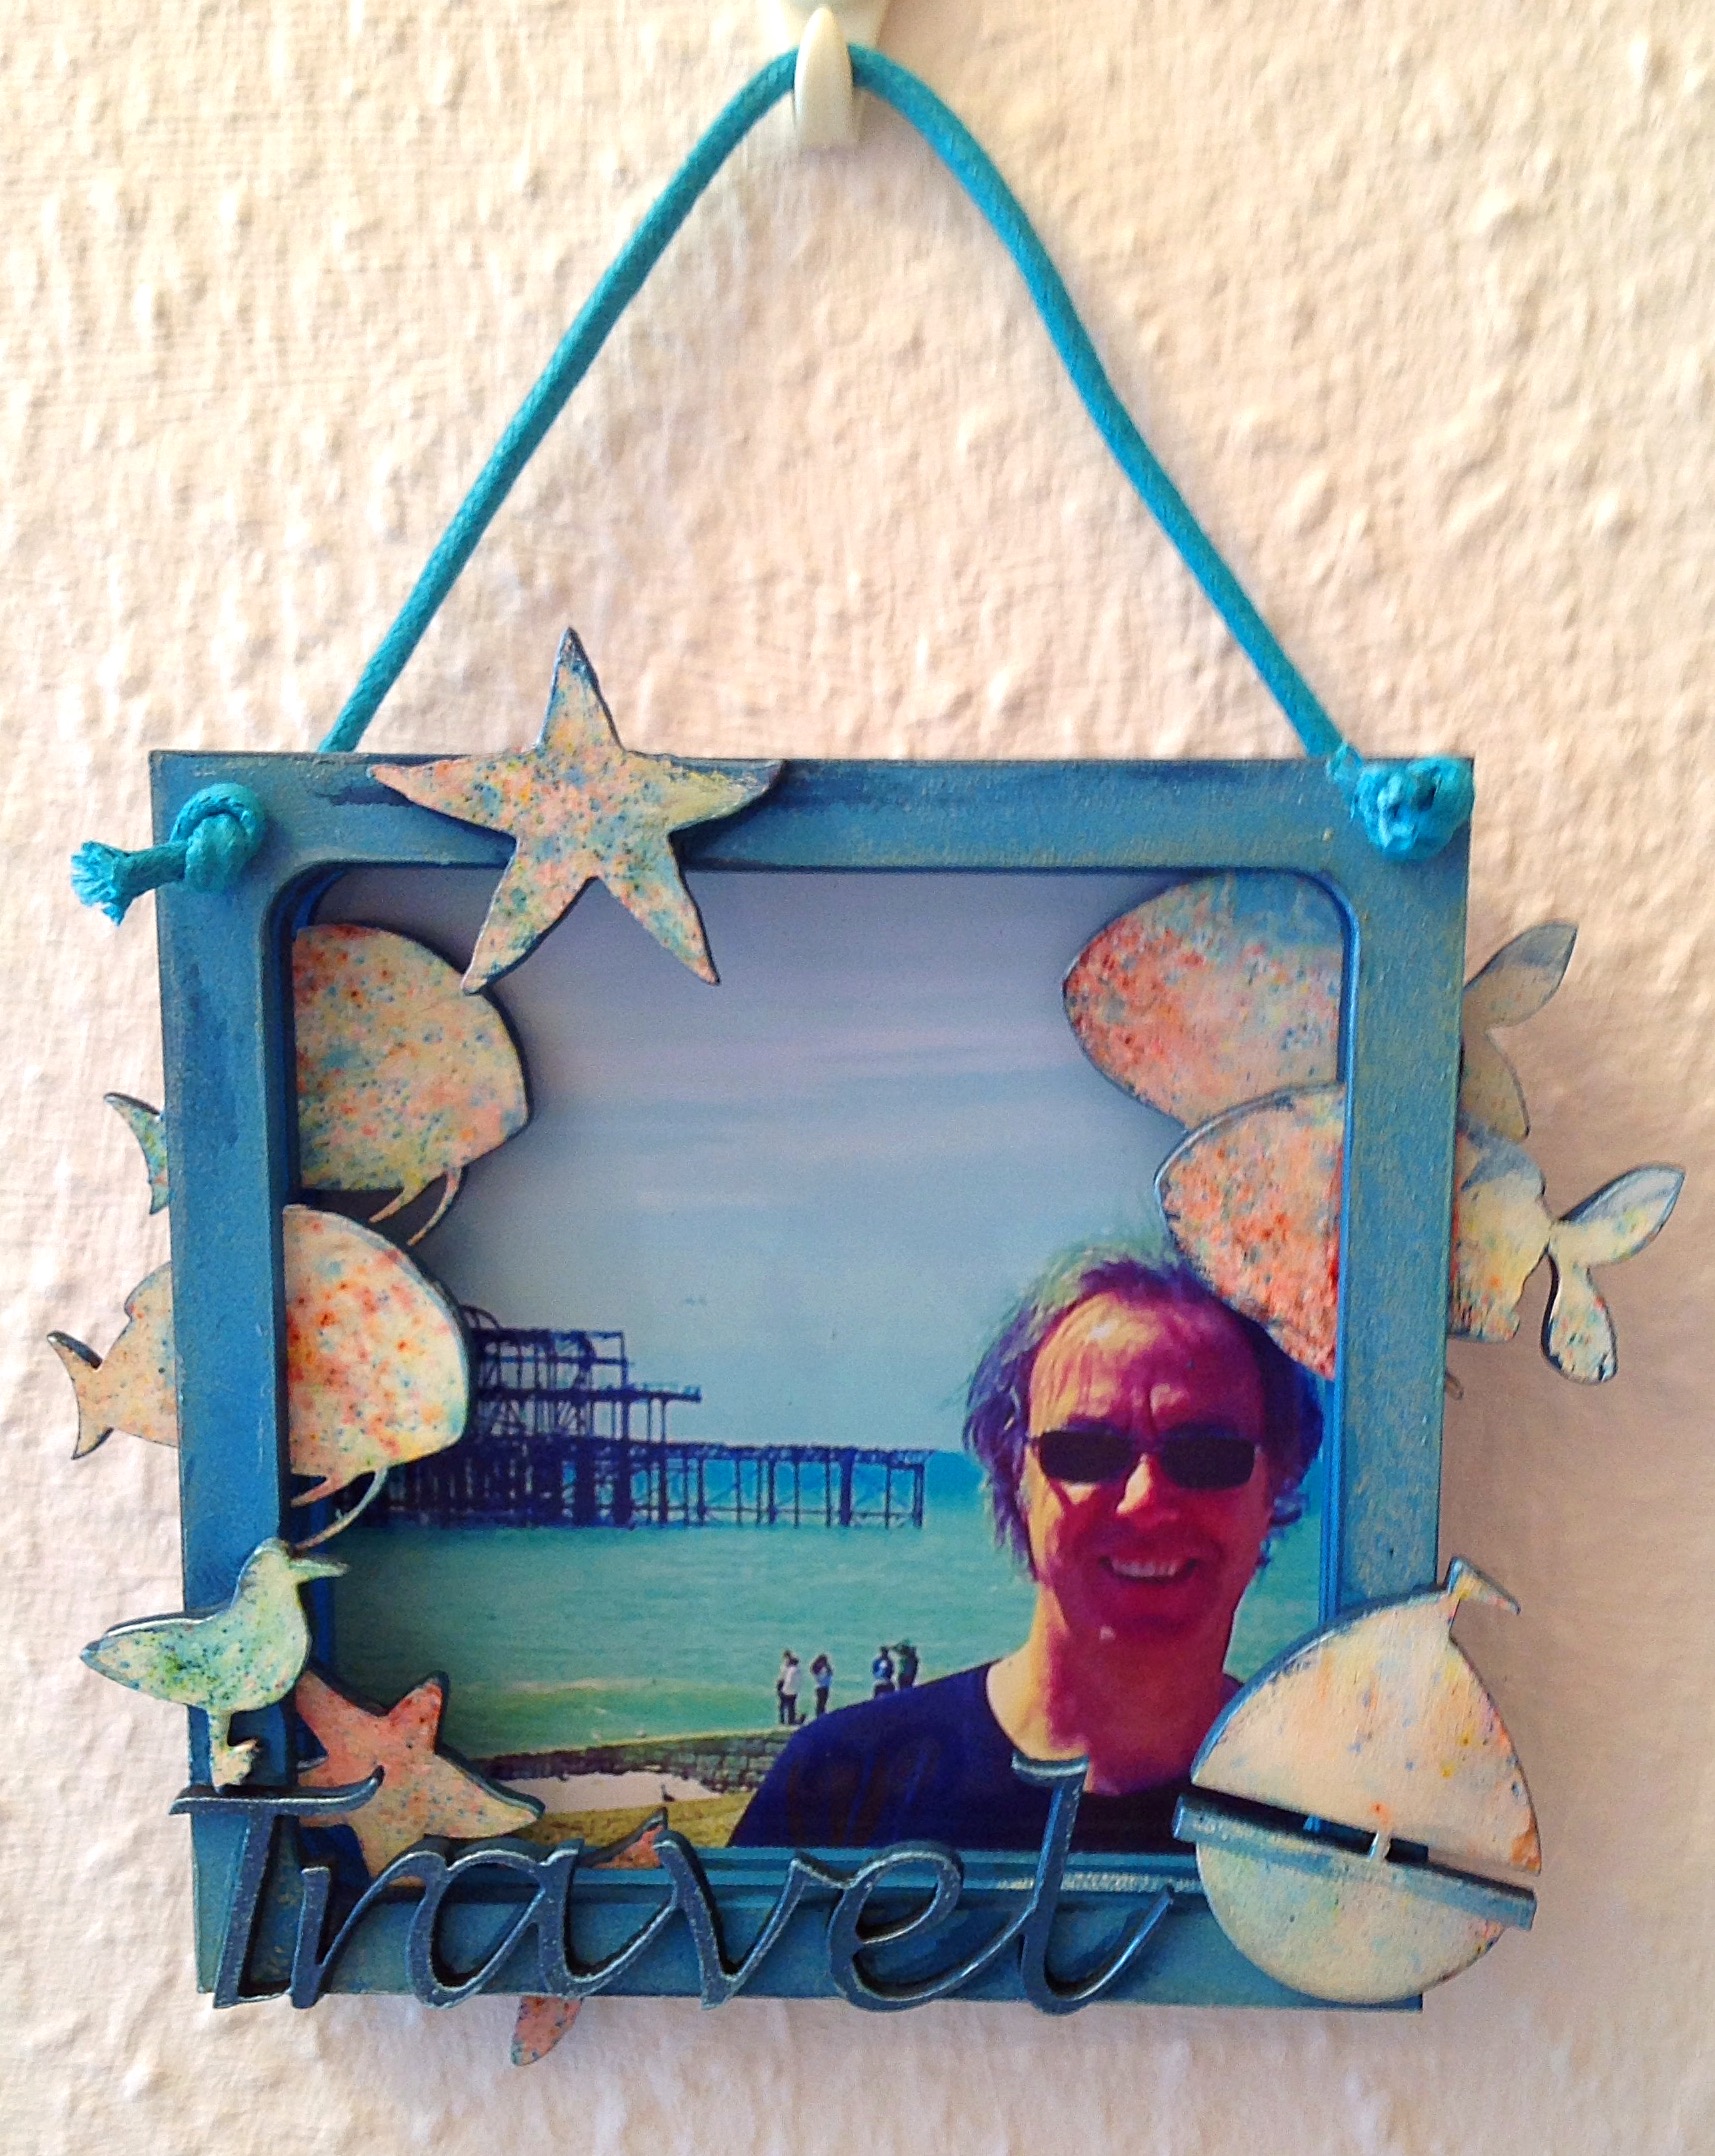
I made a photo frame using 3 MDF frames and inserted sea creatures coloured with Colourburst powders. The title Travel is MDF, painted and dry brushed. The frames were painted, crackled and Antique Creamed using DecoArt products.
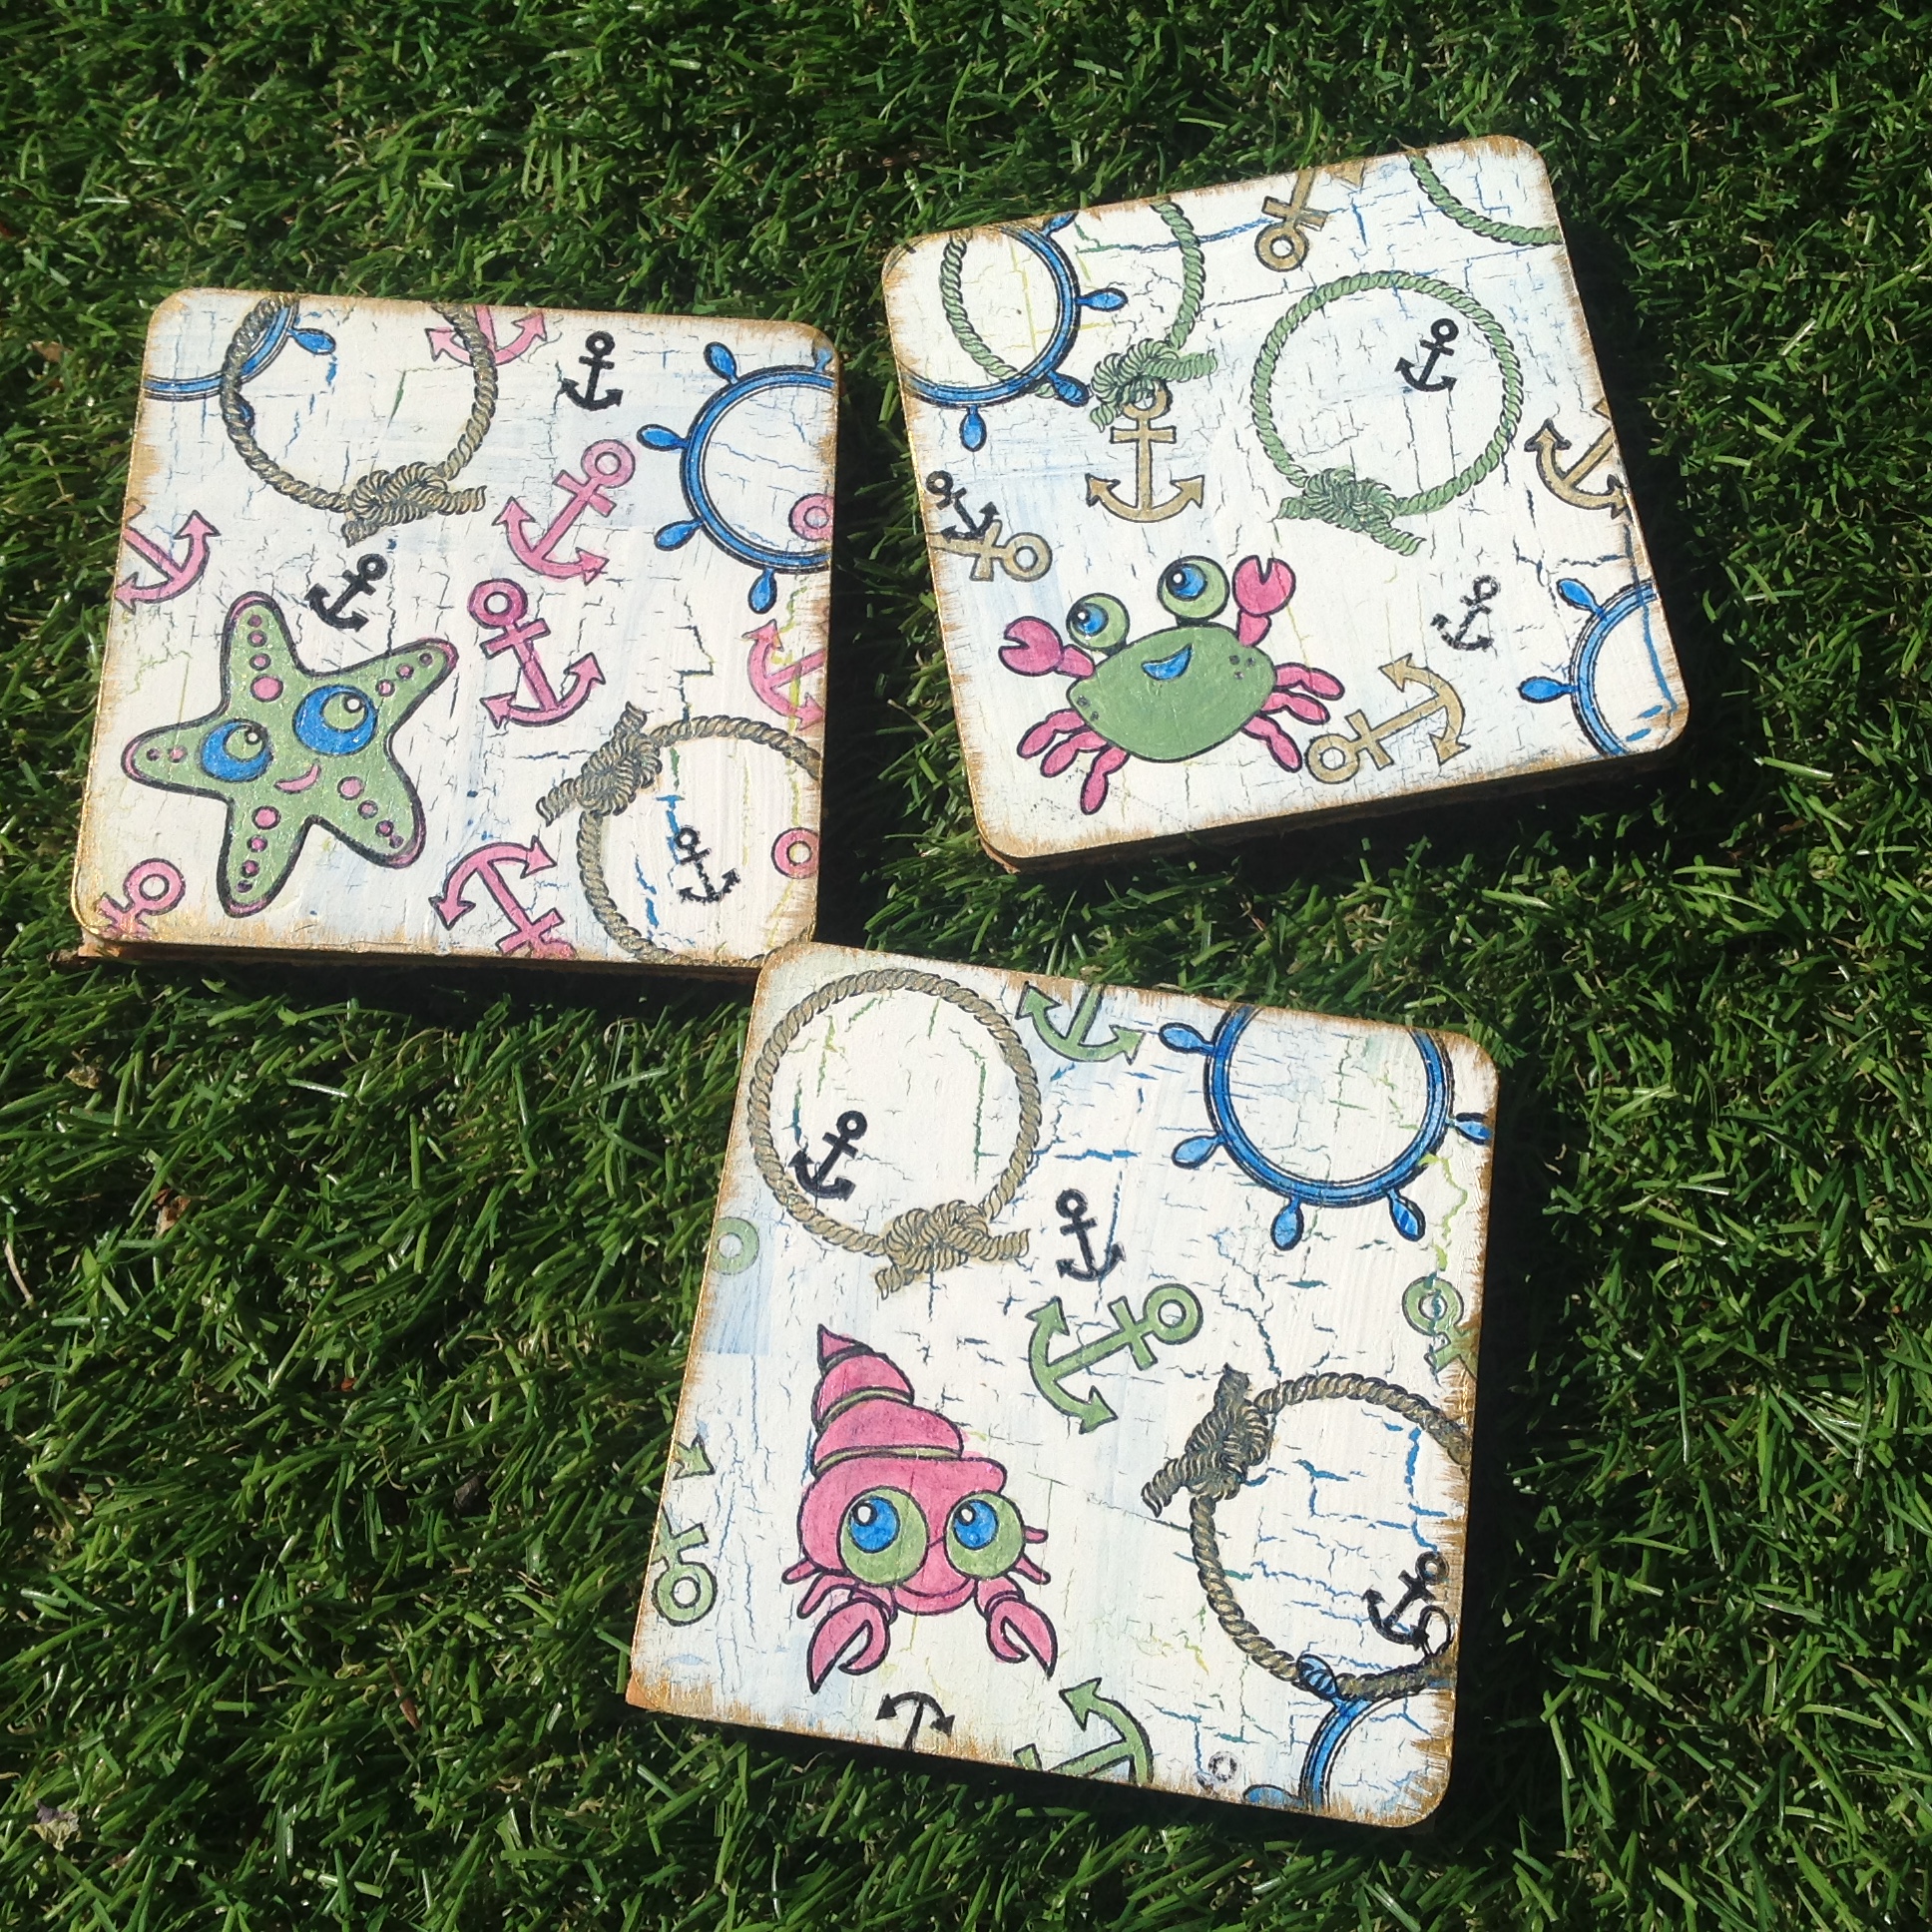
The coasters were made from the inserts from the frames above! They were painted, crackled and then stamped with Archival Inks. The shapes were painted with metallic paint, I varnished them with Softtouch. The backs were covered with black felt.
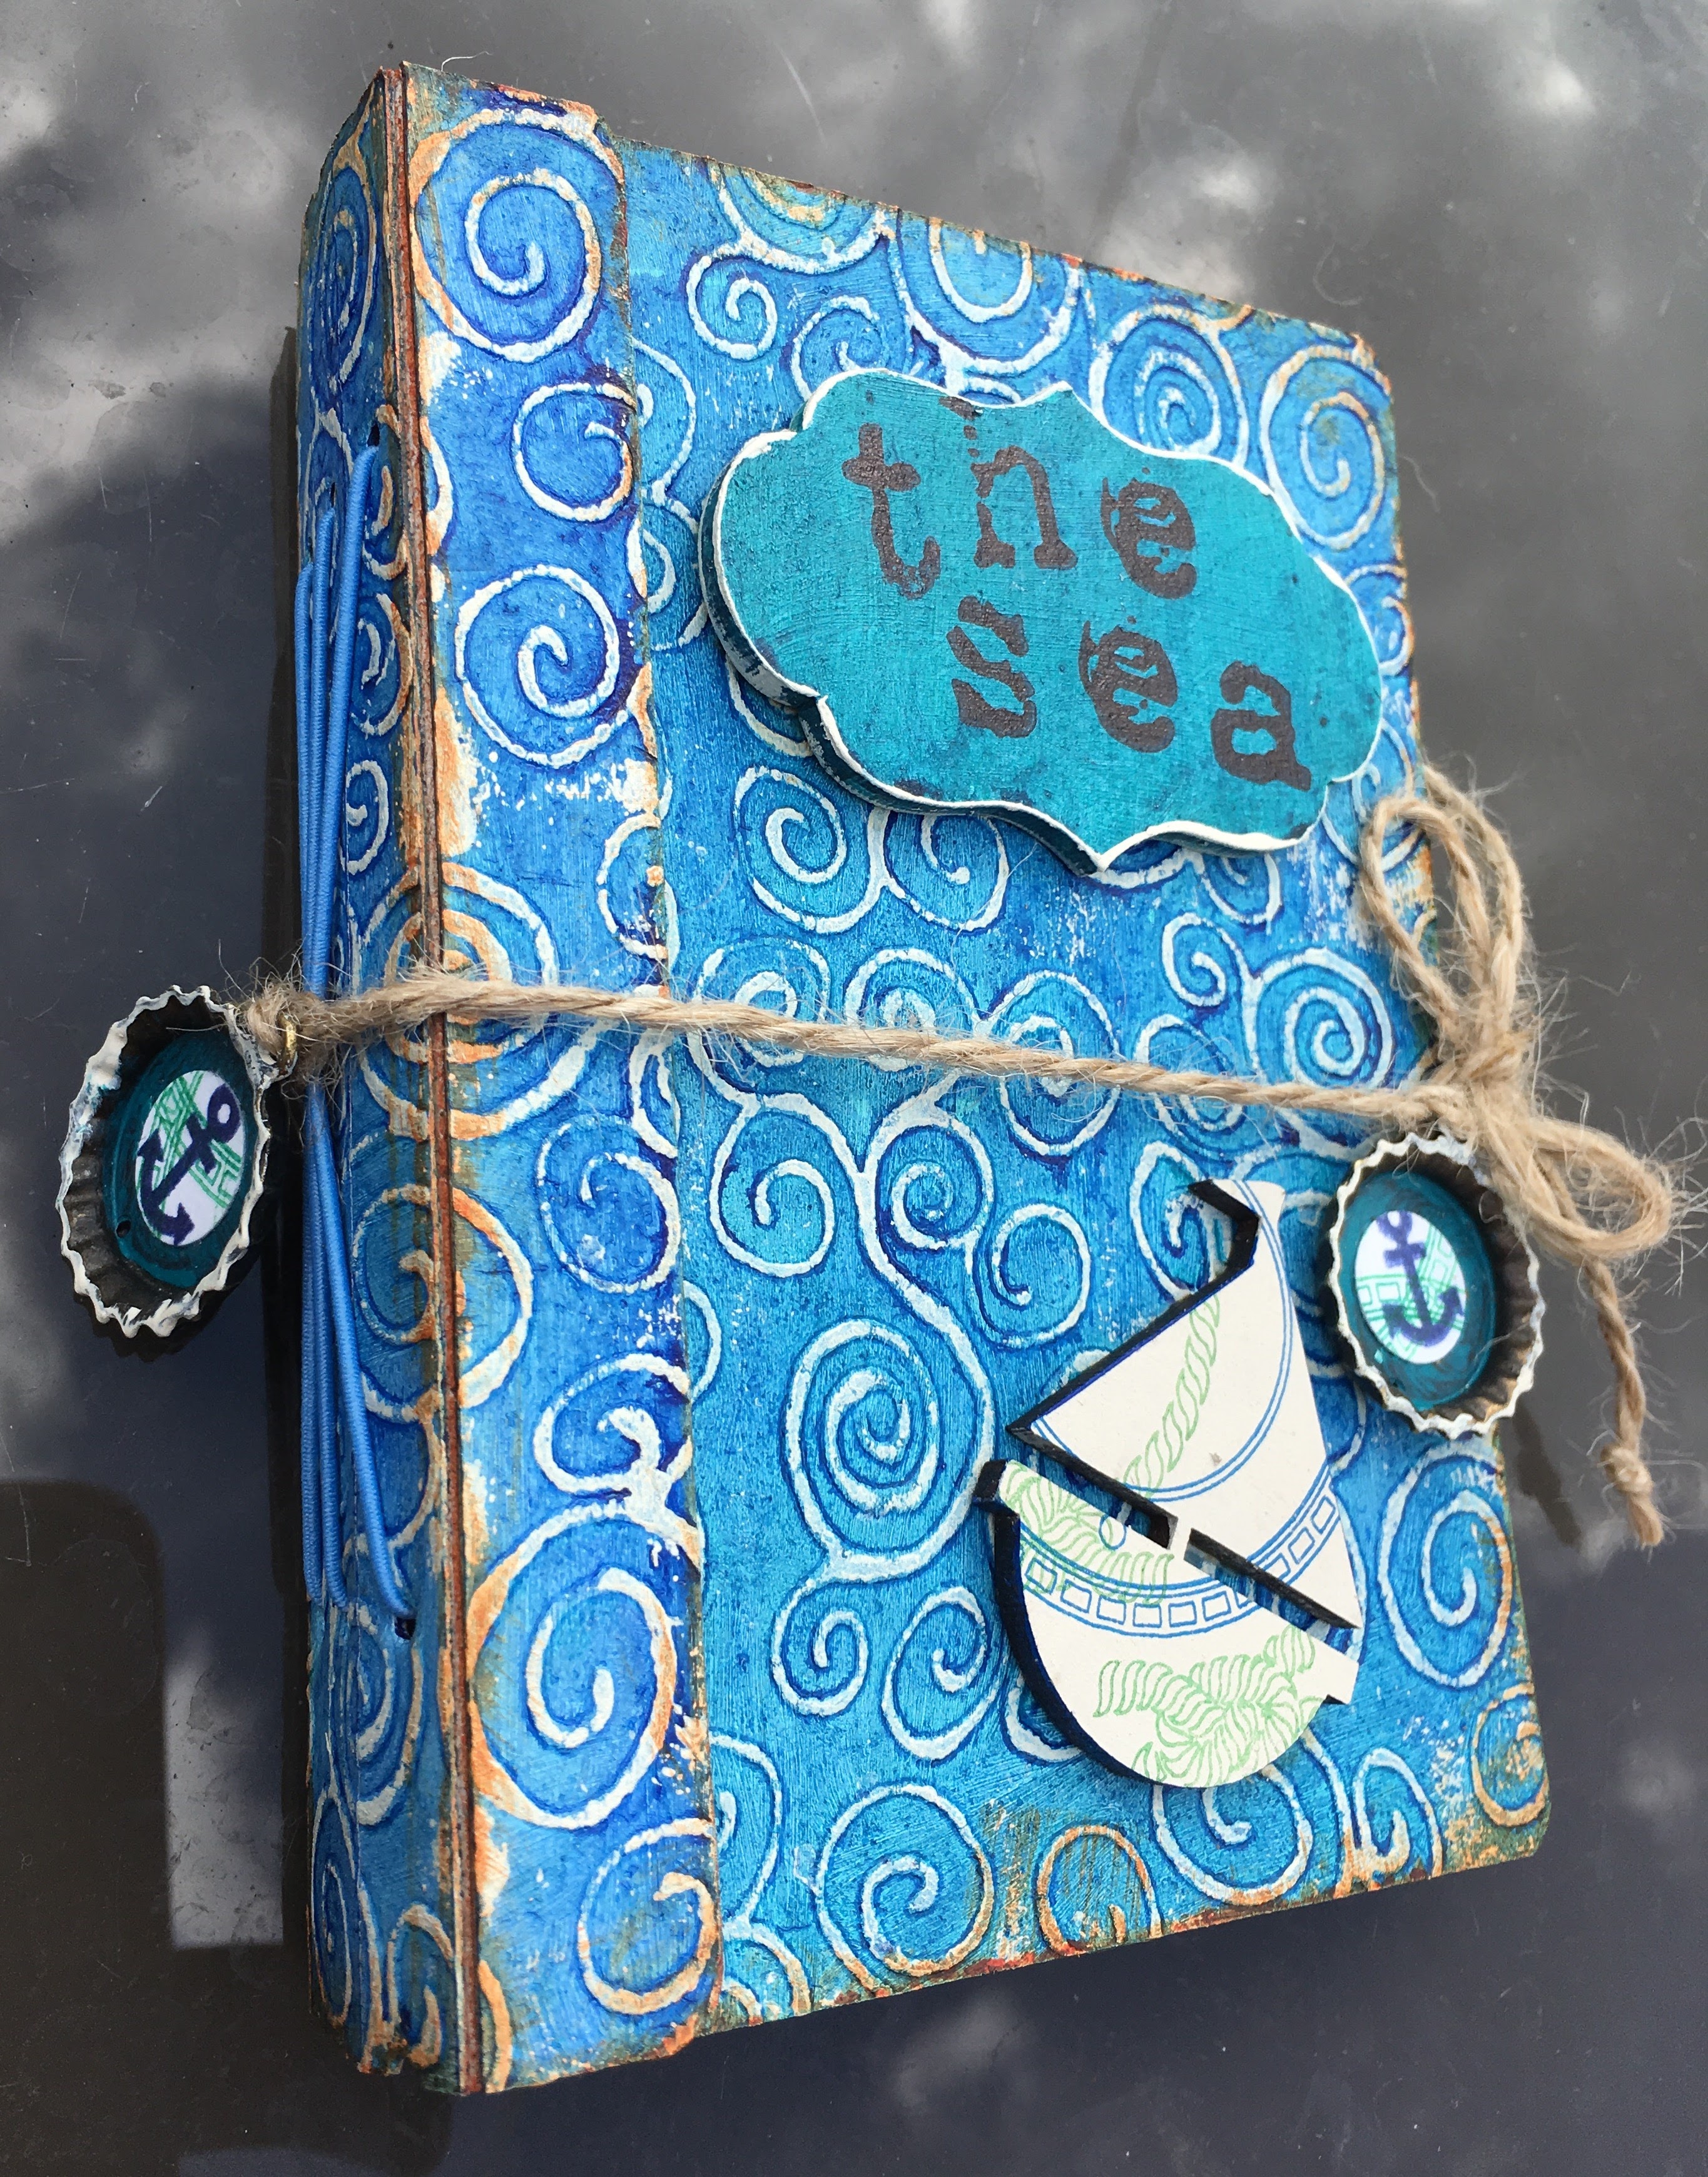
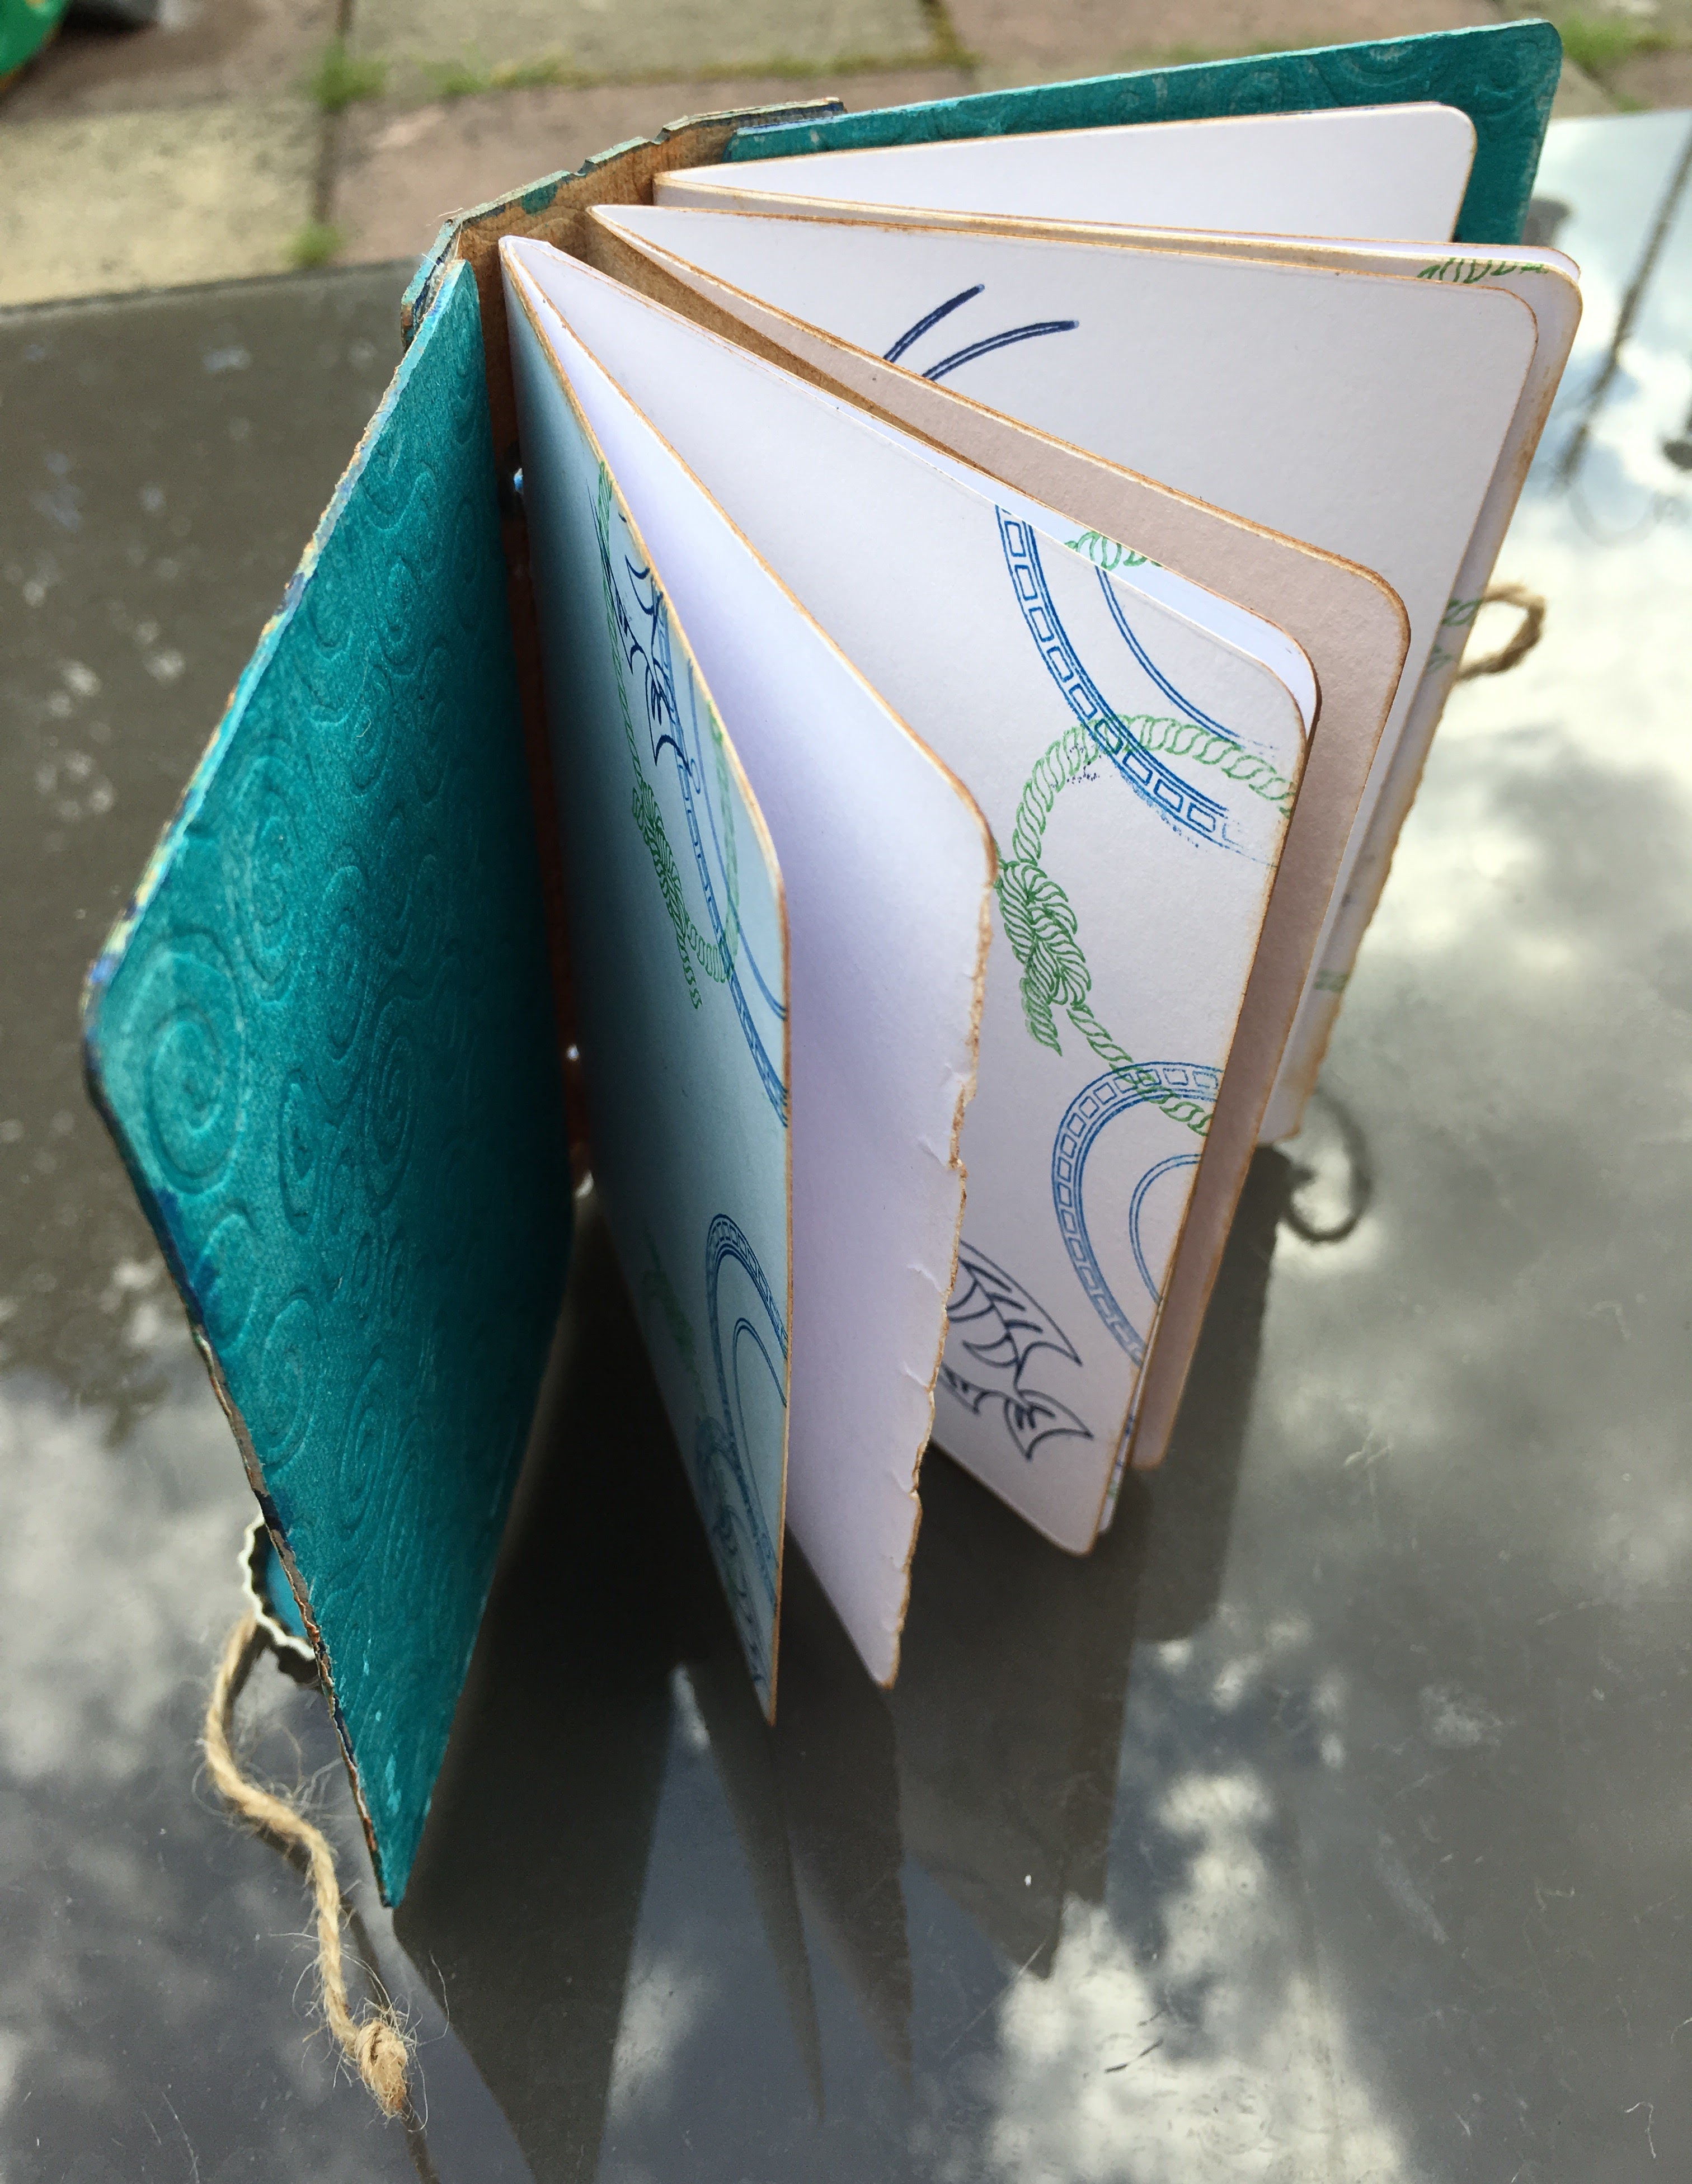
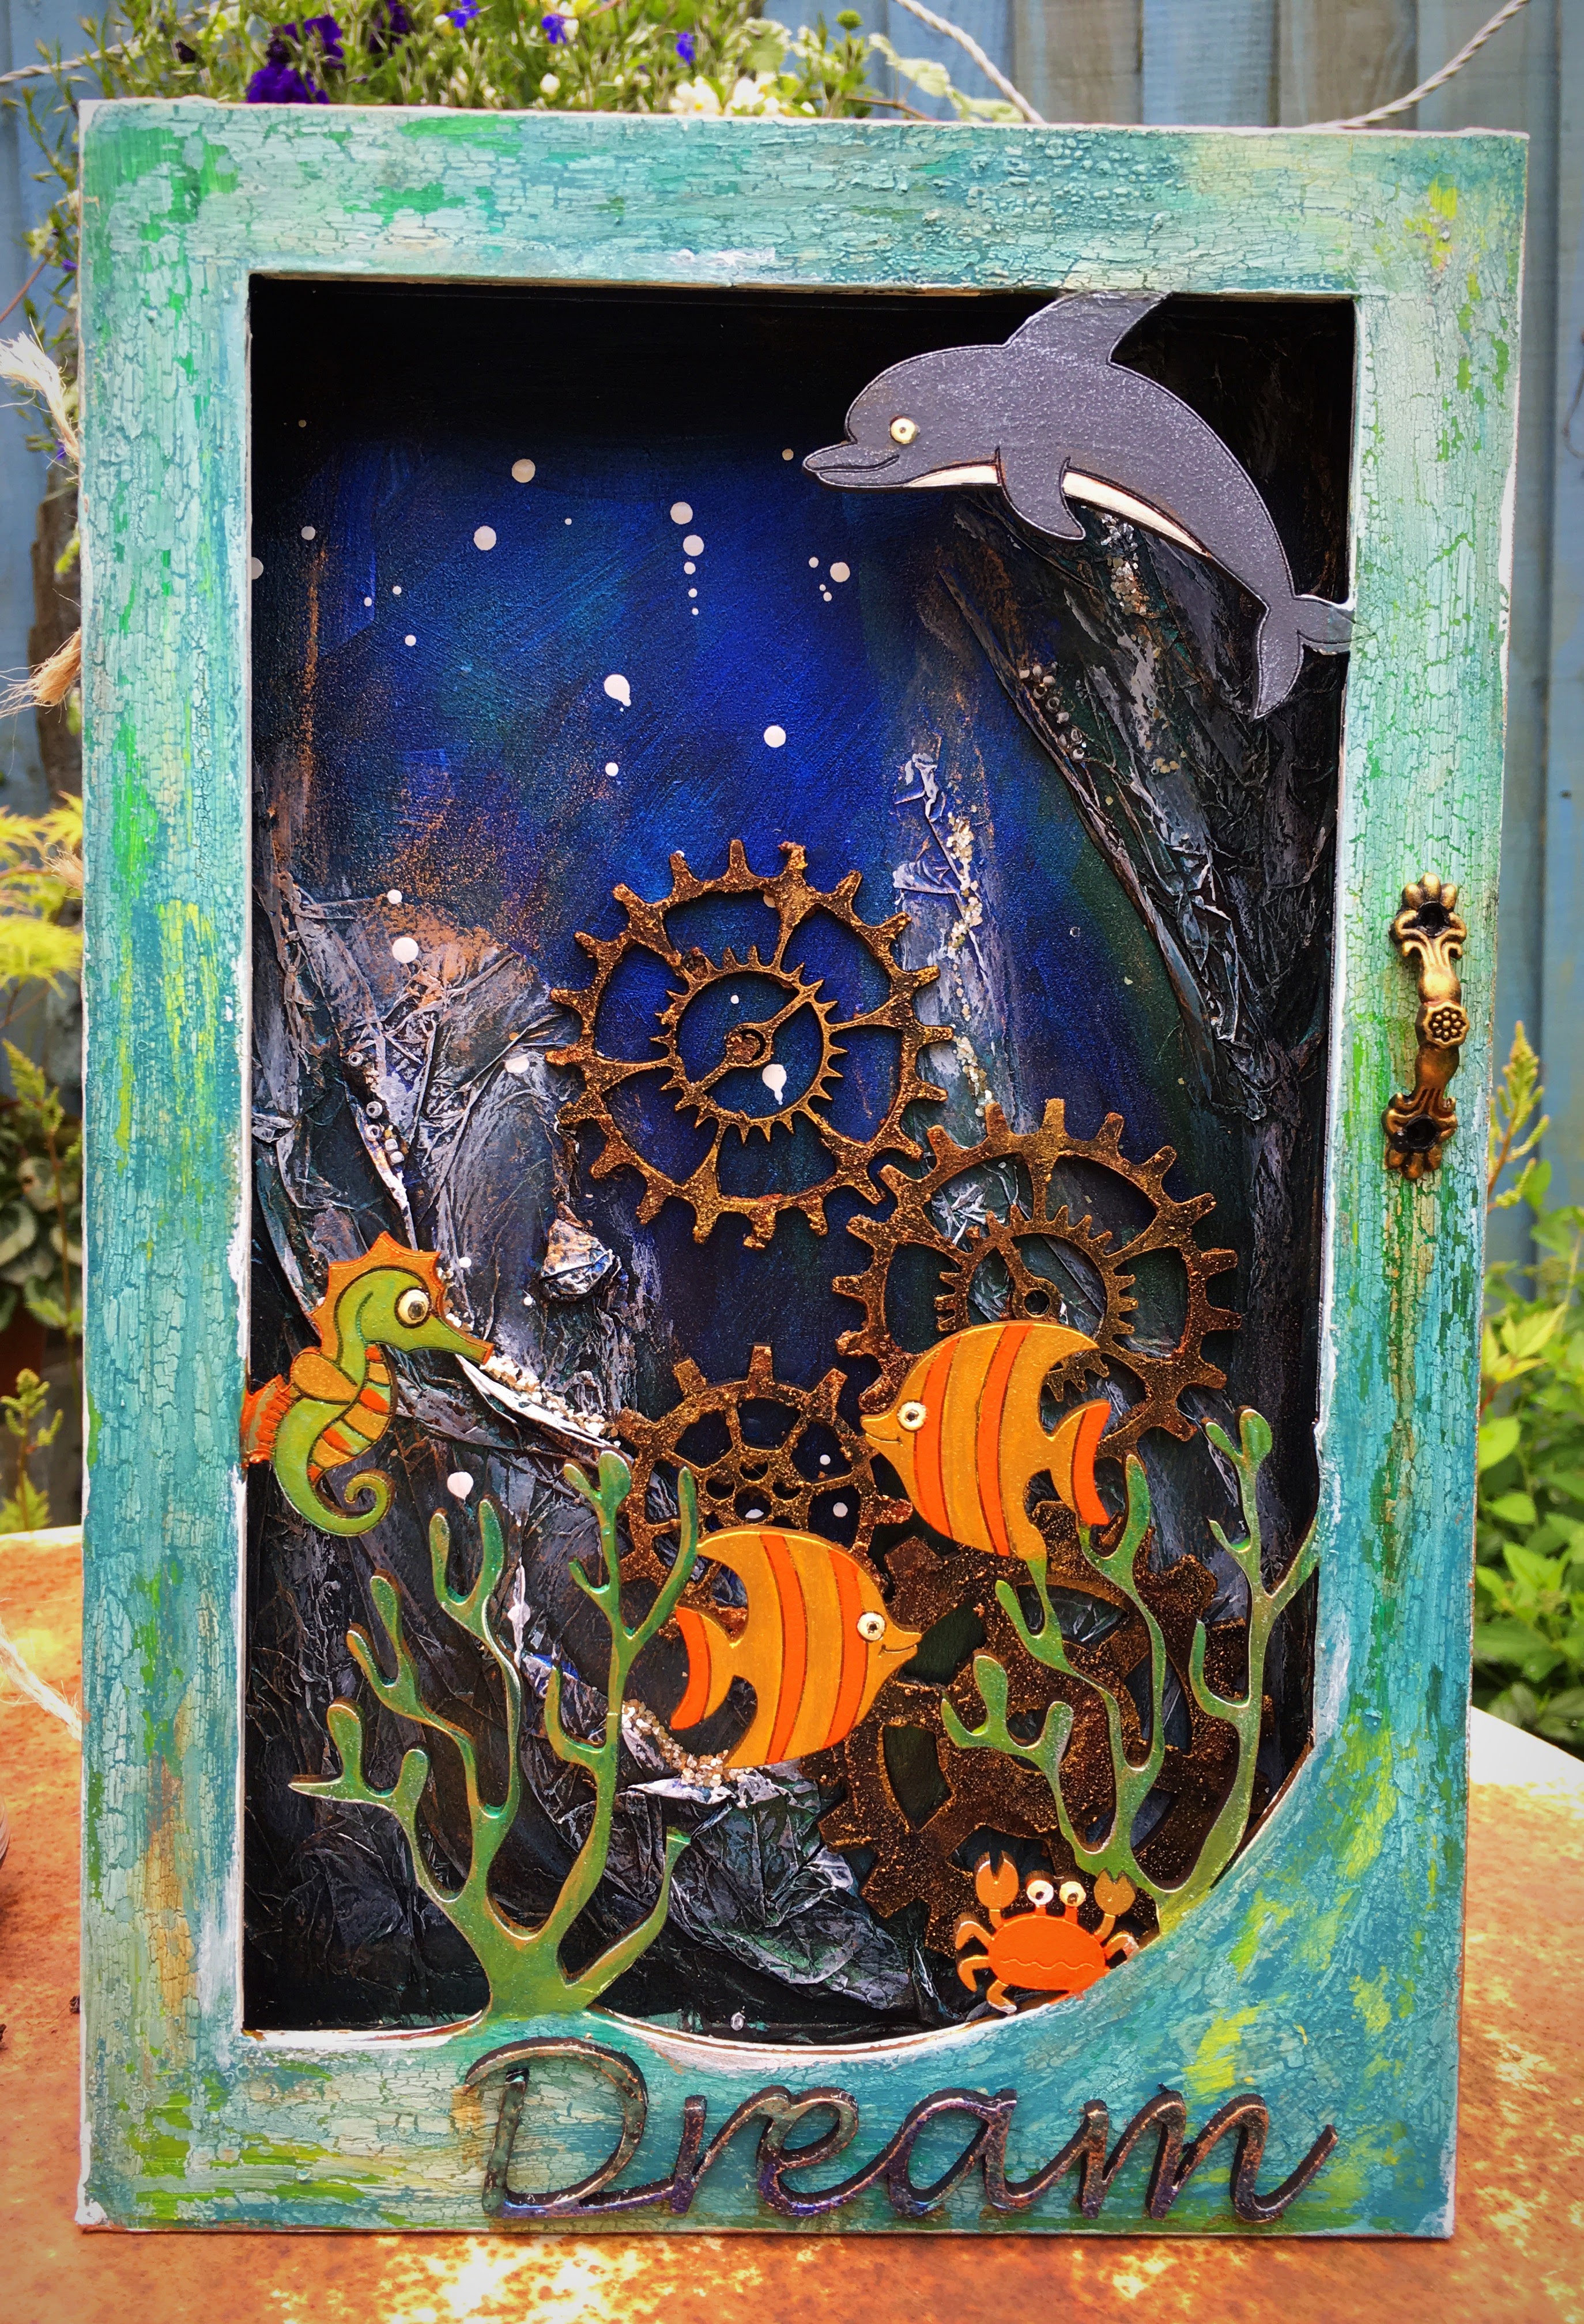
The Sea Box was fun to make! The frame was painted, crackled and Antique Creamed. The MDF title was painted and drybrushed, the handle was added and rusted. The Sea creatures were all painted with acrylics and the eyes Glossy Accented. The inner scene had tissue glued on in seaweed shapes and then painted with Iridescent Paints. The cogs were rusted using Prima products to resemble a shipwreck. The box was painted and the inner covered is scrapbook under the sea papers. The box was tied on using rough string.
I hope you see my samples on Hochanda!
Hugs
Jan x
]]>
What to do with all those rolls of washi tape? Hidden away in a drawer they never get used.
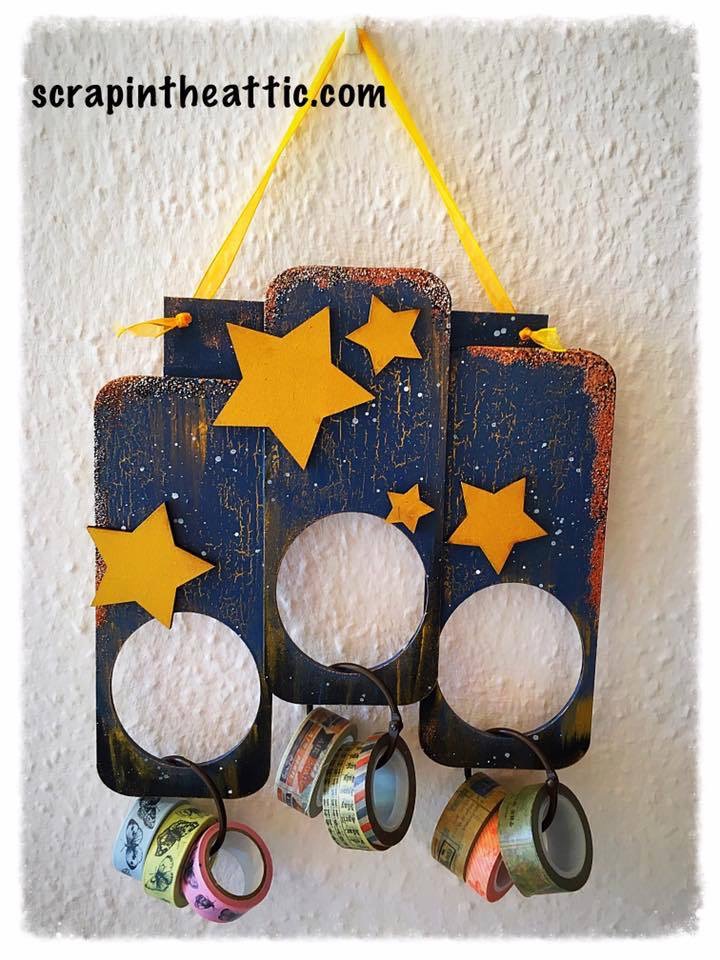
MDF door hangers! I assembled 3 upside down on a plaque with hanging holes pre drilled. I added mdf stars to fit the night sky theme I had in mind.
I coated the hangers and star with Gold Decoart paint. The hangers then had clear crackle medium applied then finally a coat of …………….. I love watching the crackles develop! The gold really shines through the crackle.
I heat embossed the edges for added texture, I used Tarnished Silver and Spice Mix. I added a gold ribbon to hang it up. I had several rings in my stash, I think they were 7 Gypsies, to hang through the holes, lots of room to add more!
The MDF is available from
Daisy’s and Jewels
Have fun crafting
Jan x
]]>