Dies and Distress

Posted on

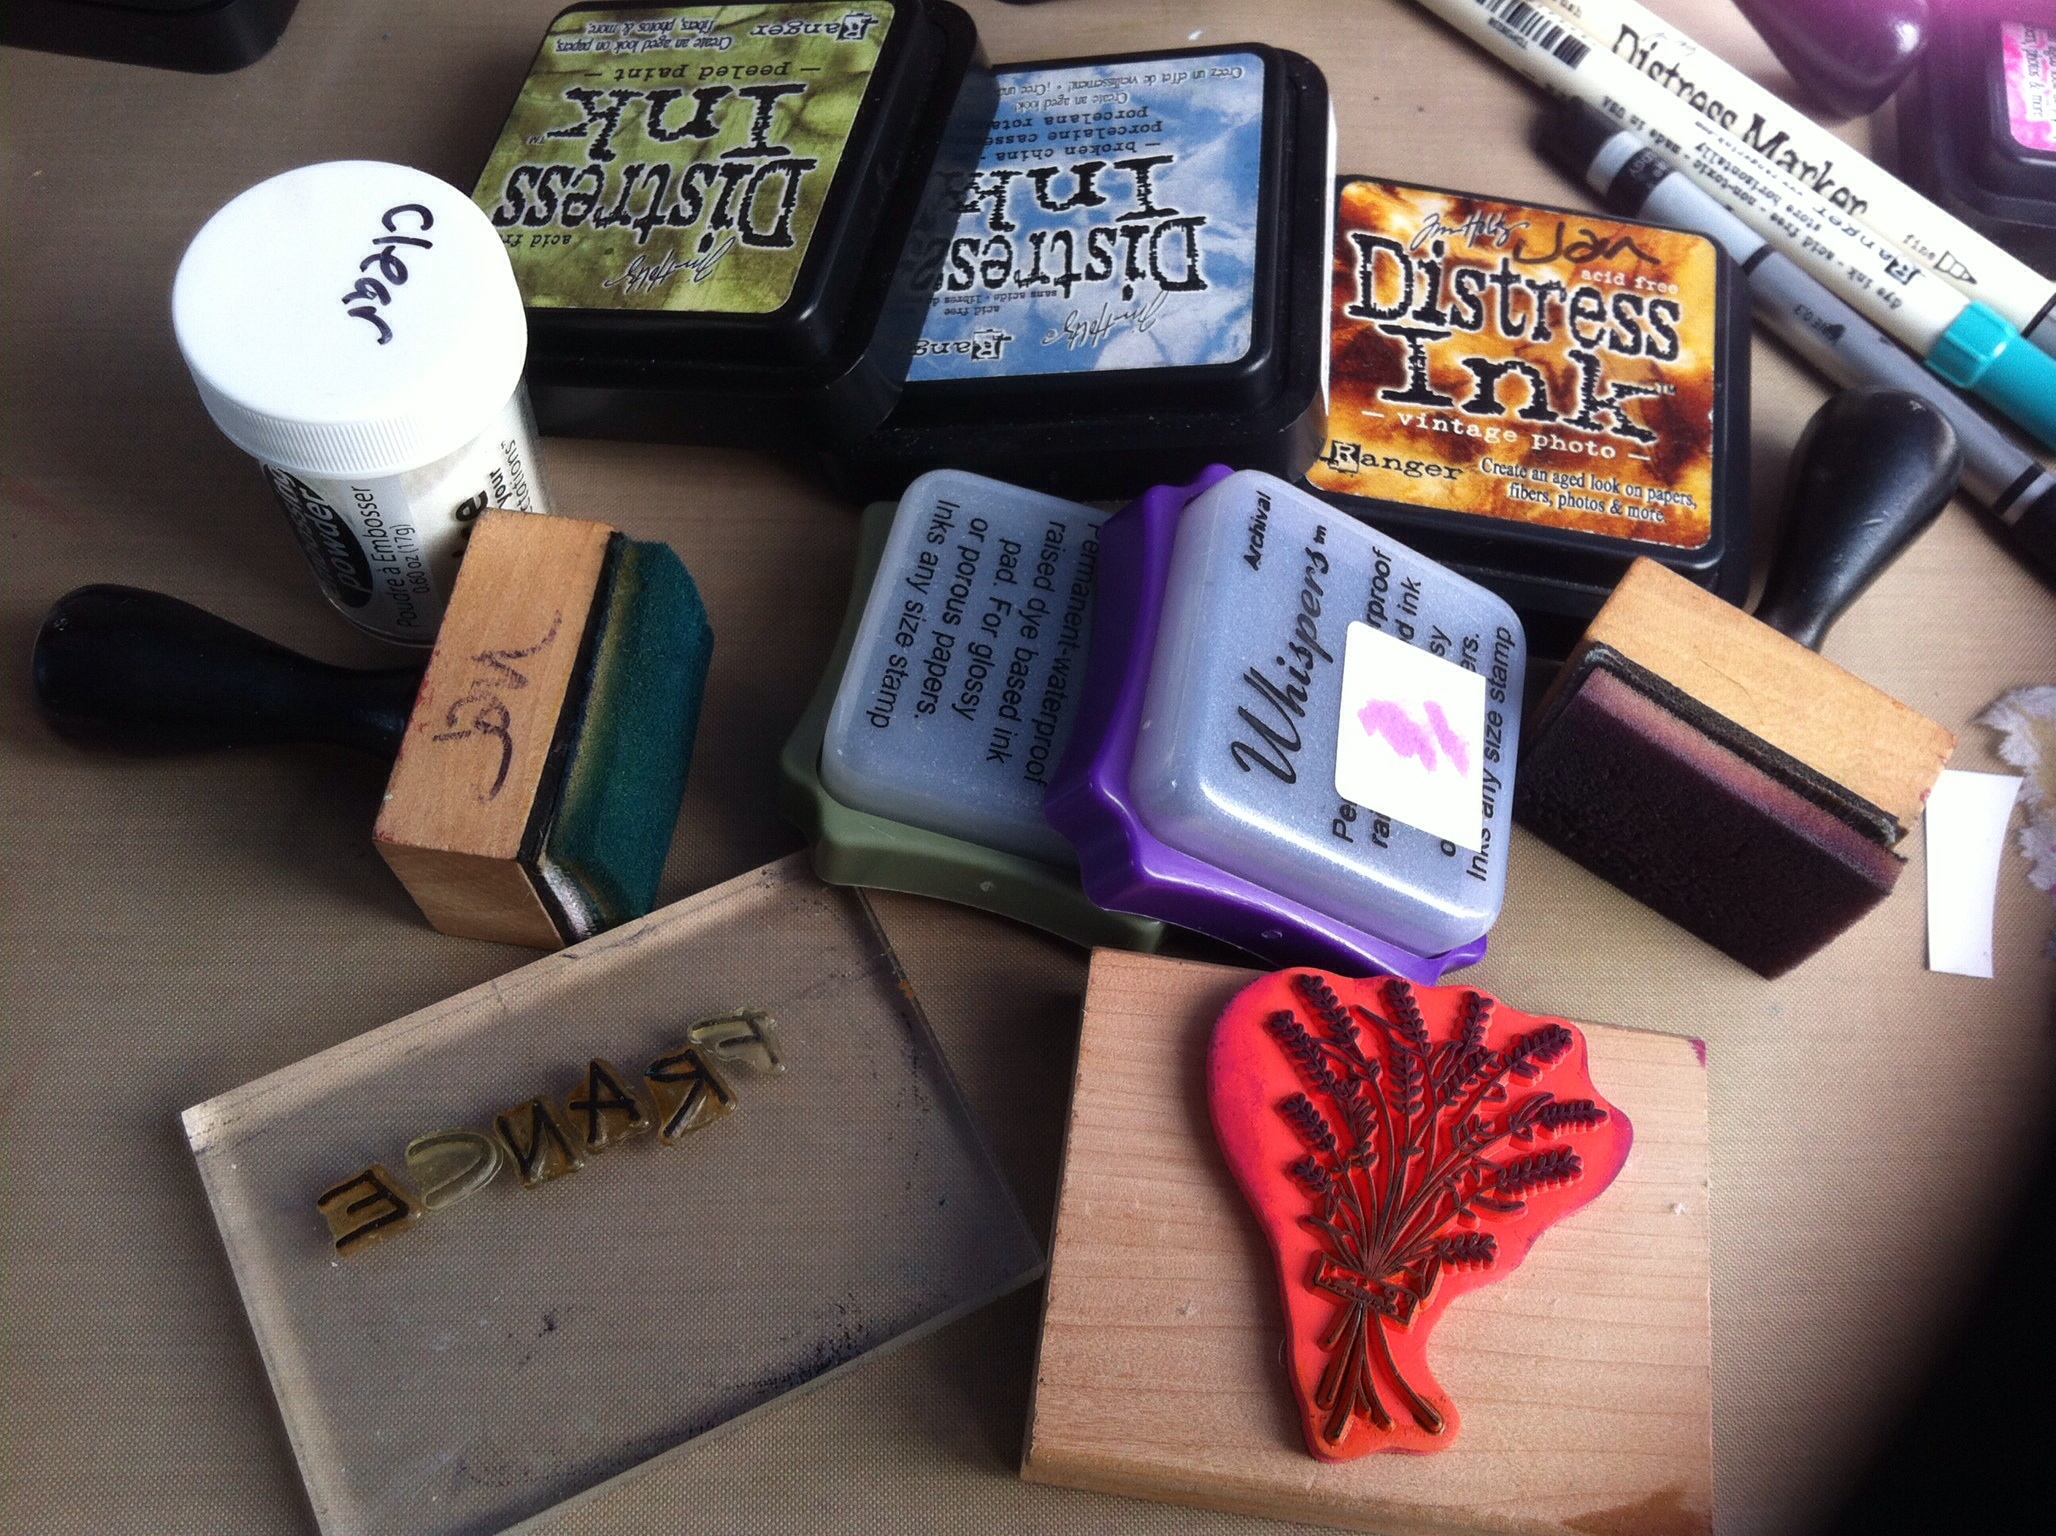
I was quite excited to see the new challenge at a Vintage Journey, Dies and Distress, my two favourite techniques. However, when I opened the Die cupboard I was spoiled for choice and really couldn’t decide which to use. There were even dies I had forgotten I had bought ( and never used!)
Sooooo I thought what I need is an album of all the TH dies I possess and a quick flick through when I need a die will remind what I have. The dies all looked a bit sad so I collected themes, with embossing folders, and want to make a page for each idea.
The album would be 7 x 6 ins, made from grey board, but I am not sure how many pages I will make (AND new room for more dies.) So I decided to make the pages first…….
Page 1 Sewing
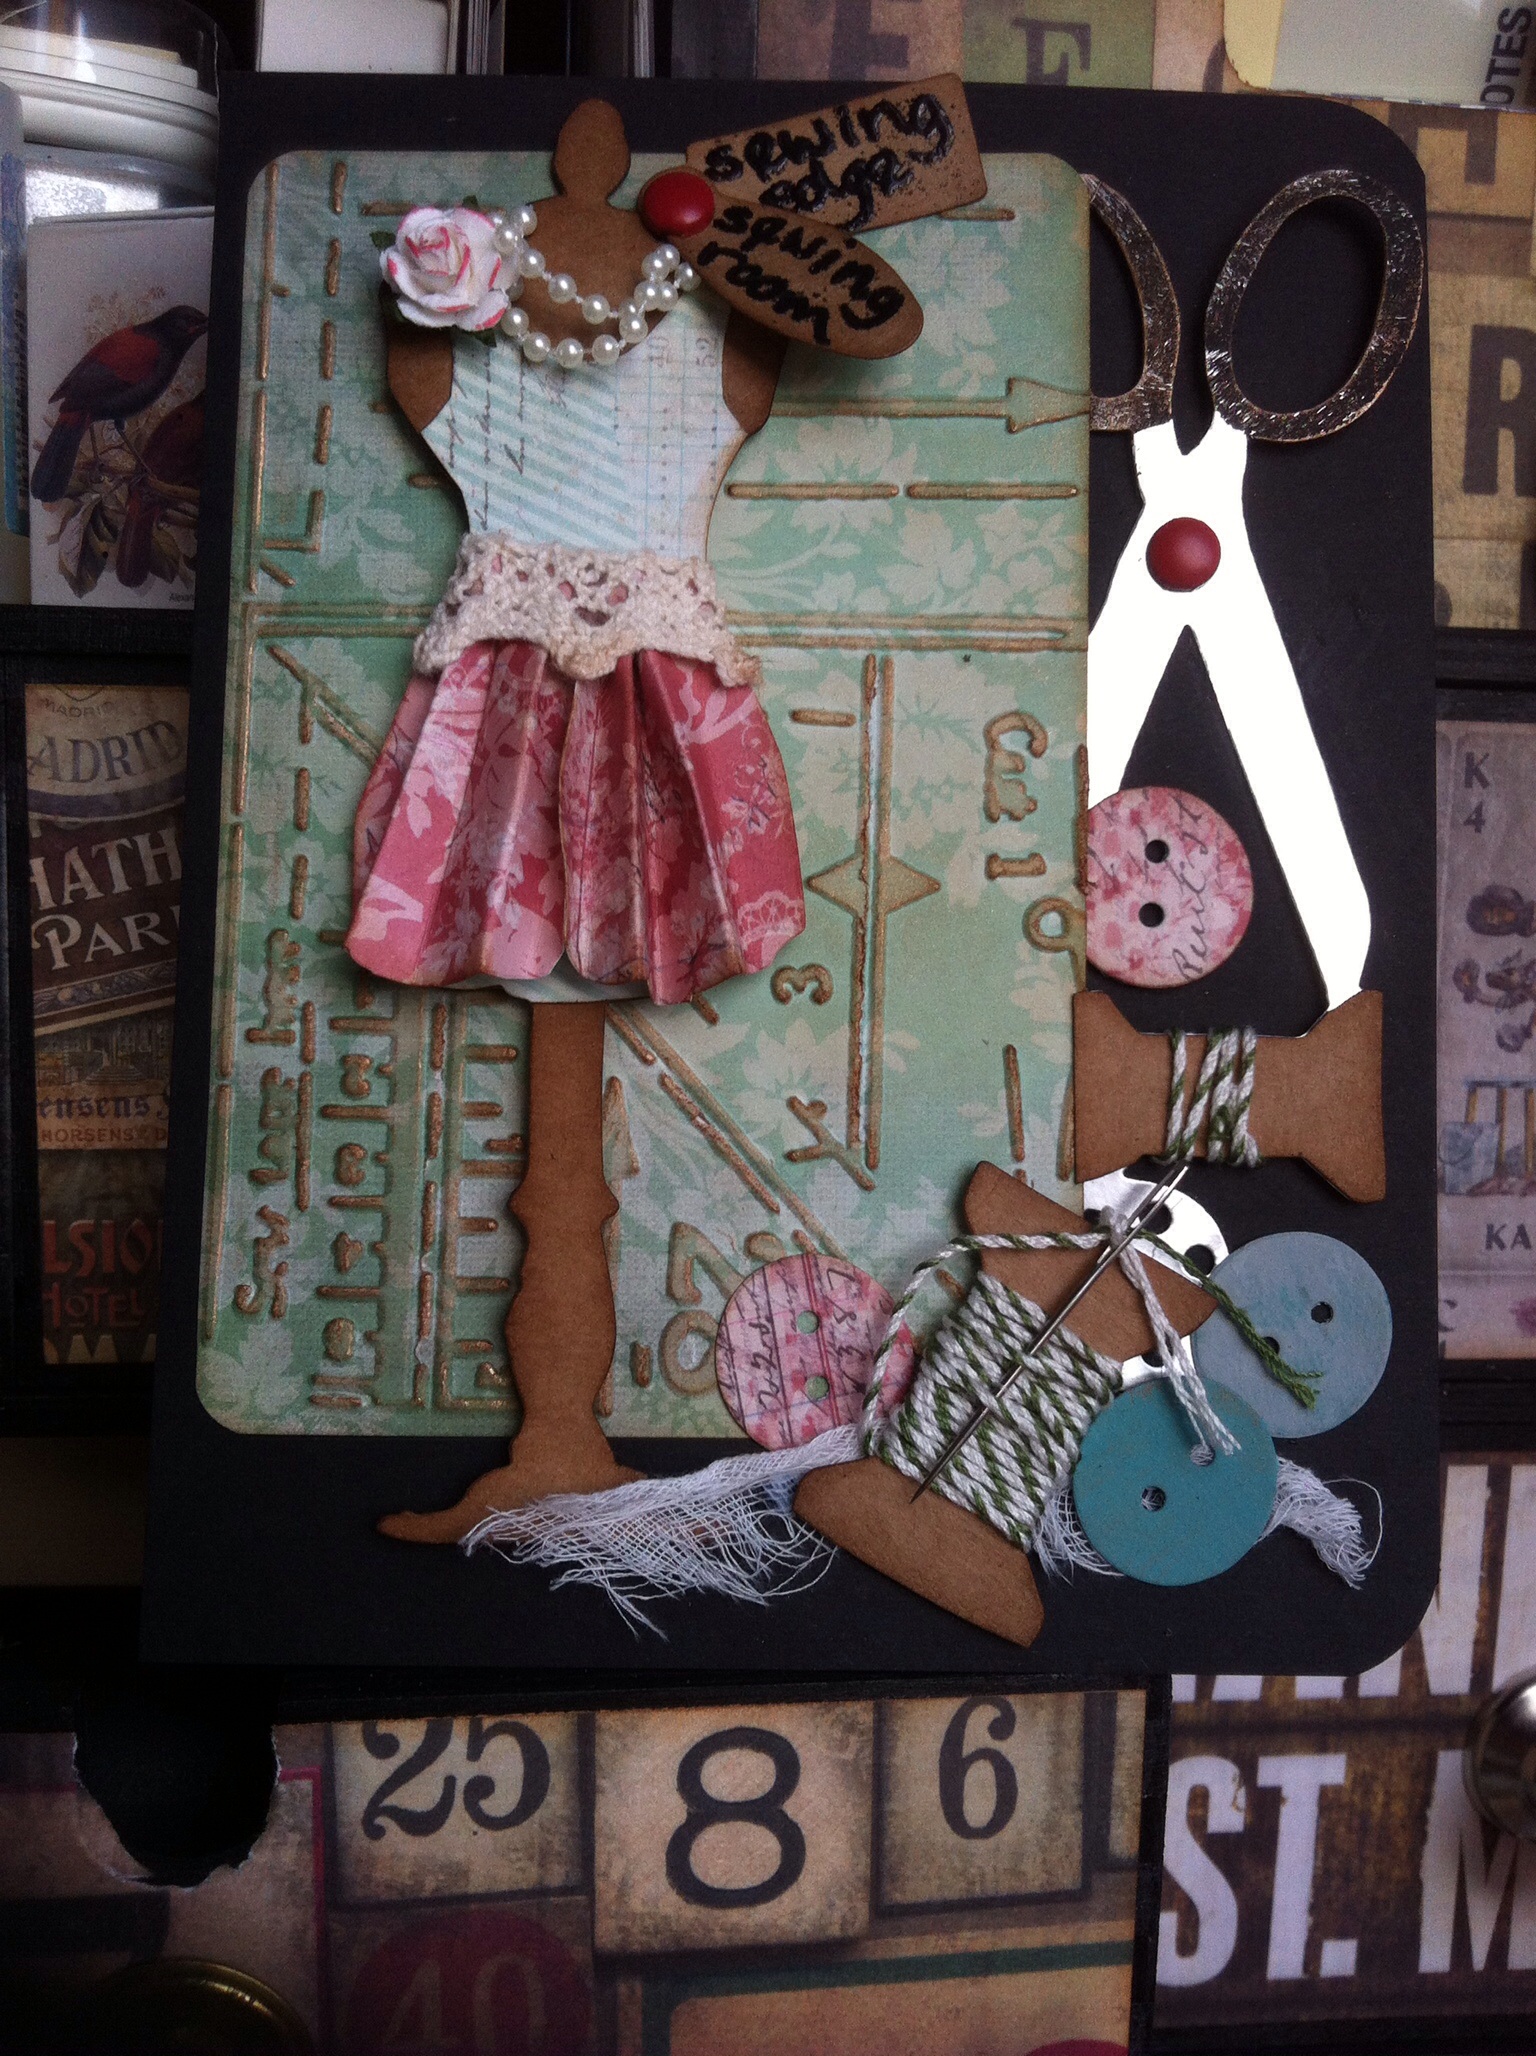
The first page was easy because the sewing room and sewing edge fitted perfectly with the folders.Some DI and a touch of treasure gold finished it off.
Page2 Tattered Flowers
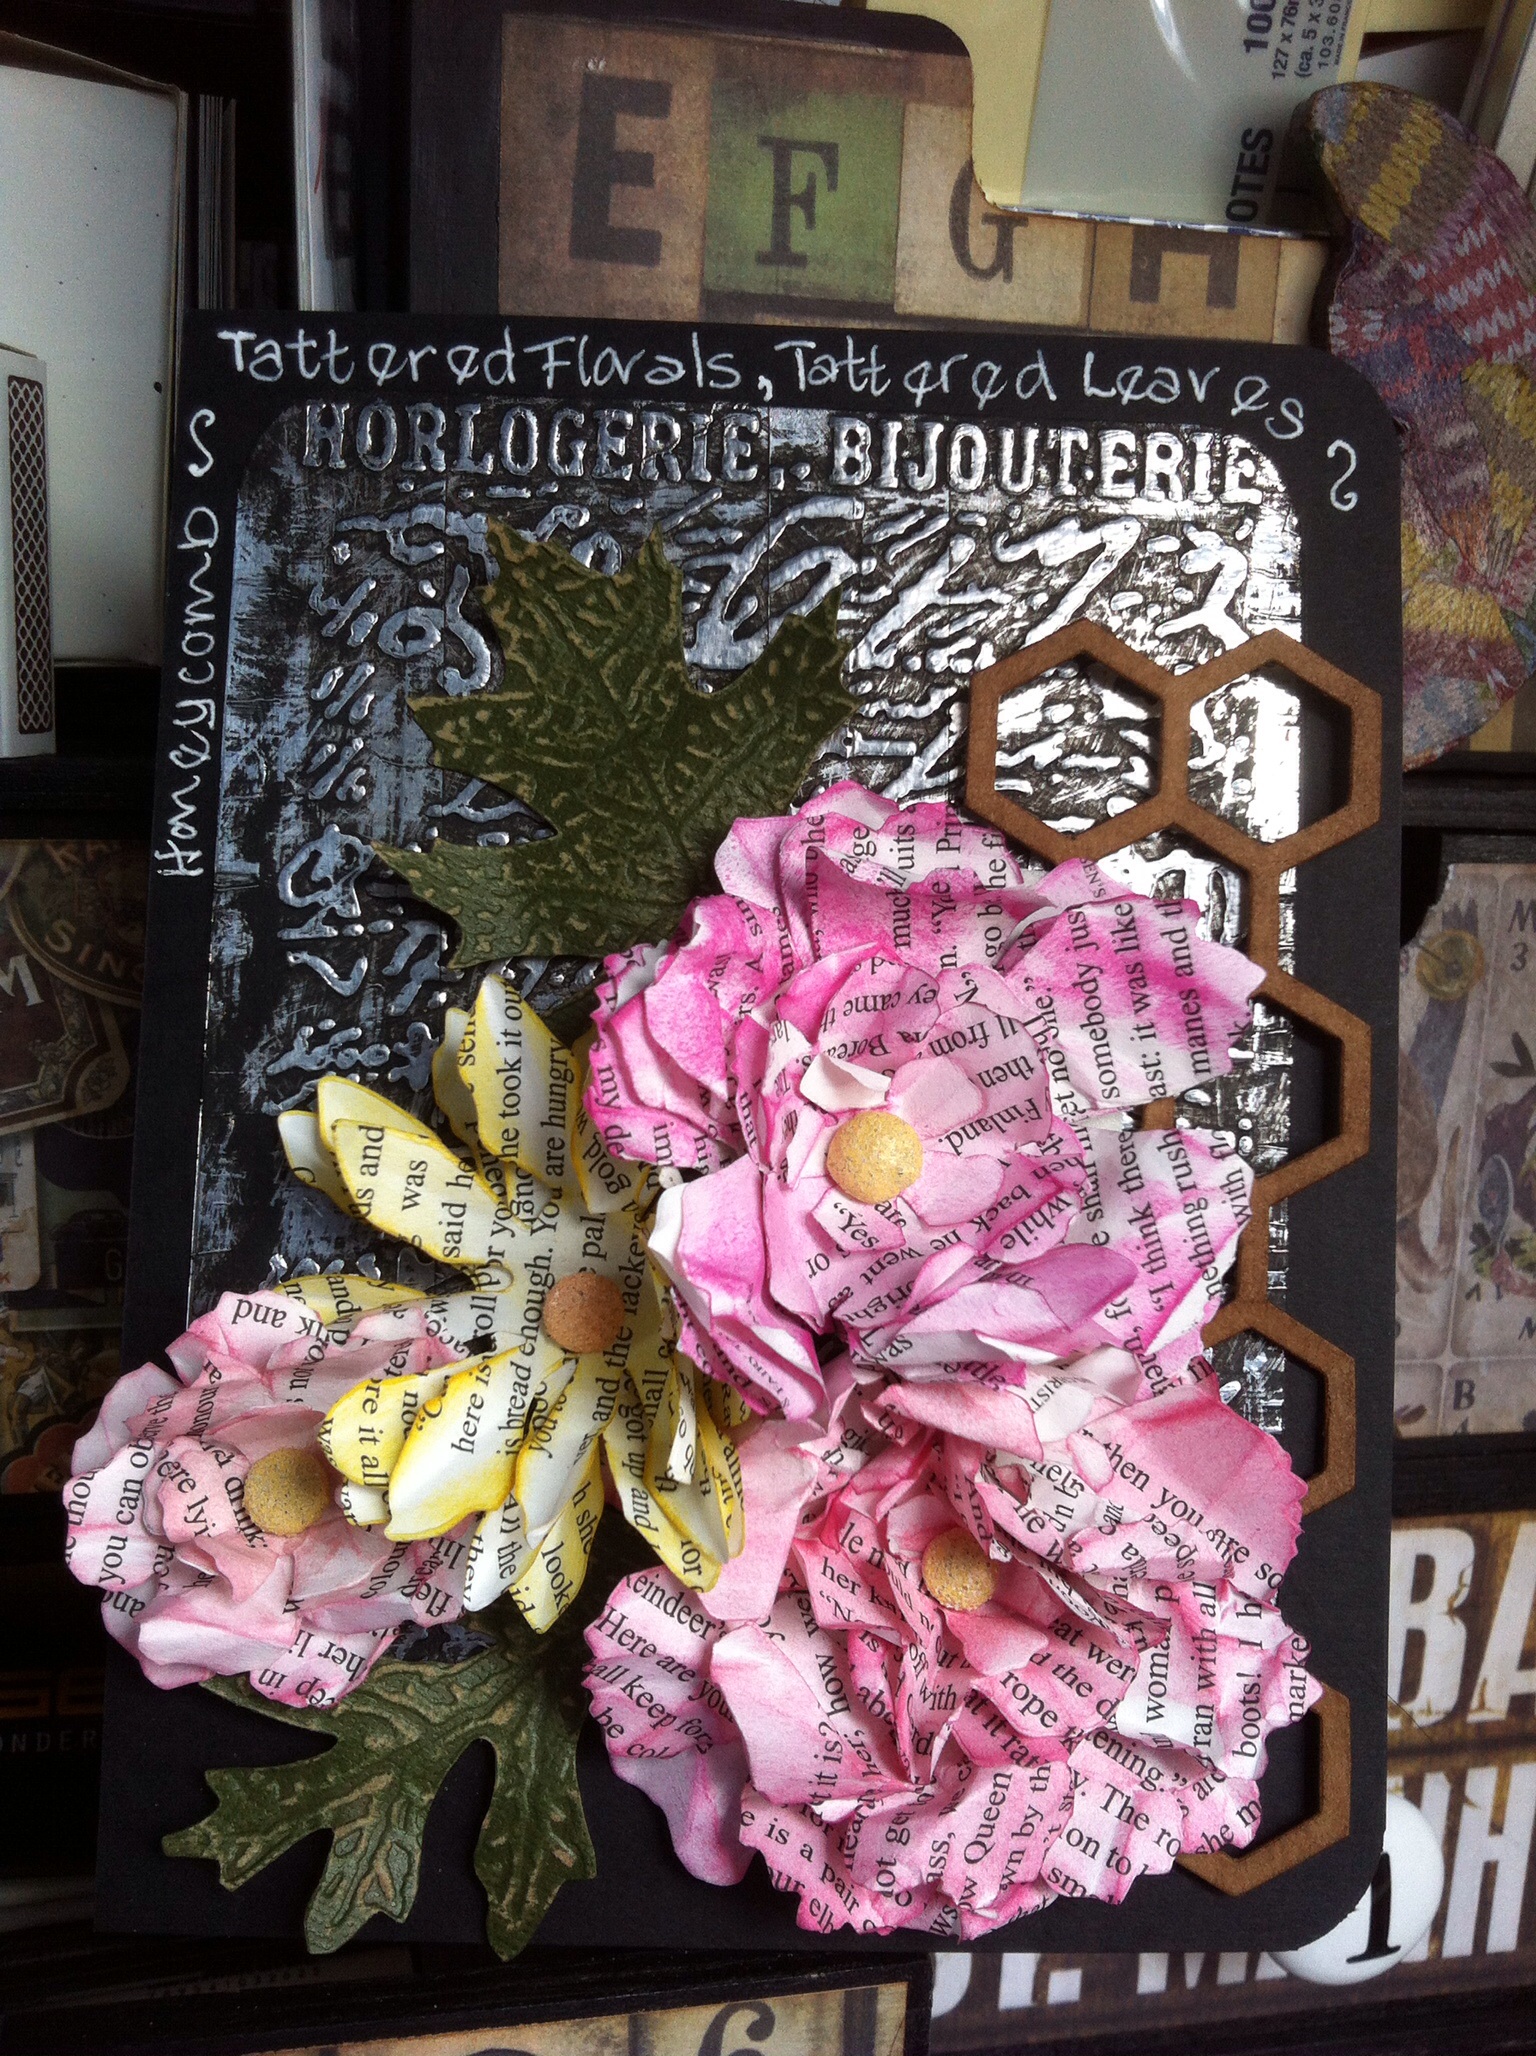
I love making the Tattered flowers and recently bought Tattered leaves and the embossing folder. The industrial background looked a good contrast. I made the flowers from book pages and embossed the pink brads with Distress embossing powder for the centres. I discovered less is more, heat the brads then dip in the powder, quick flash from the heat tool and a second dip worked best. The leaves were cut from kraft core’dinations and the honeycomb was added at the side.

Page 3  Flight
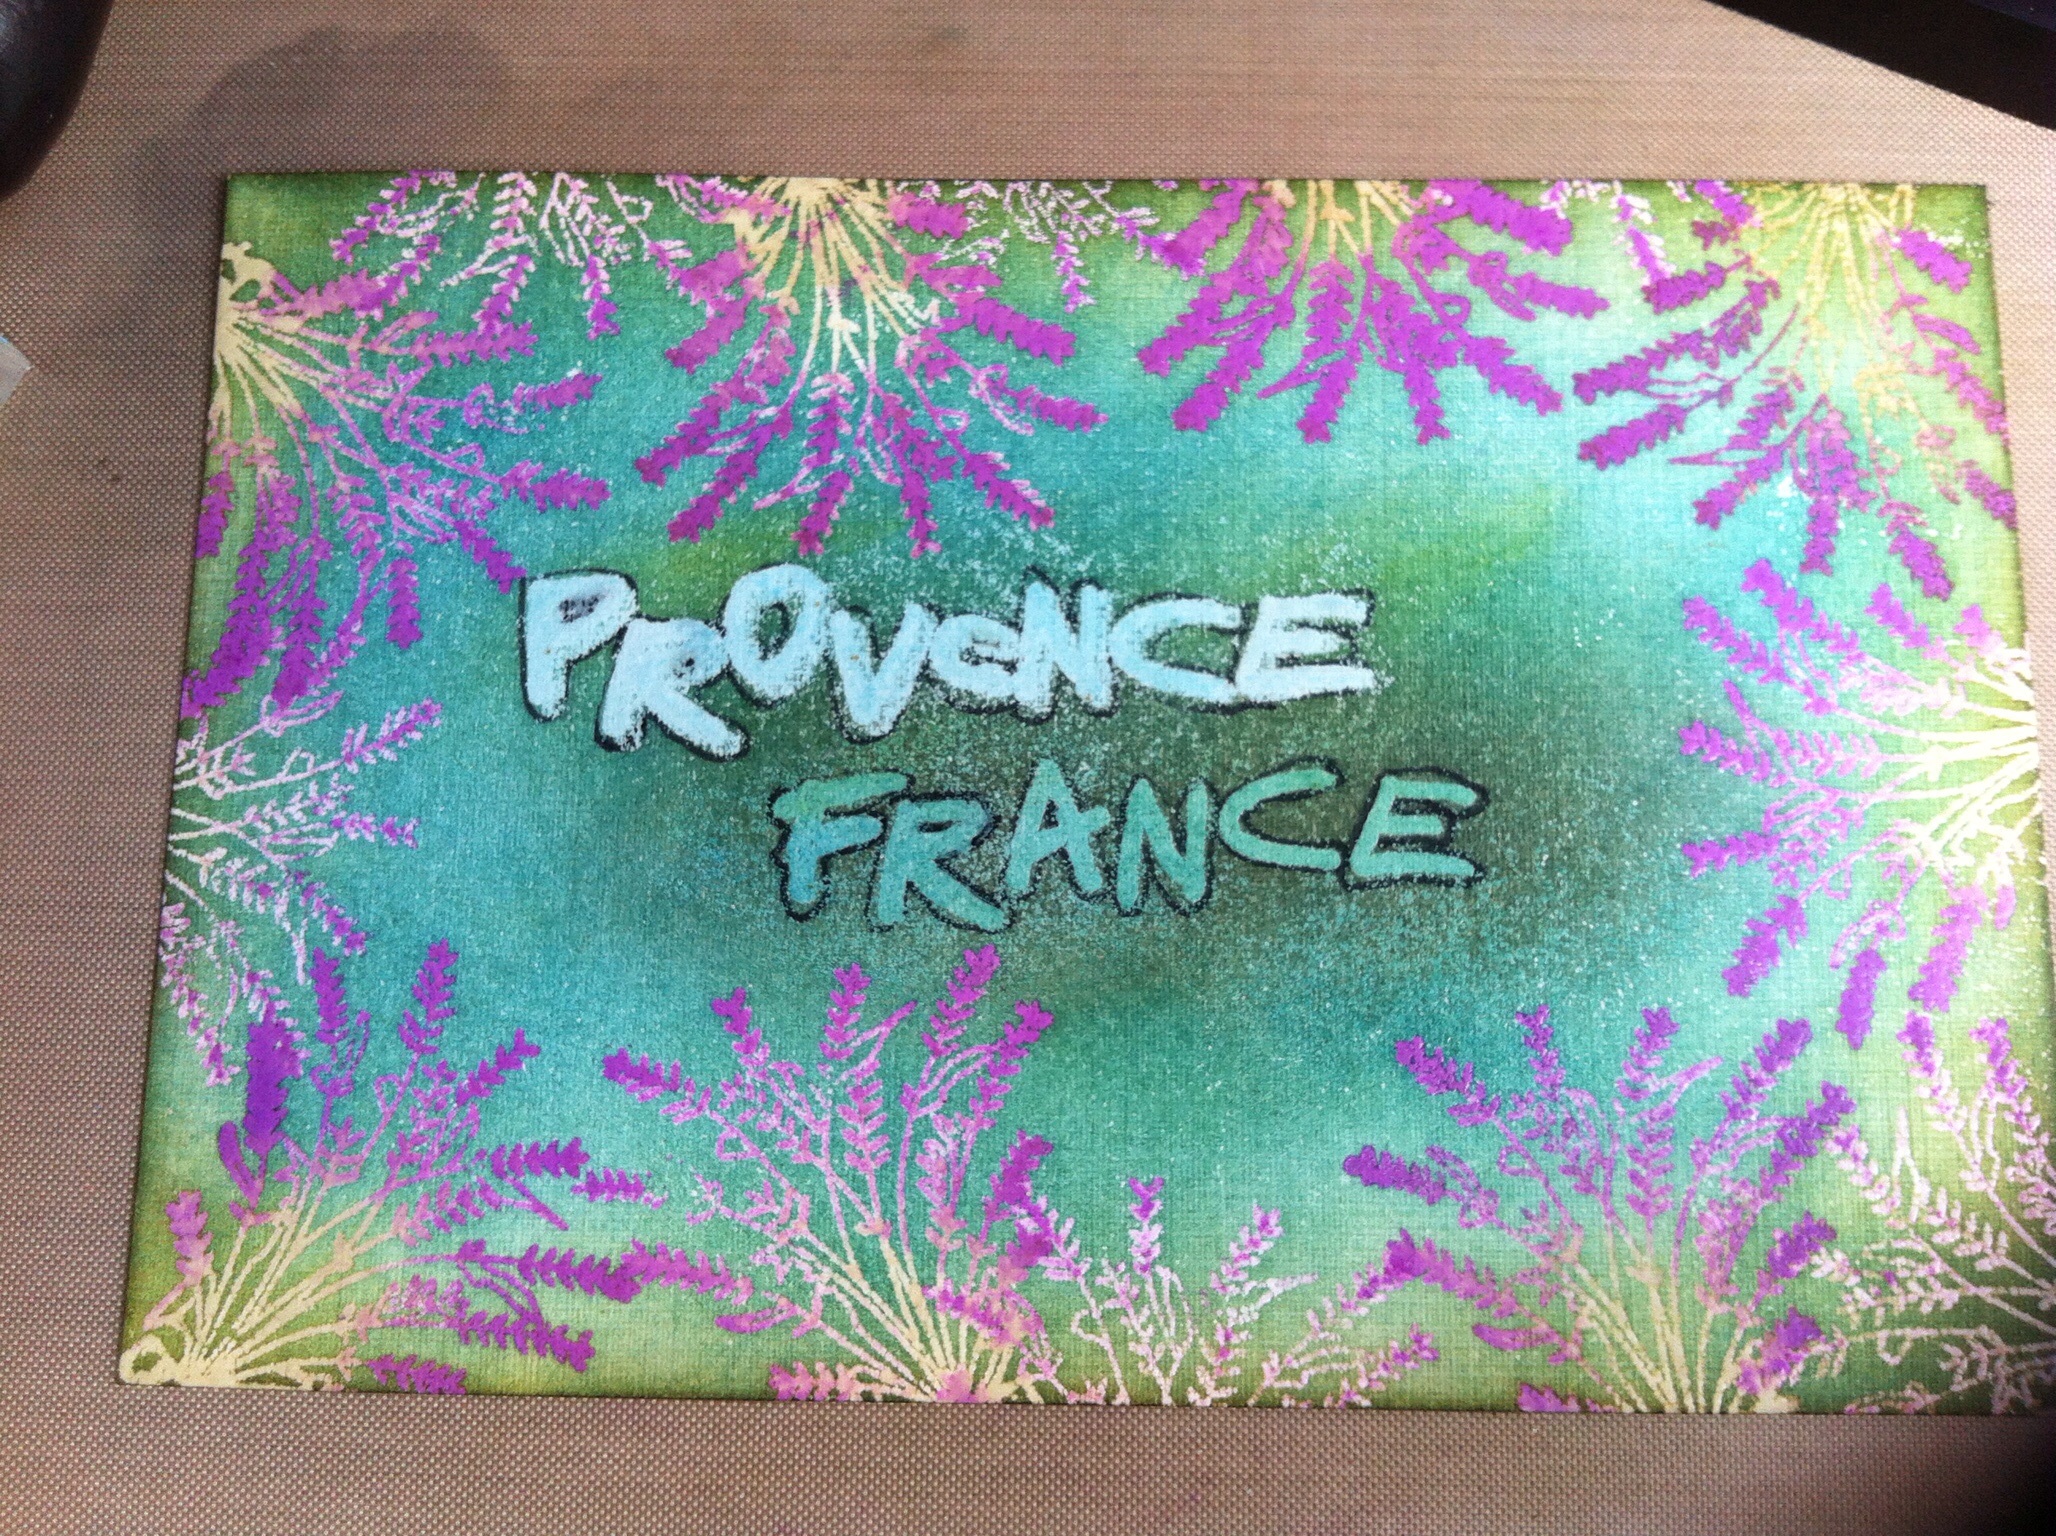
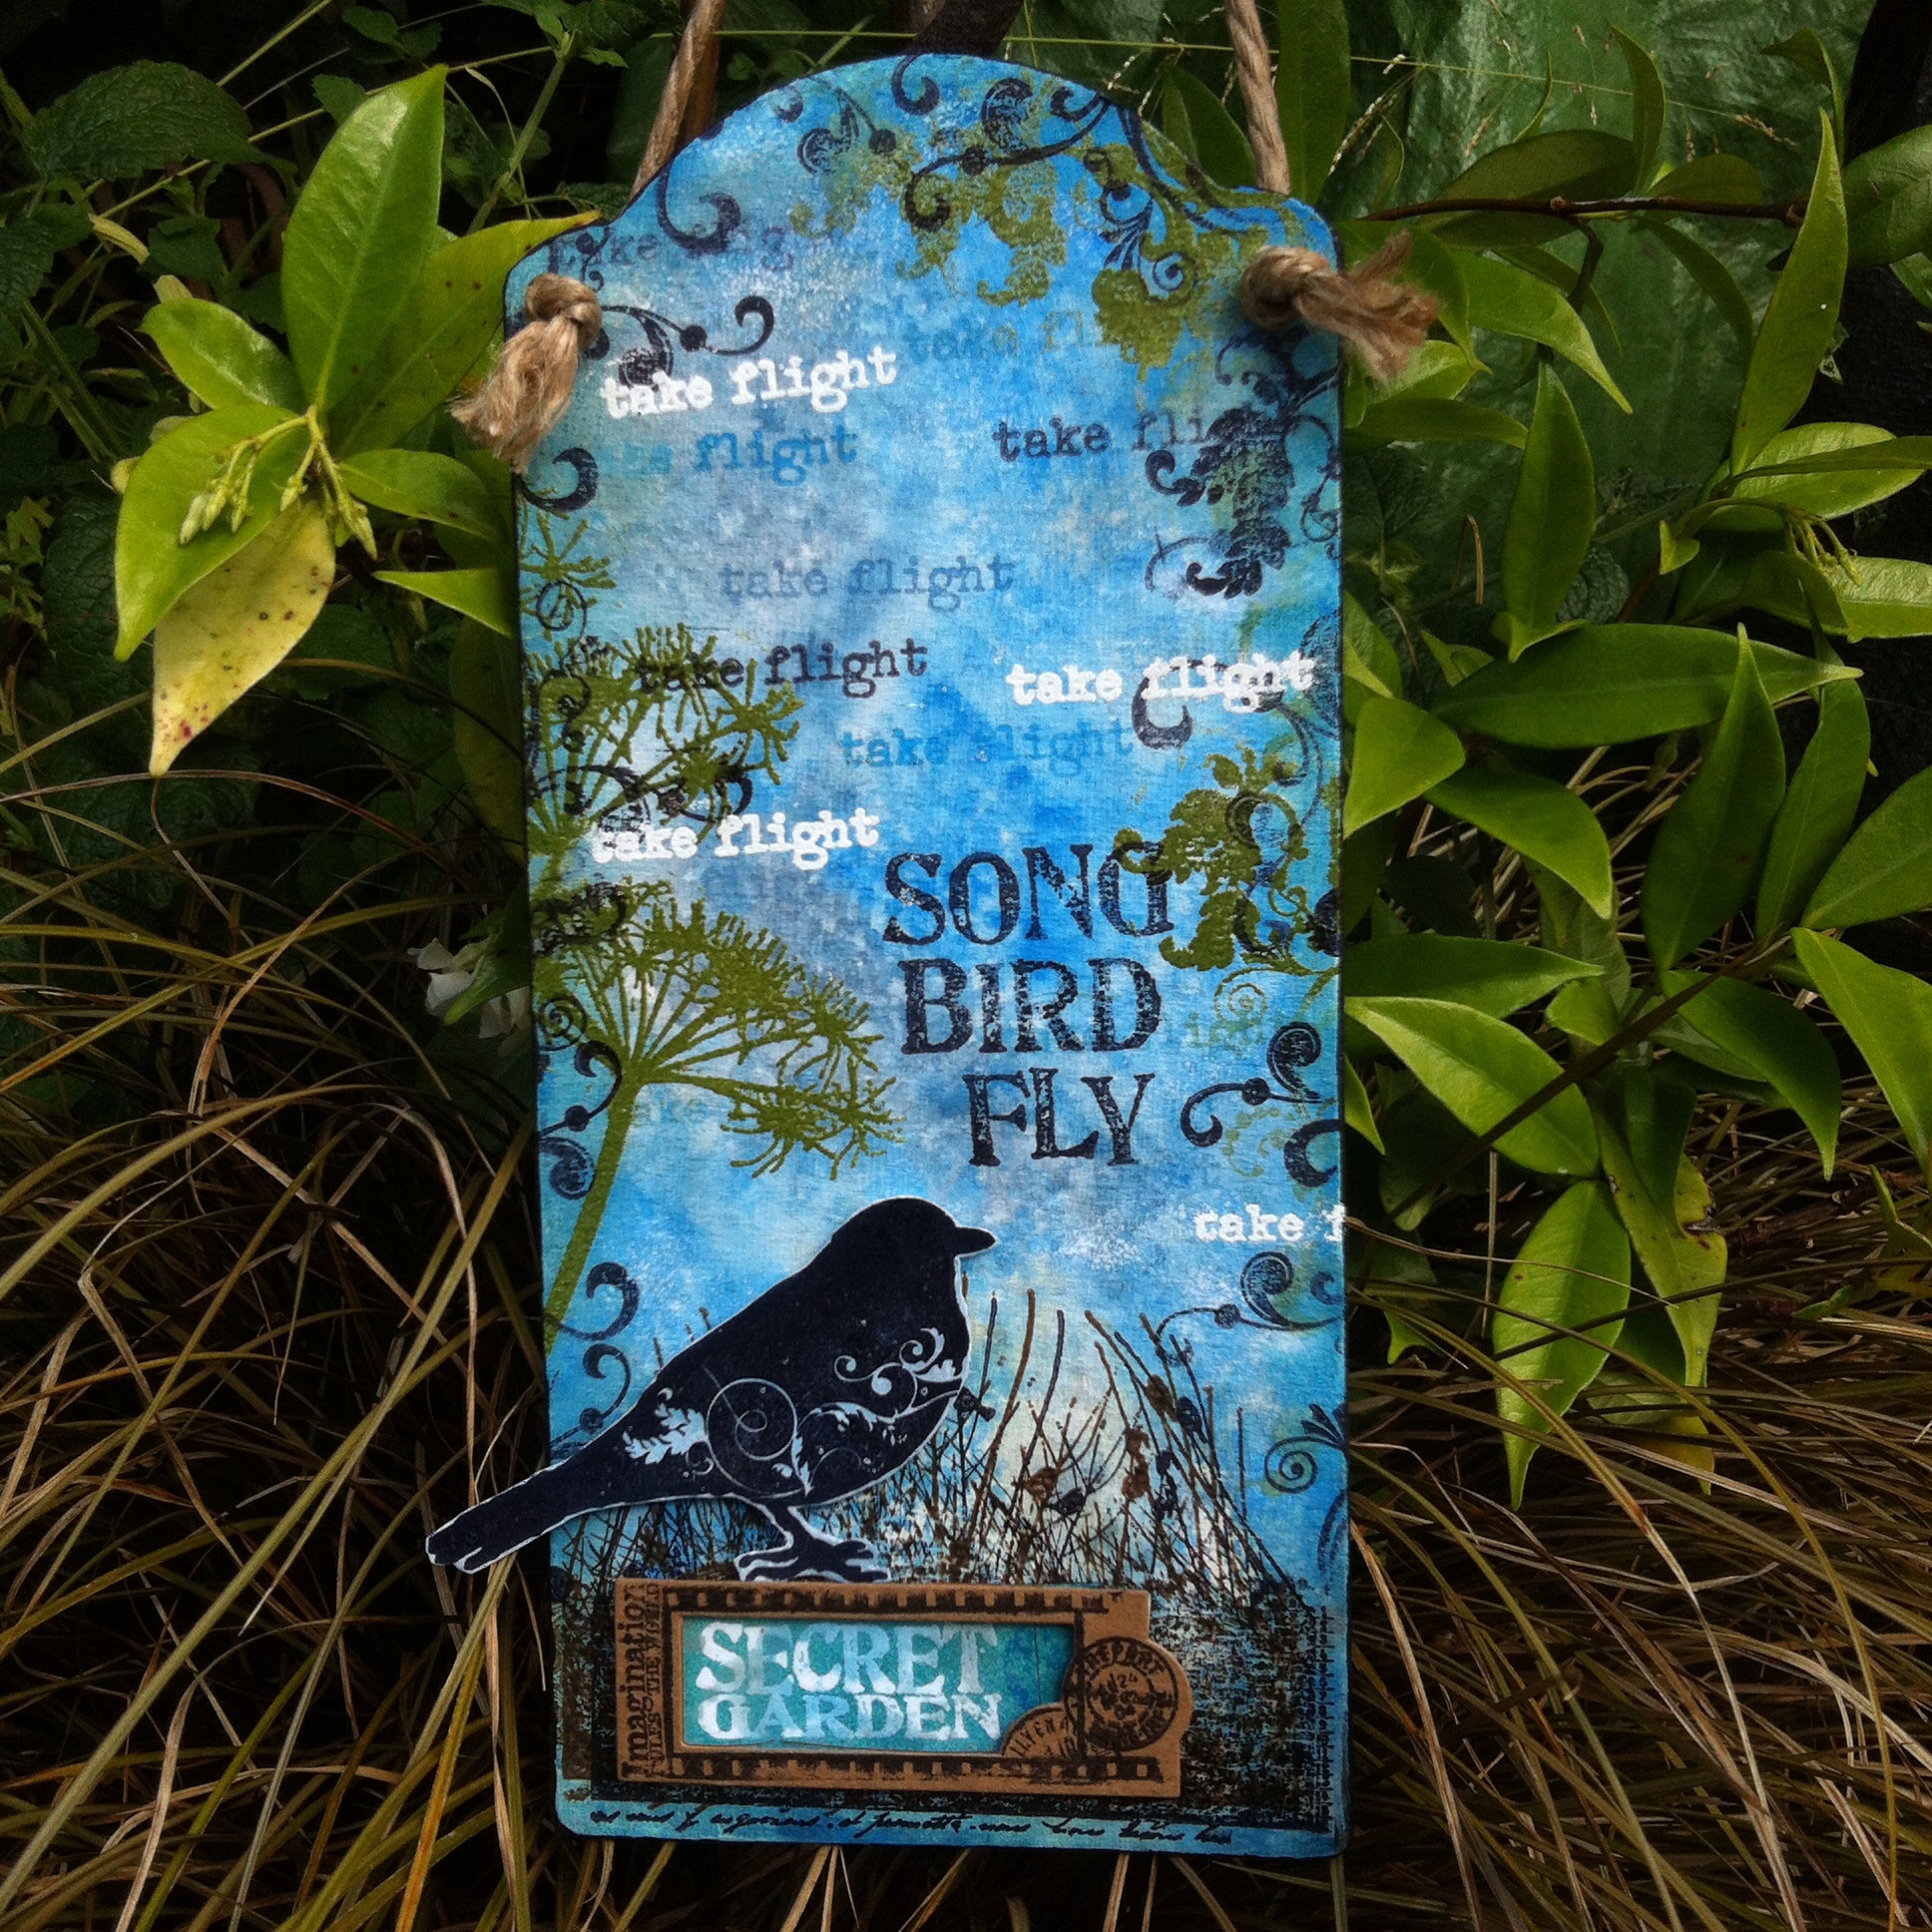
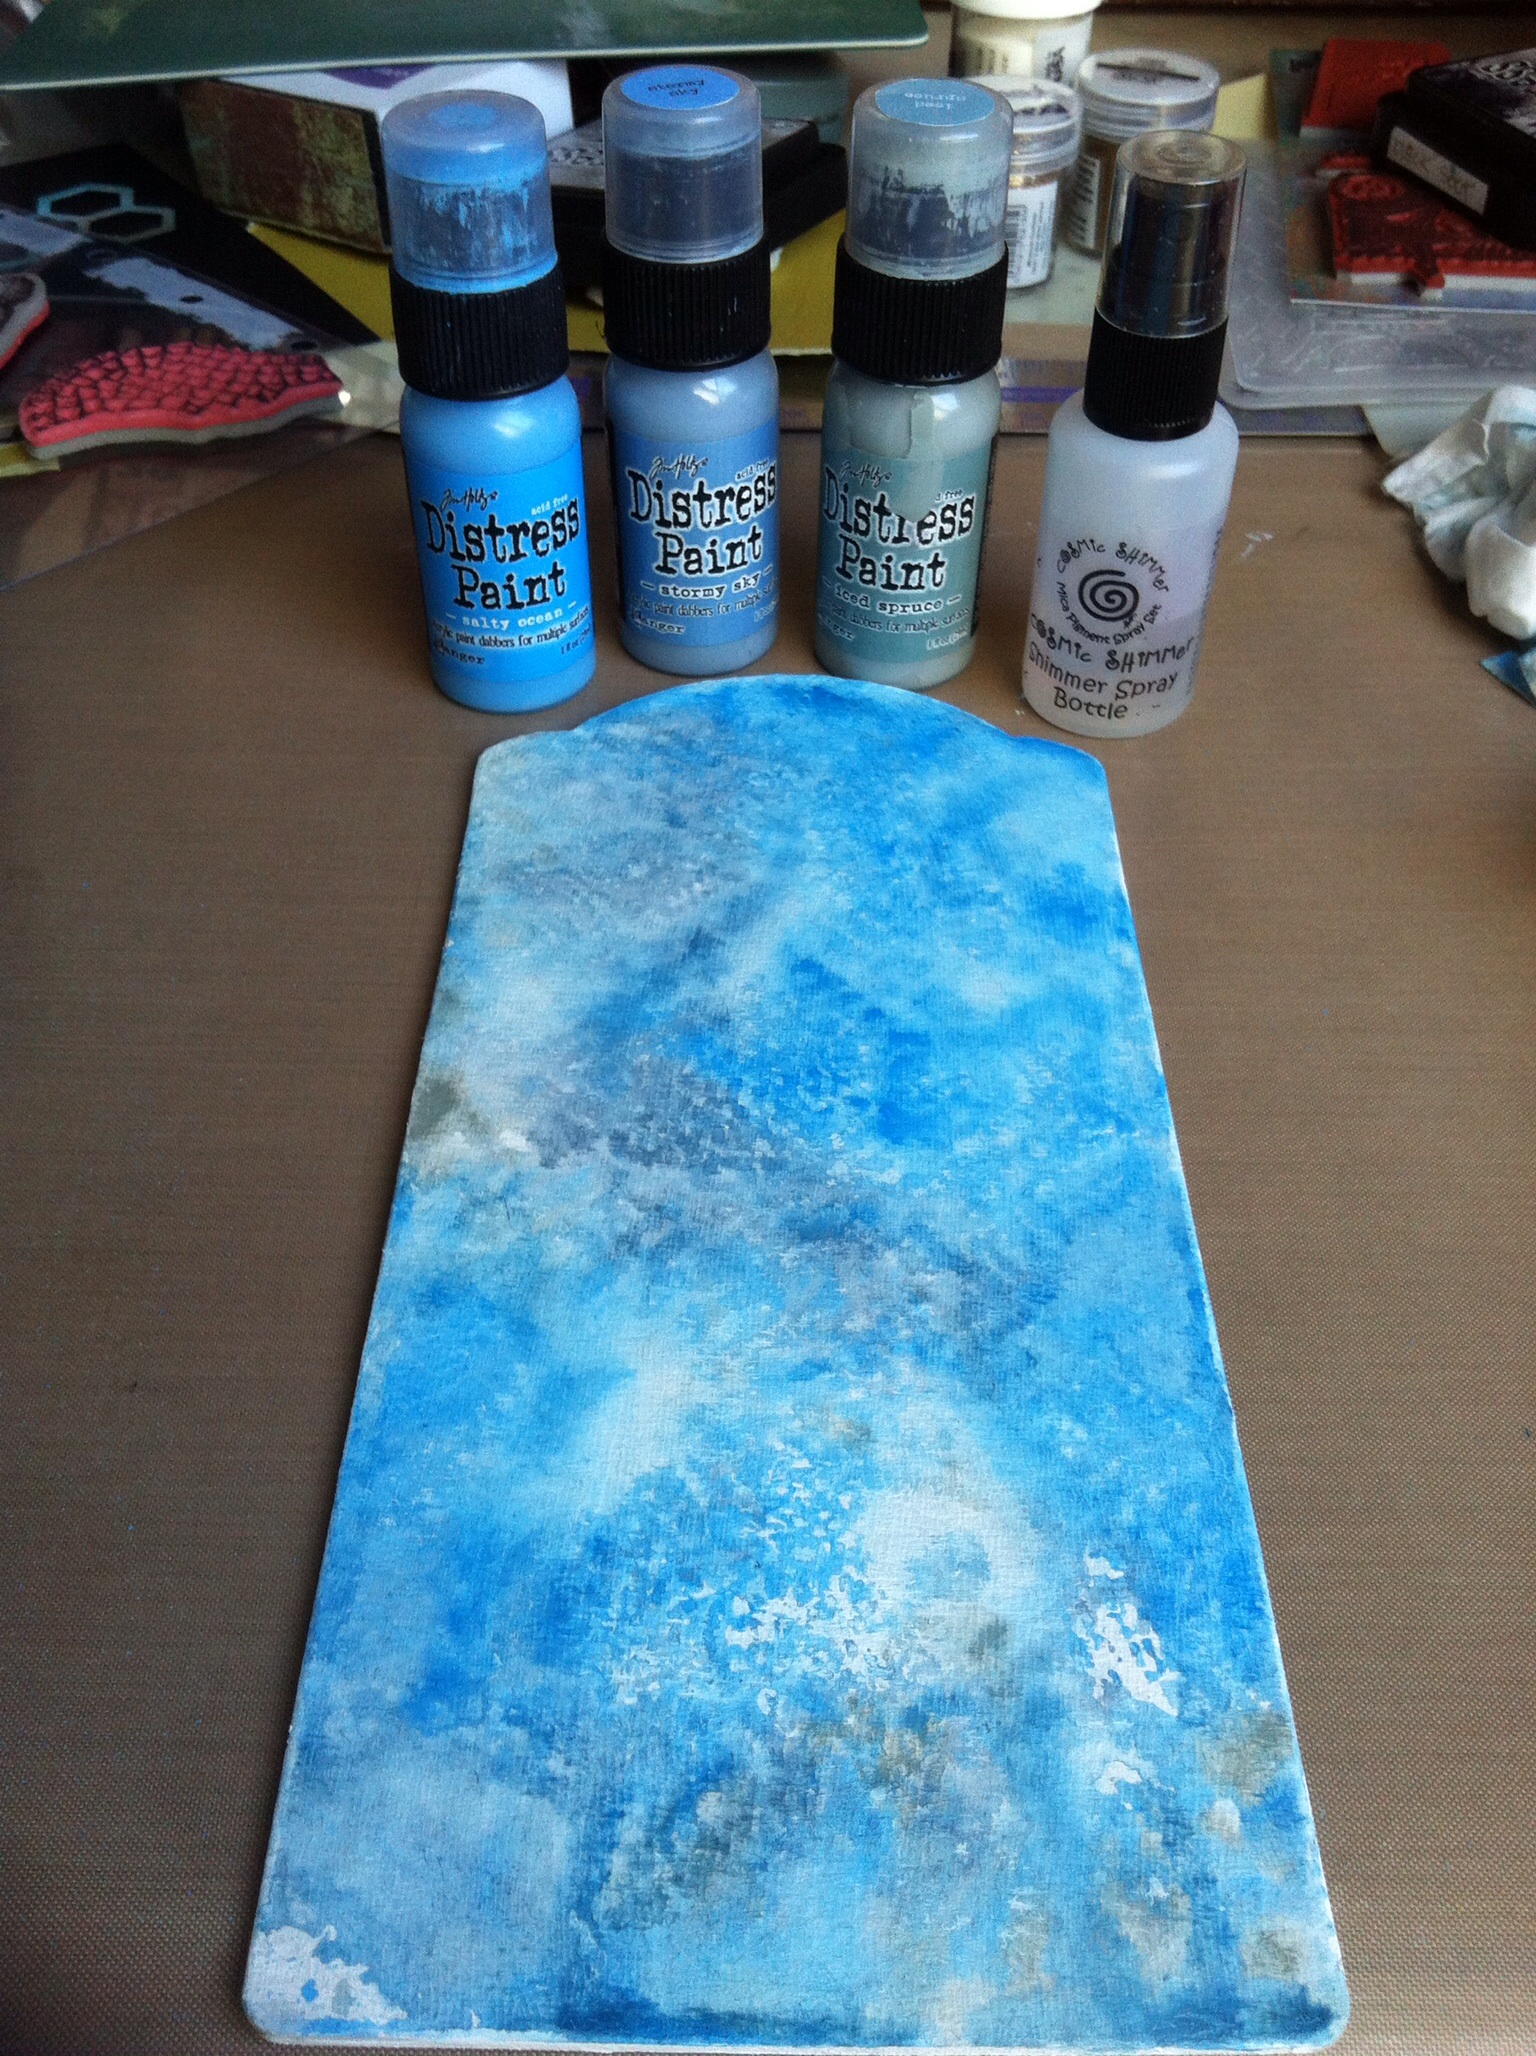
The third page was titled Flight, using Caged Bird, On The Edge. Butterflies and one of the letter dies. The new Wallflower papers seemed to fit as the background. I embossed the cage with Tarnished Copper, the bird was DI with Peacock feathers and clear embossed. The butterfly die cut the edge of the paper.I die cut an elegant flourish to hold the bird cage,plus a few turquoise pearls added here and there. I was pleased with the look.
My challenge now is to make the next 10 pages!!!


Postcard from Provence

Posted on

Postcard from ProvenceWe enjoyed visiting Provence in France. We went to Avignon and on every corner there were soap shops and souvenir shops selling bags of lavender. The smell was delicious! I decided to create a postcard from Provence for Artful Times challenge.
I inked a lavender stamp with whispers ink, green and purple, stamped then clear heat embossed the image. I stamped around the edge of textured card. I then Distress inked in China Blue in the middle and peeled paint around the edges. I clear embossed ” Provence” in the middle, more DI ink blending then I did the same with “France”. I used Mustard Seed and Vintage Photo to reveal the words.Some of the stuff I used


Postcard from abroad

Posted on

Postcard from ParisWe have just been to France on holiday and stayed at Carcassonne in the South. I collected lots of postcards from the regions we visited and some of the lovely, quaint towns and cities. I thought I would experiment with DI inks and markers on embossing folders to create postcards to use in my scrapbooking. I used my favourite inks, Peacock feathers, Mustard Seed, Picked Raspberry and Salty Ocean. I low lighted in Pumice Stone marker. I wanted to represent the vibrant creative life of Paris. I was quite pleased with this Parisian postcard and will enter to Artful Times challenge.


Ladies Day at Ascot

Posted on
CSI case 130

CSI case 130

I really enjoyed scrapping these photos. I went to Ascot with Marilyn in June. We went on a coach organised from the gym we attend. We had bought an exotic picnic to take with use plus wine. However, we ended up buying jugs of Pimms! We lost some money on bets on each race but had fun choosing our horses. We saw the Royal carriages doing a circuit of the track over the heads of the crowd but saw the Queen, Prince Phillip and Princess Beatrice on the screens. We had a great day out, very English.
I stamped a Paperartsy flag I got in a goody bag and stencilled and sprayed the splatters with D I ink. The letters are die cut and the de bossed words from Tim using core’dinations.


Song Bird

Posted on

Song Bird

We have a pair of blackbirds nesting in our wisteria and they are fun to watch flying in and out.
I was inspired to have a play at Tim’s distress paint marbling techniques after reading Sandy’s excellent demo on A Vintage Journey blog. I tried them all but sample 4 looked most like the sky effect I was trying to achieve.
Distress Paint Marbling technique
I used it for a background on gessoed,grey board to join in the Challenge 9 at A Vintage Journey, Use Every Stamp in the Set. I used Paperartsy Hotpicks HP1005 because of the bird stamp.
Paperartsy stamps HP1005
I used the plant and swirl stamps around the edges, some in Peeled Paint DI, some embossed with Olive Wow powder and black Archival Ink.The words, take flight, were repeatedly stamped in the same colours from the background, plus black Archival and white embossing powder. The grasses were stamped in Archival Potting Soil but I didn’t like the effect so overstamped in black.The small stamps are in the grasses if you look carefully. I also spritzed distress markers in picket fence and pumice stone to blend the edges.
I clear embossed Secret Garden on some marbled backing paper then inked over to reveal the letters, to give the effect of secret writing.

Clear embossing and inking reveals the words

Clear embossing and inking reveals the words

I have the PA die of the film strip so die cut and stamped the image into kraft card. The blackbird was stamped in Archival over some more of the background paper and then clear heat embossed.I tied brown string to use as a hanger to link to the kraft card.
Overall, I am pleased with the effect and used 9 stamps. Hope you like it too!


Little wooden key cupboard

Posted on
The tiny key cupboard

The tiny key cupboard


Inside

Inside


Finished pieceFinished piece

I bought this tiny wooden key cupboard from The Craft Barn last year because it looked so cute. It had stayed forgotten in a drawer until I saw the Artful Times Challenge Blog, I wanted to try something different so the key box saw the light of inspiration. I applied black gesso all over then stamped Tim’s Classic Favourites 1 and 3 (Stampers Anonymous) with Distress embossing ink then covered in Wow Brass Sparkle and heat embossed. I stamped the classics pear and tile pattern on watercolour paper. I used Distress Markers to paint in the colours using a waterbrush, following instructions on Page 39 from Compendium of Curiosities 3. I cut the images to fit the front and inside recess. Treasure gold came to the rescue to add a bit of sparkle to the Matt gesso. I hung some keys and chain inside. My plan is to hide the box in the garden because when my son goes out as he usually forgets his keys!
I am also entering the CC3 challenge 5, hosted by Linda Ledbetter, check out her site here. There are some great prizes from Inspiration Emporium.

Watercolour technique using distress markers

Watercolour technique using distress markers

Watercolour with distress markers

Watercolour with distress markers