Make and use a Masterboard

Posted on

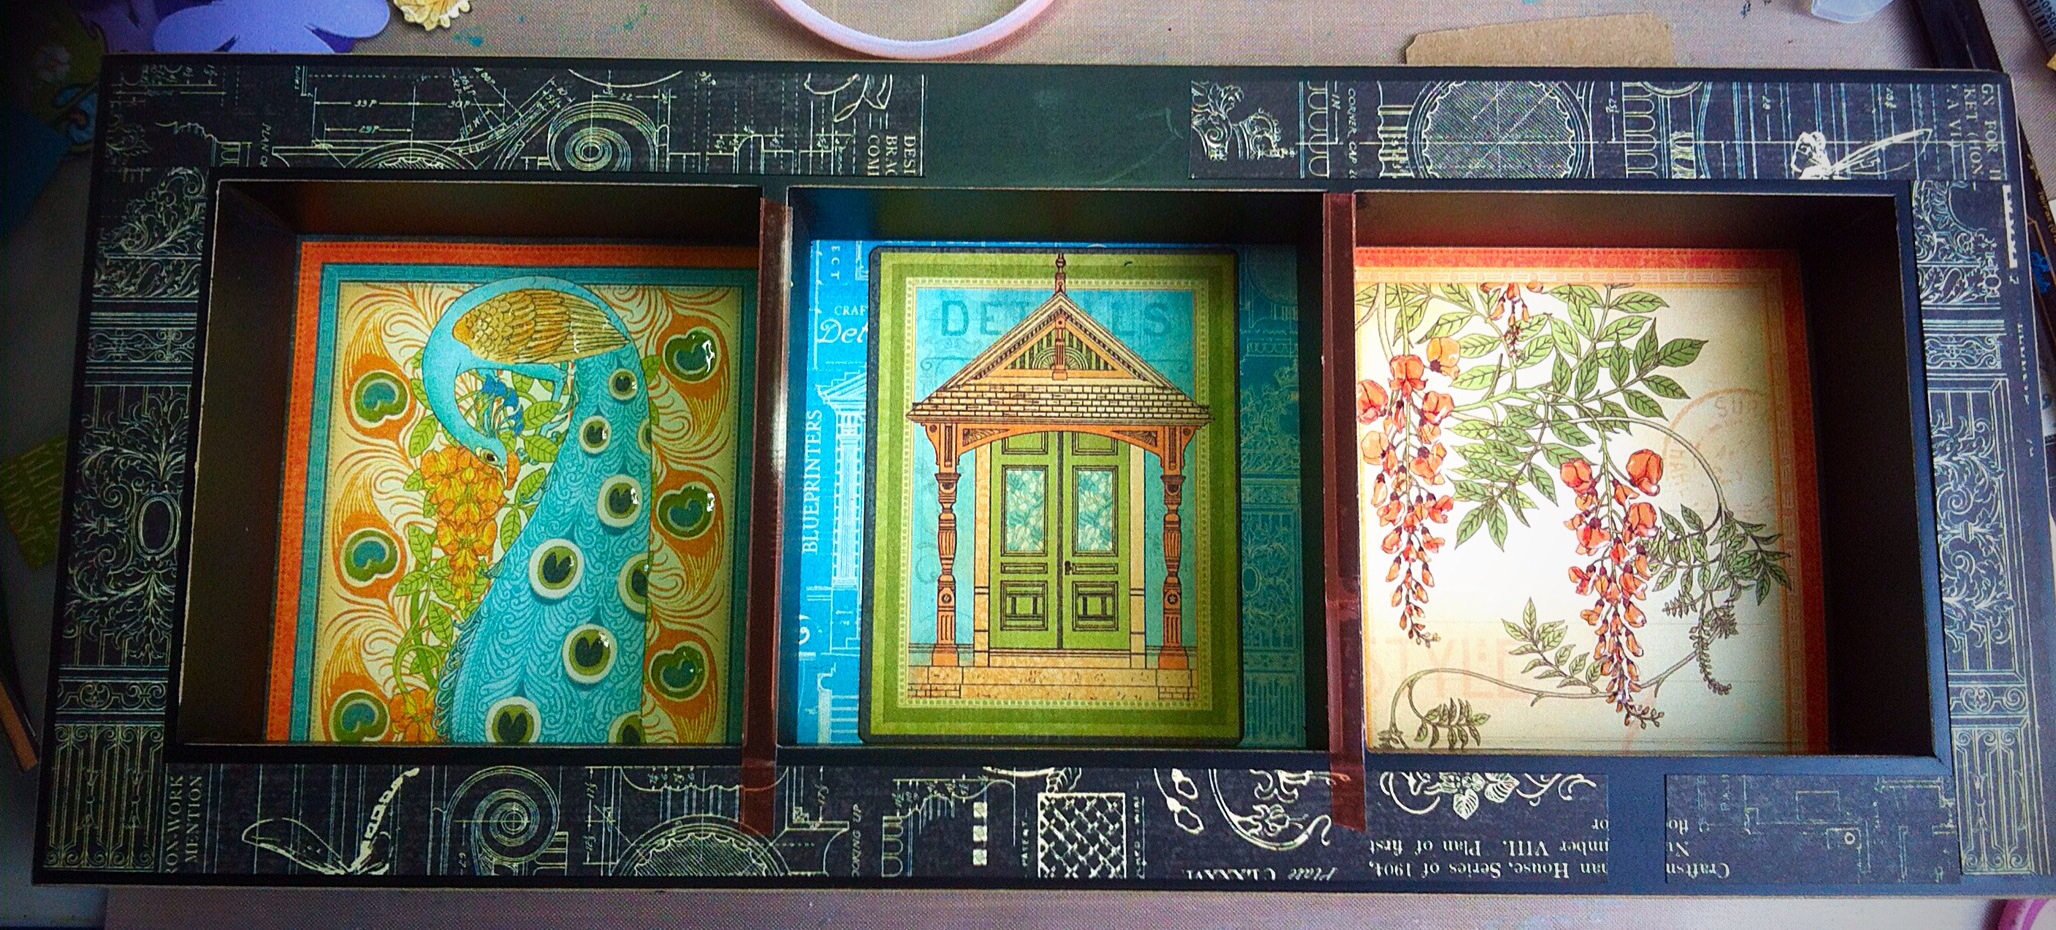
Our theme for this month is to create and use a Masterboard. A masterboard is a large background piece designed to be cut up and used in smaller projects, such as journals, postcards, cards, ATC’s etc. It can be created with any combination of collage, paint, inks, sprays, rubber stamps, stencils.

Our host is Angela, and she will be choosing our Winner and Top 5.

We are thrilled to be sponsored by

WOODWARE CRAFT COLLECTION
With a prize of £12.00 to spend at your favourite Woodware Stockist, either in store or on line.

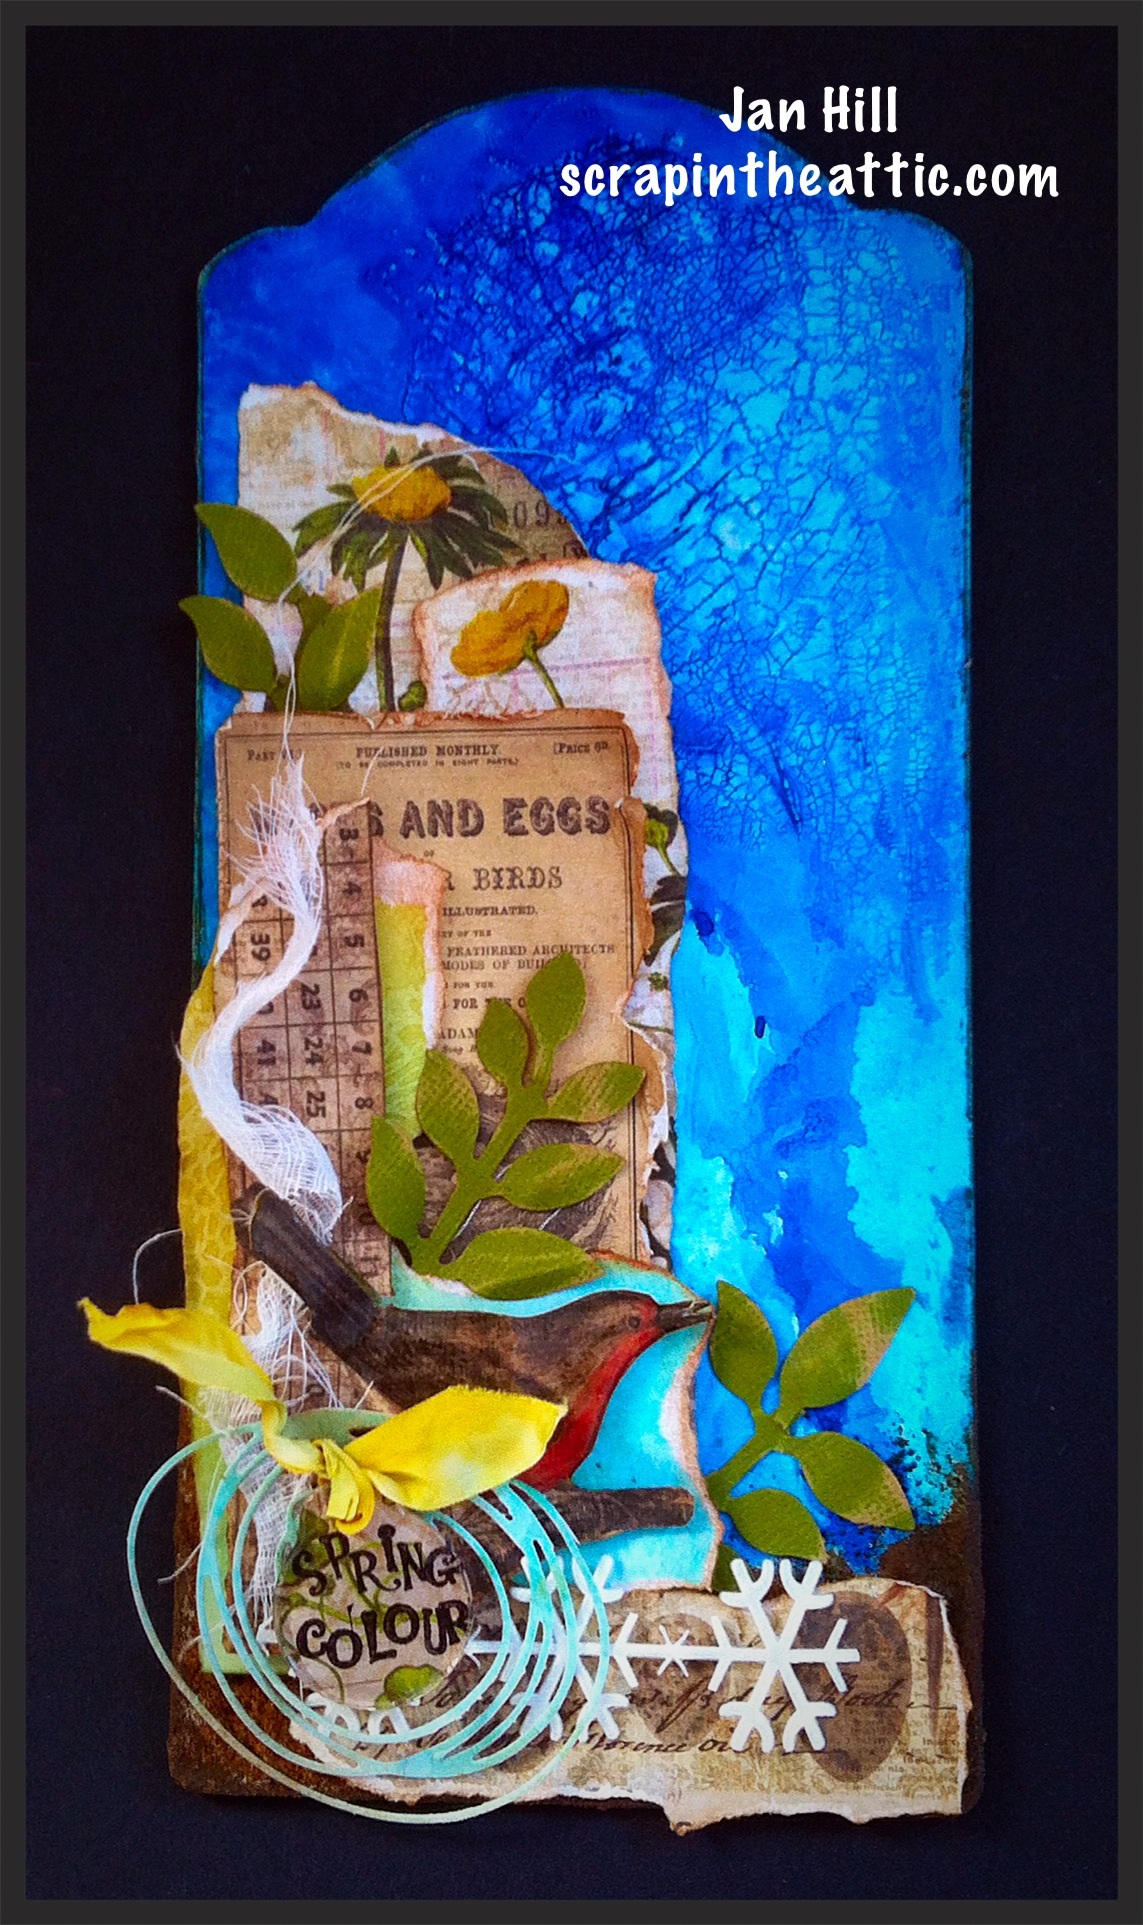
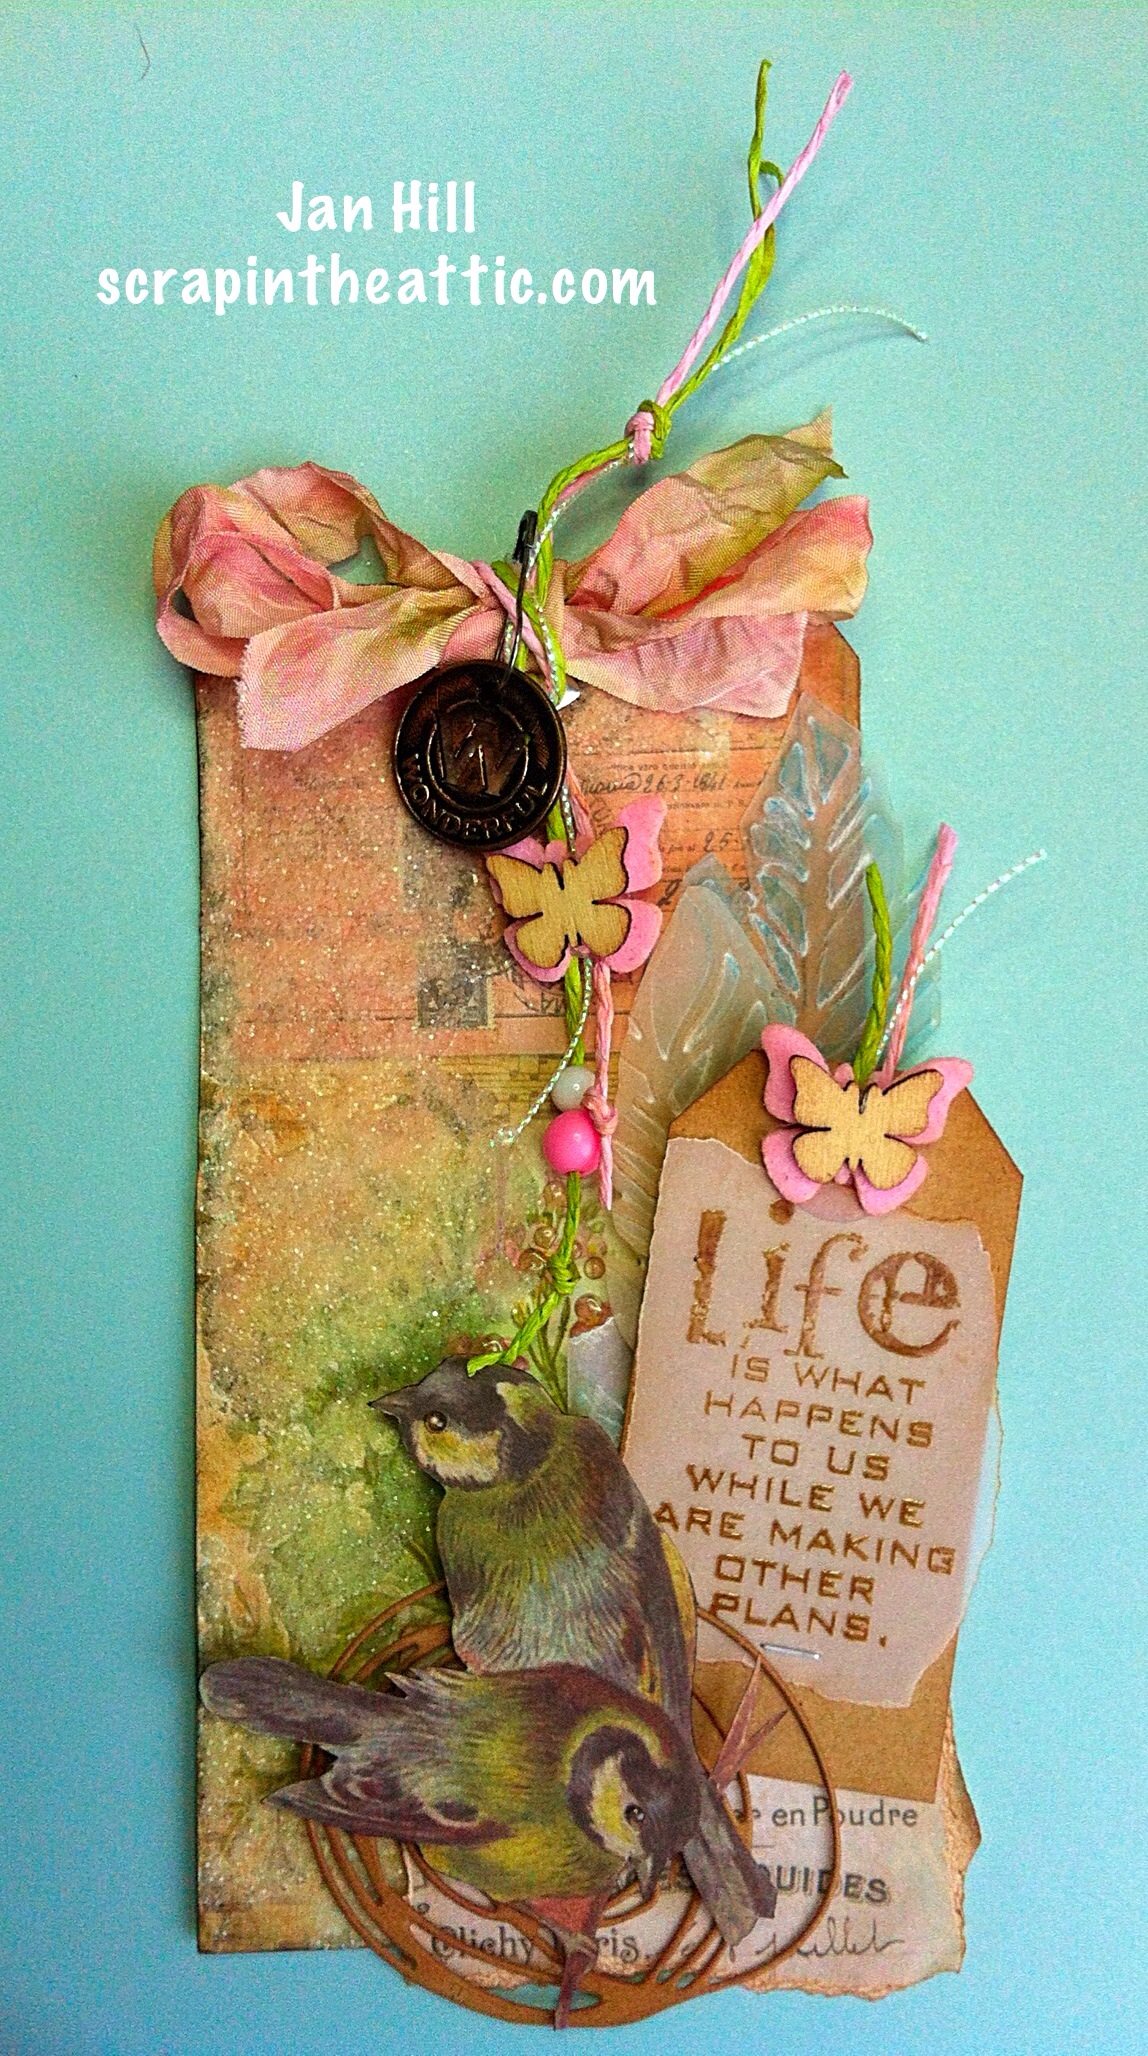
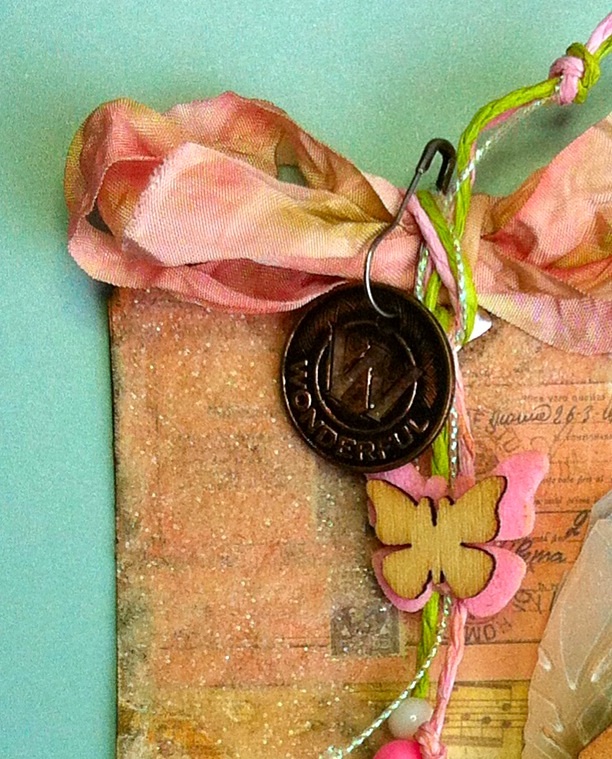
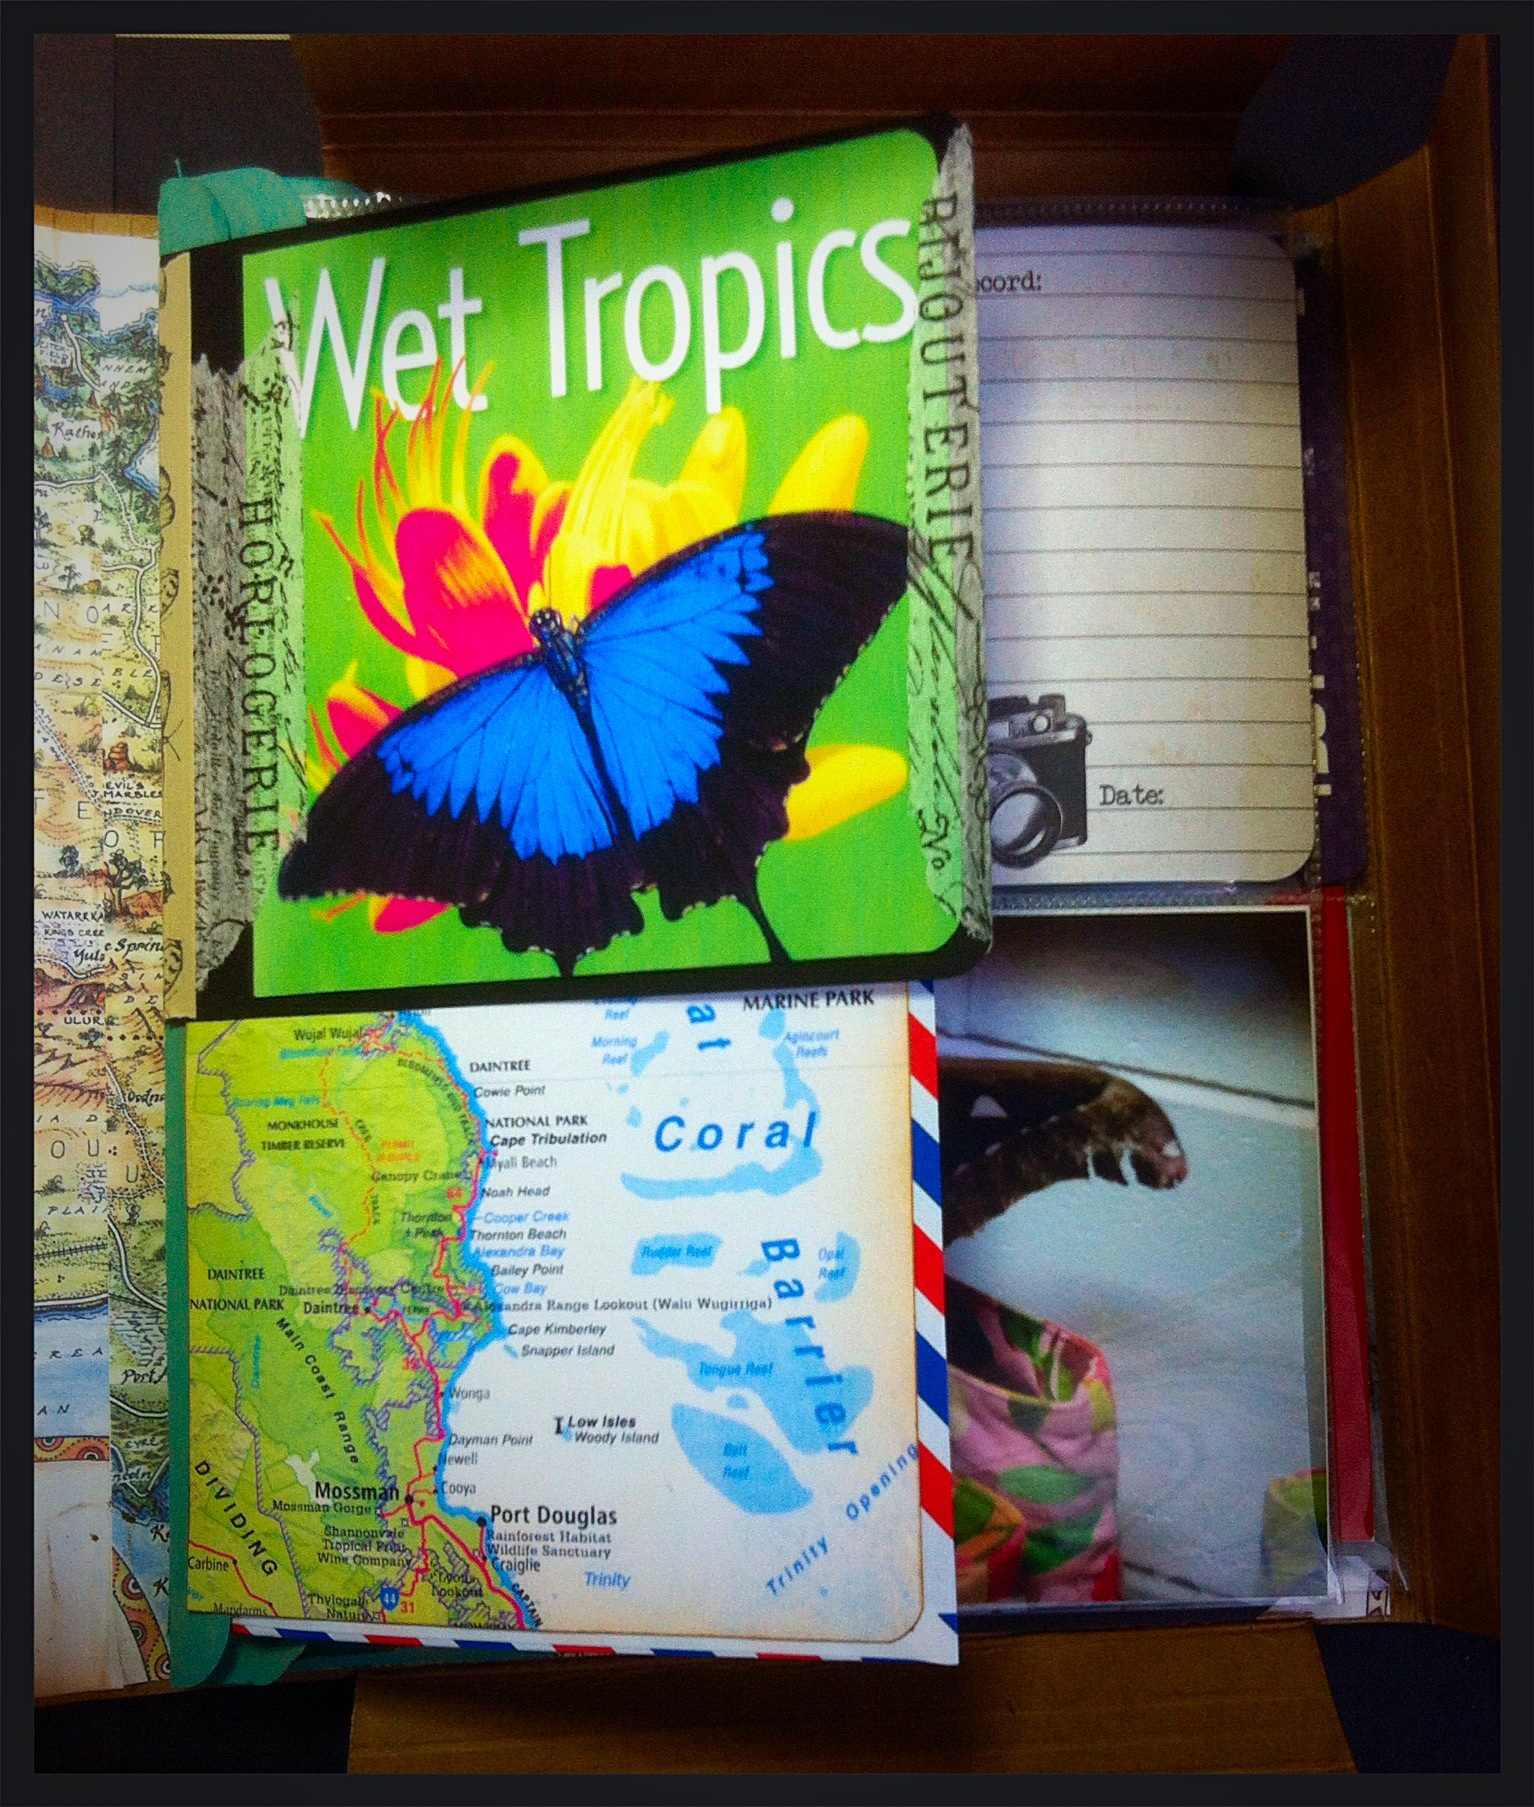
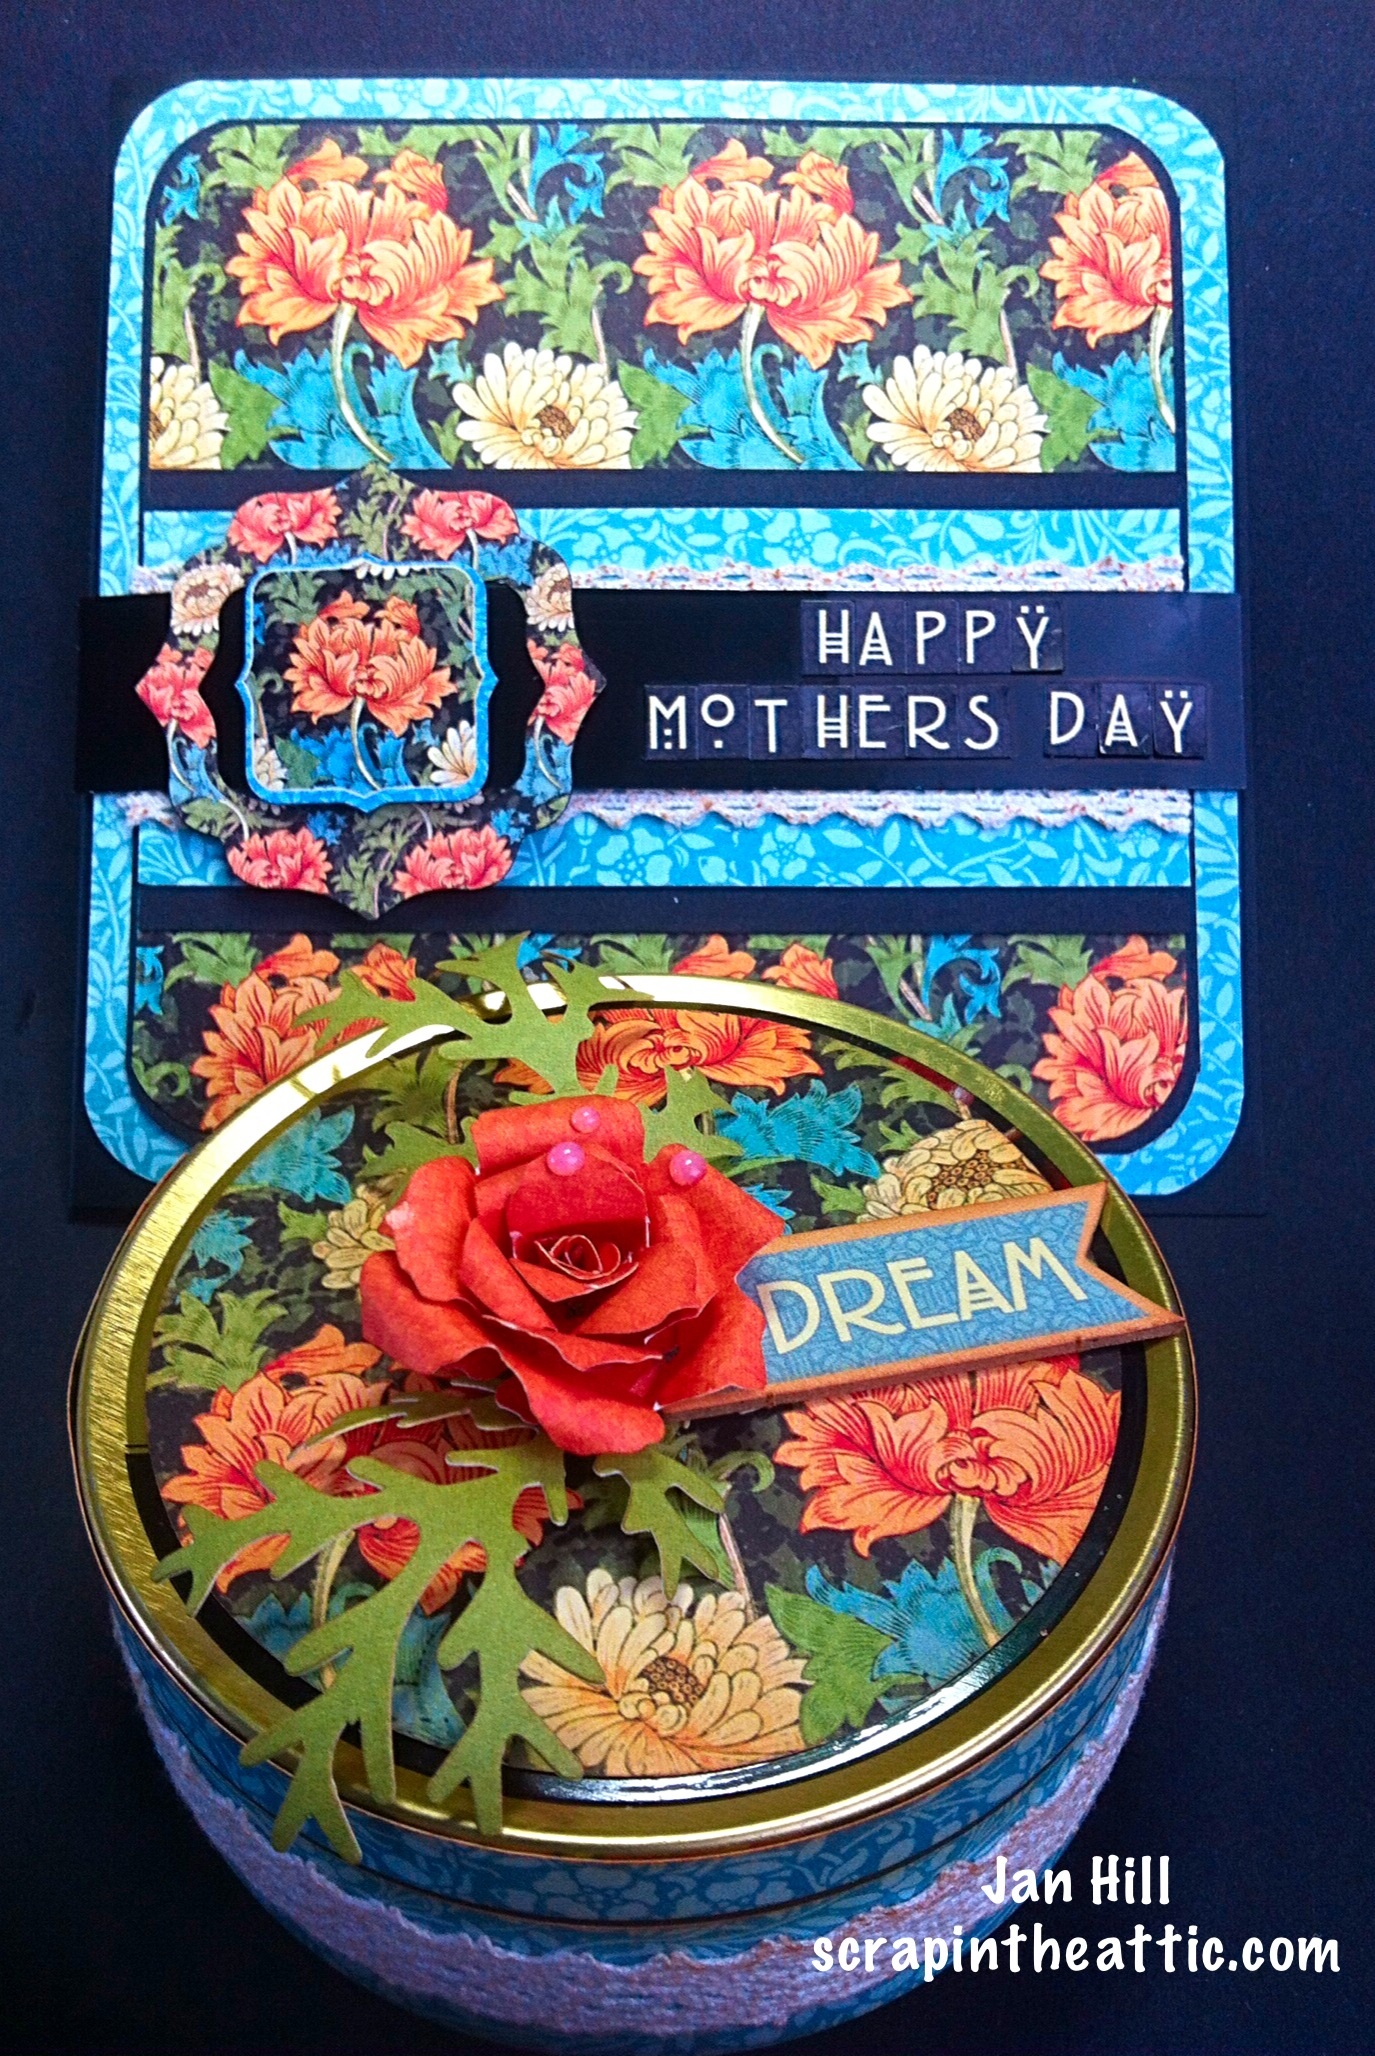
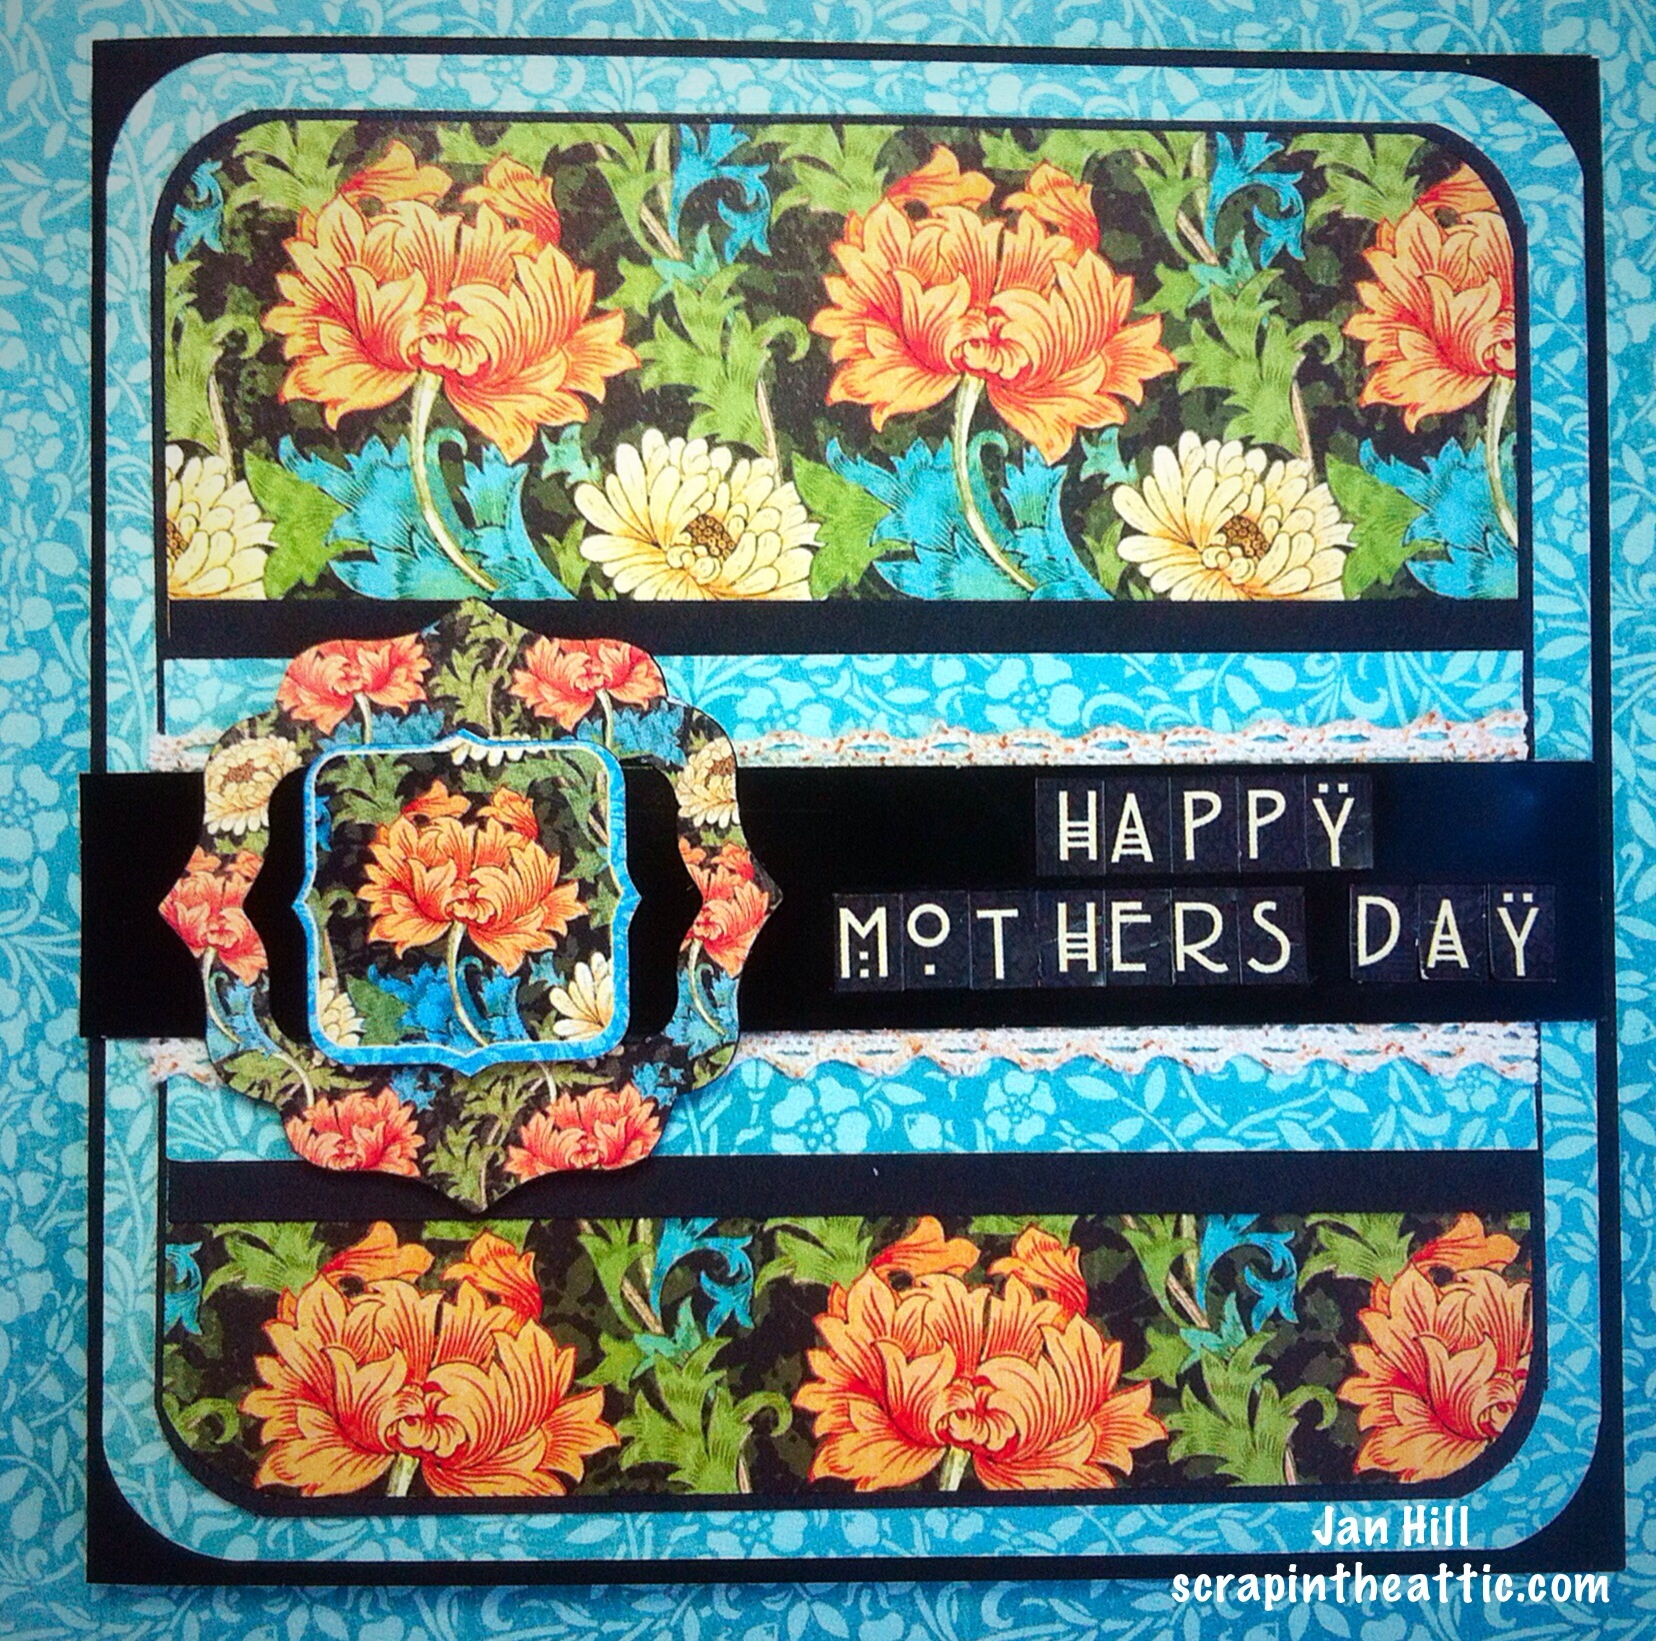
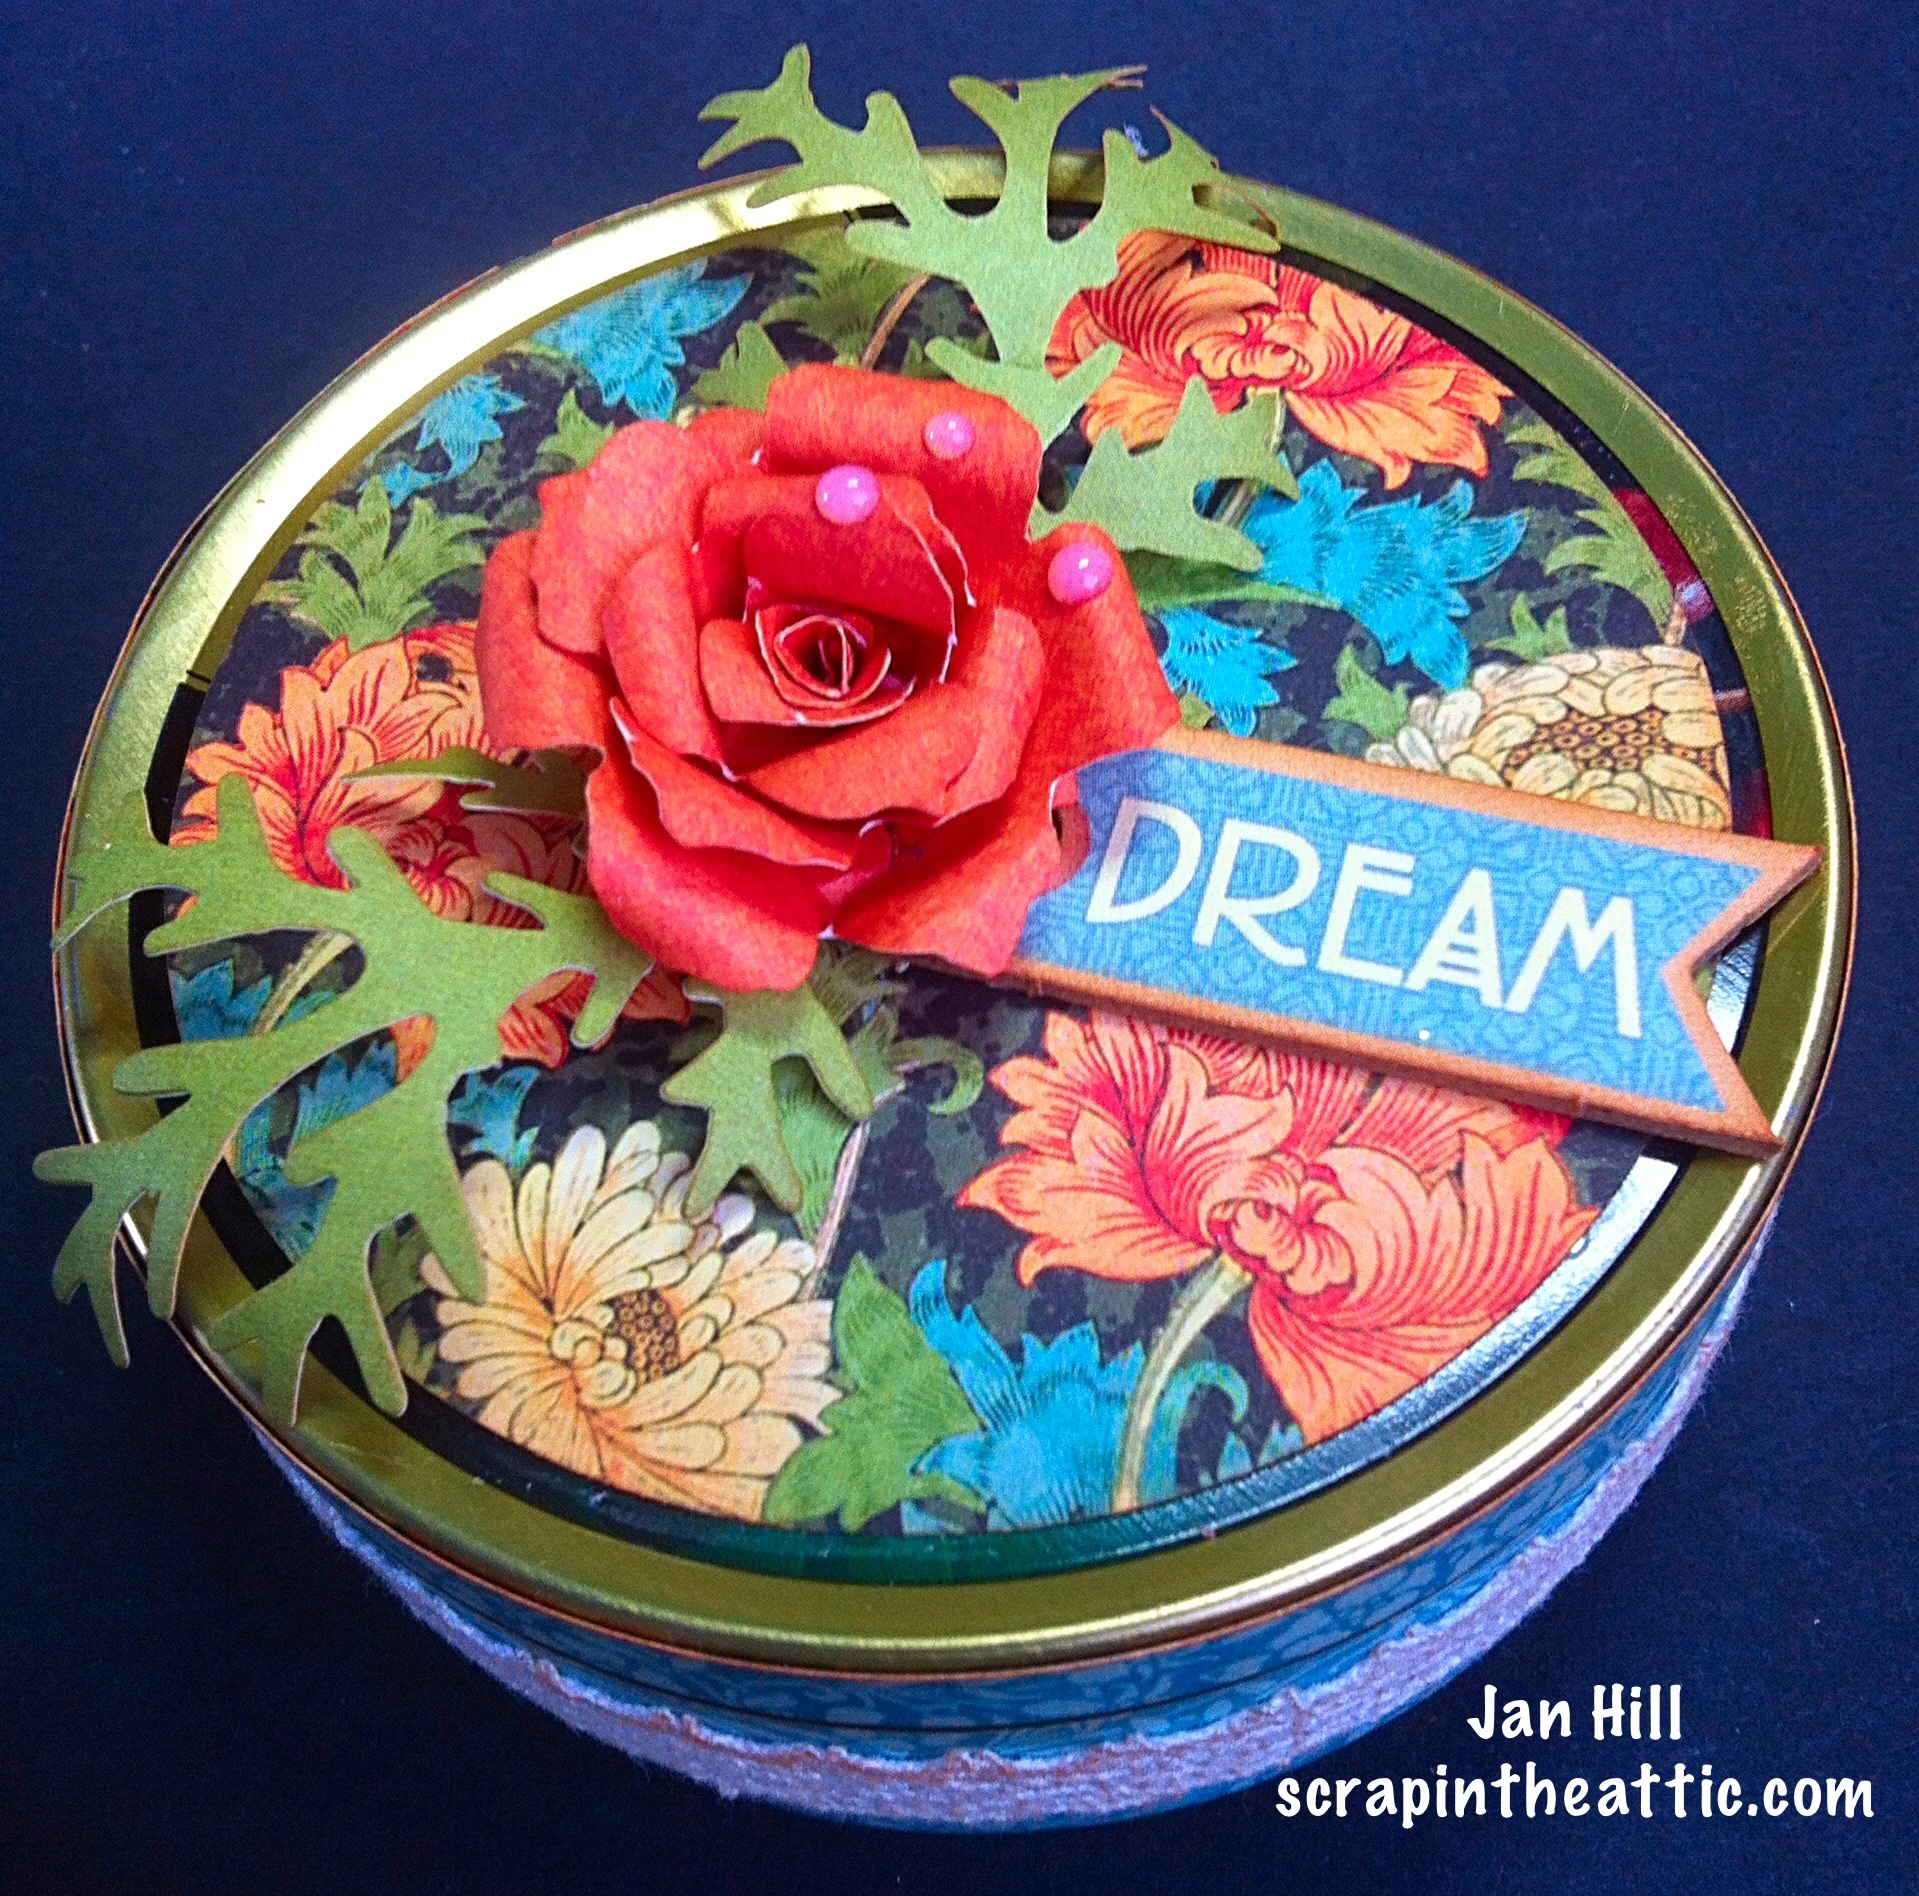
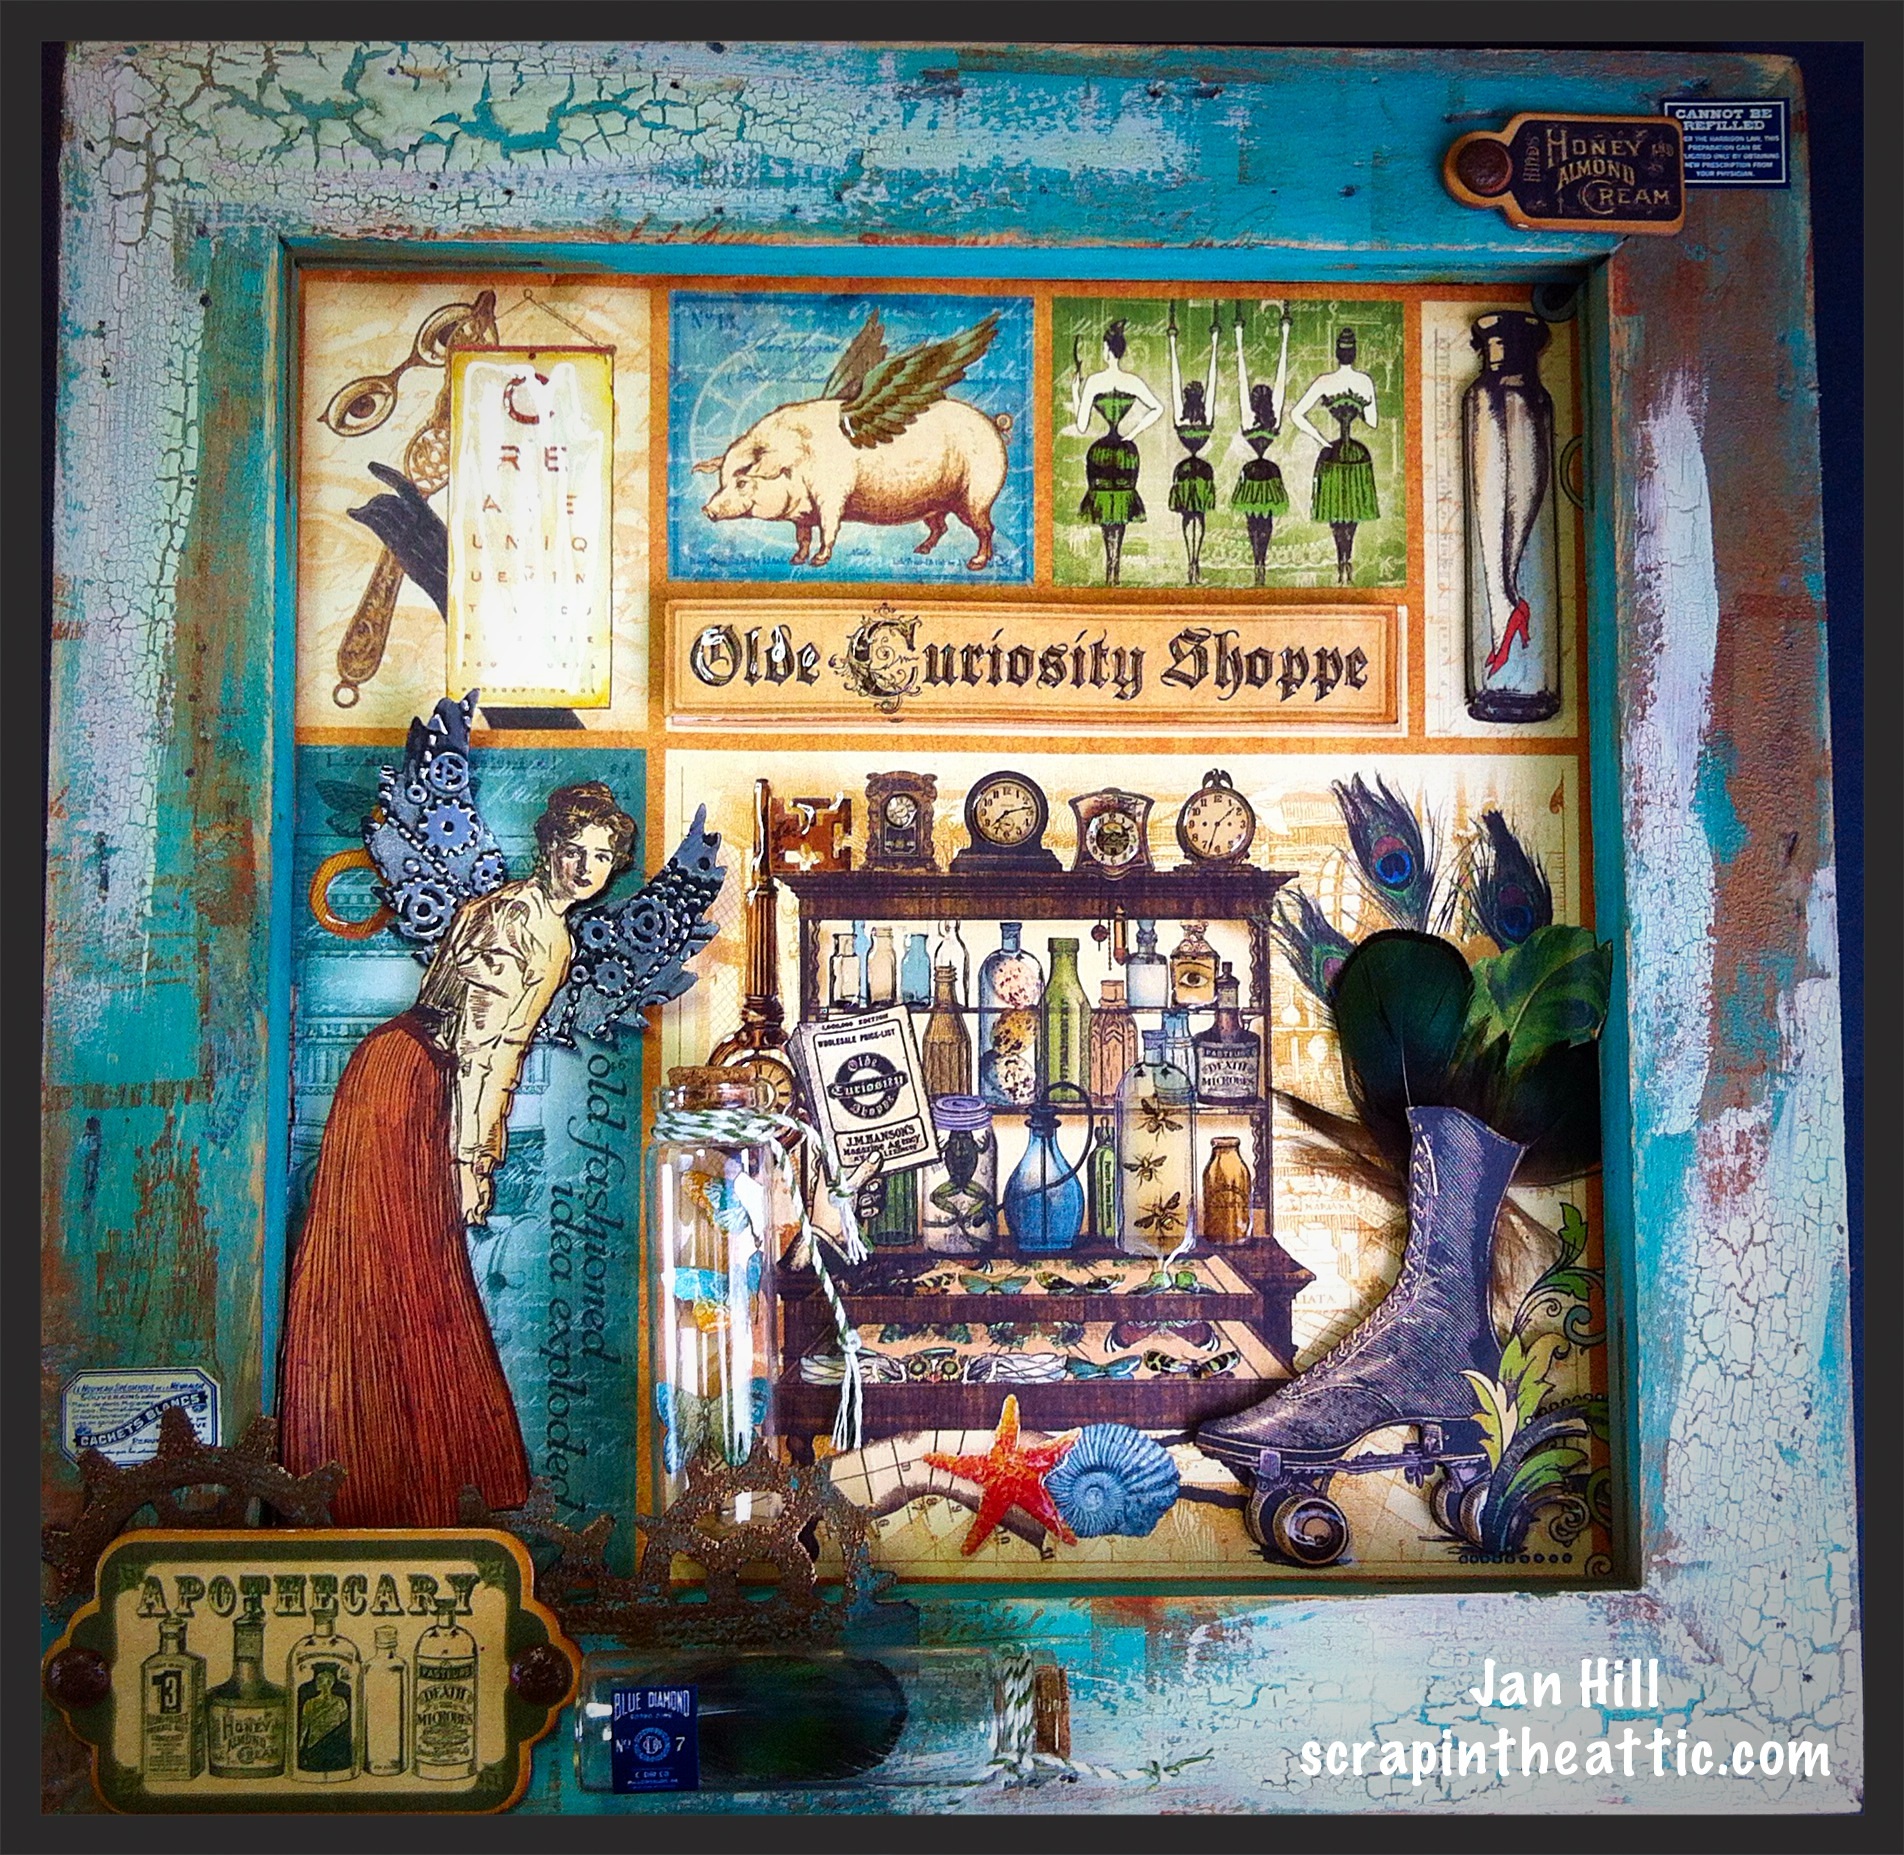
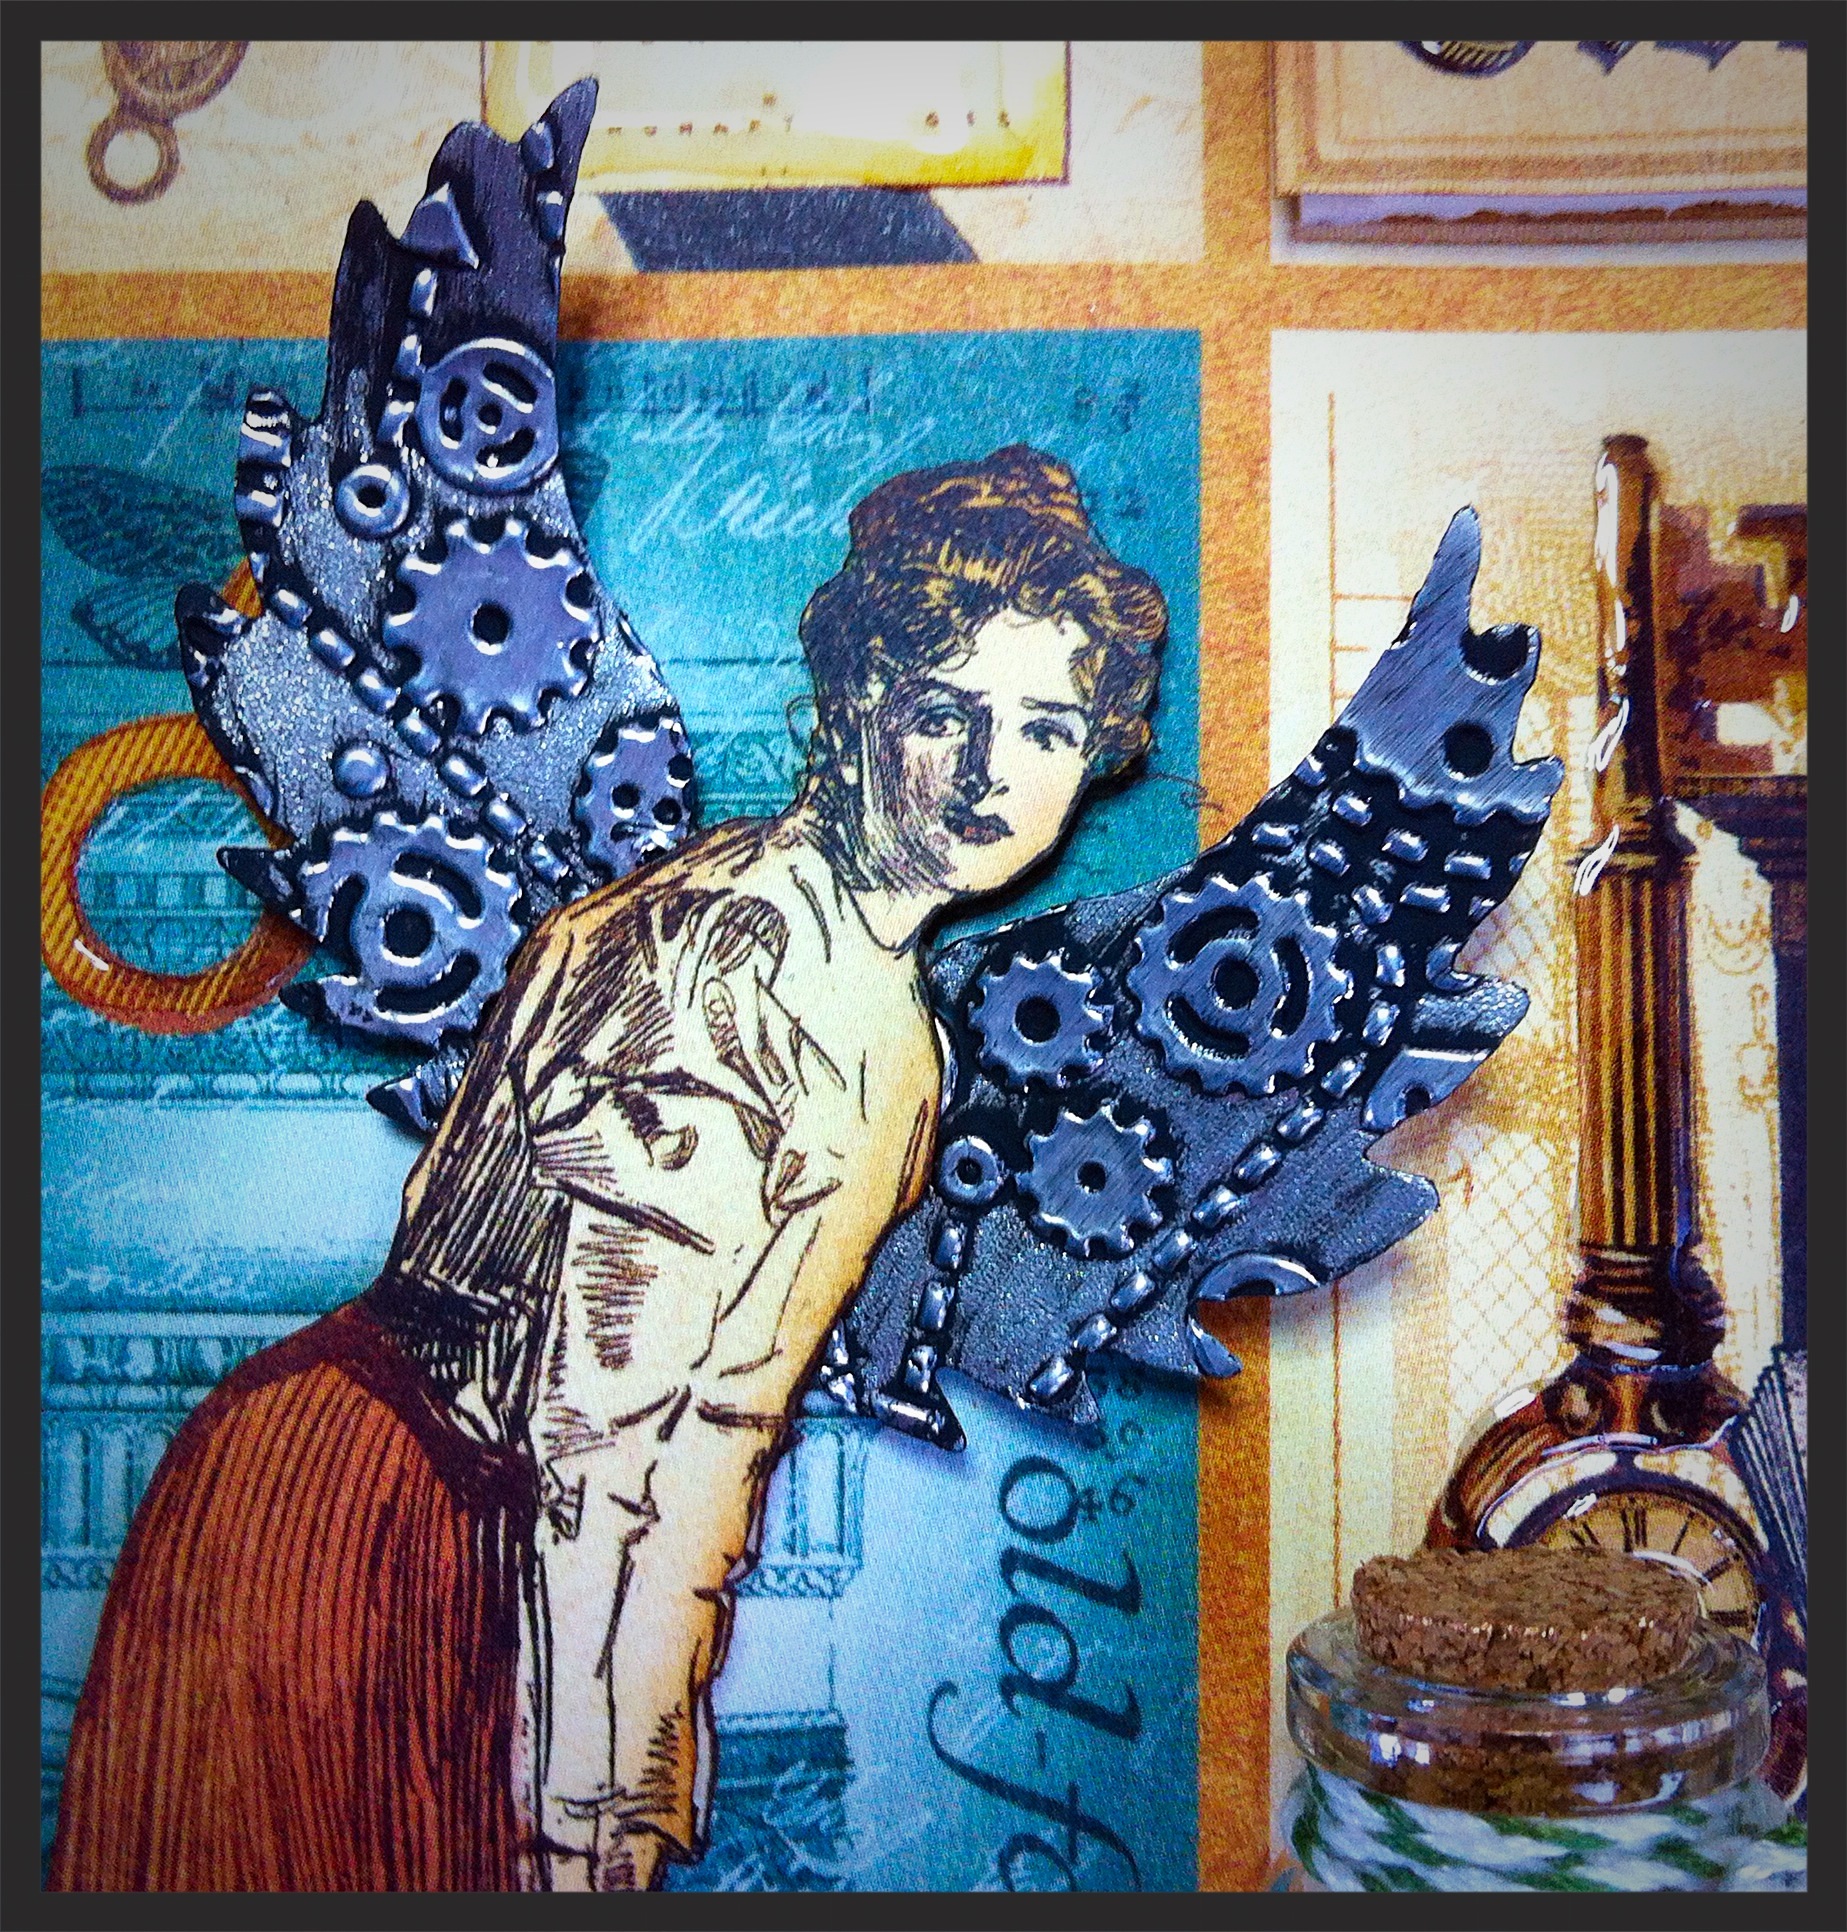
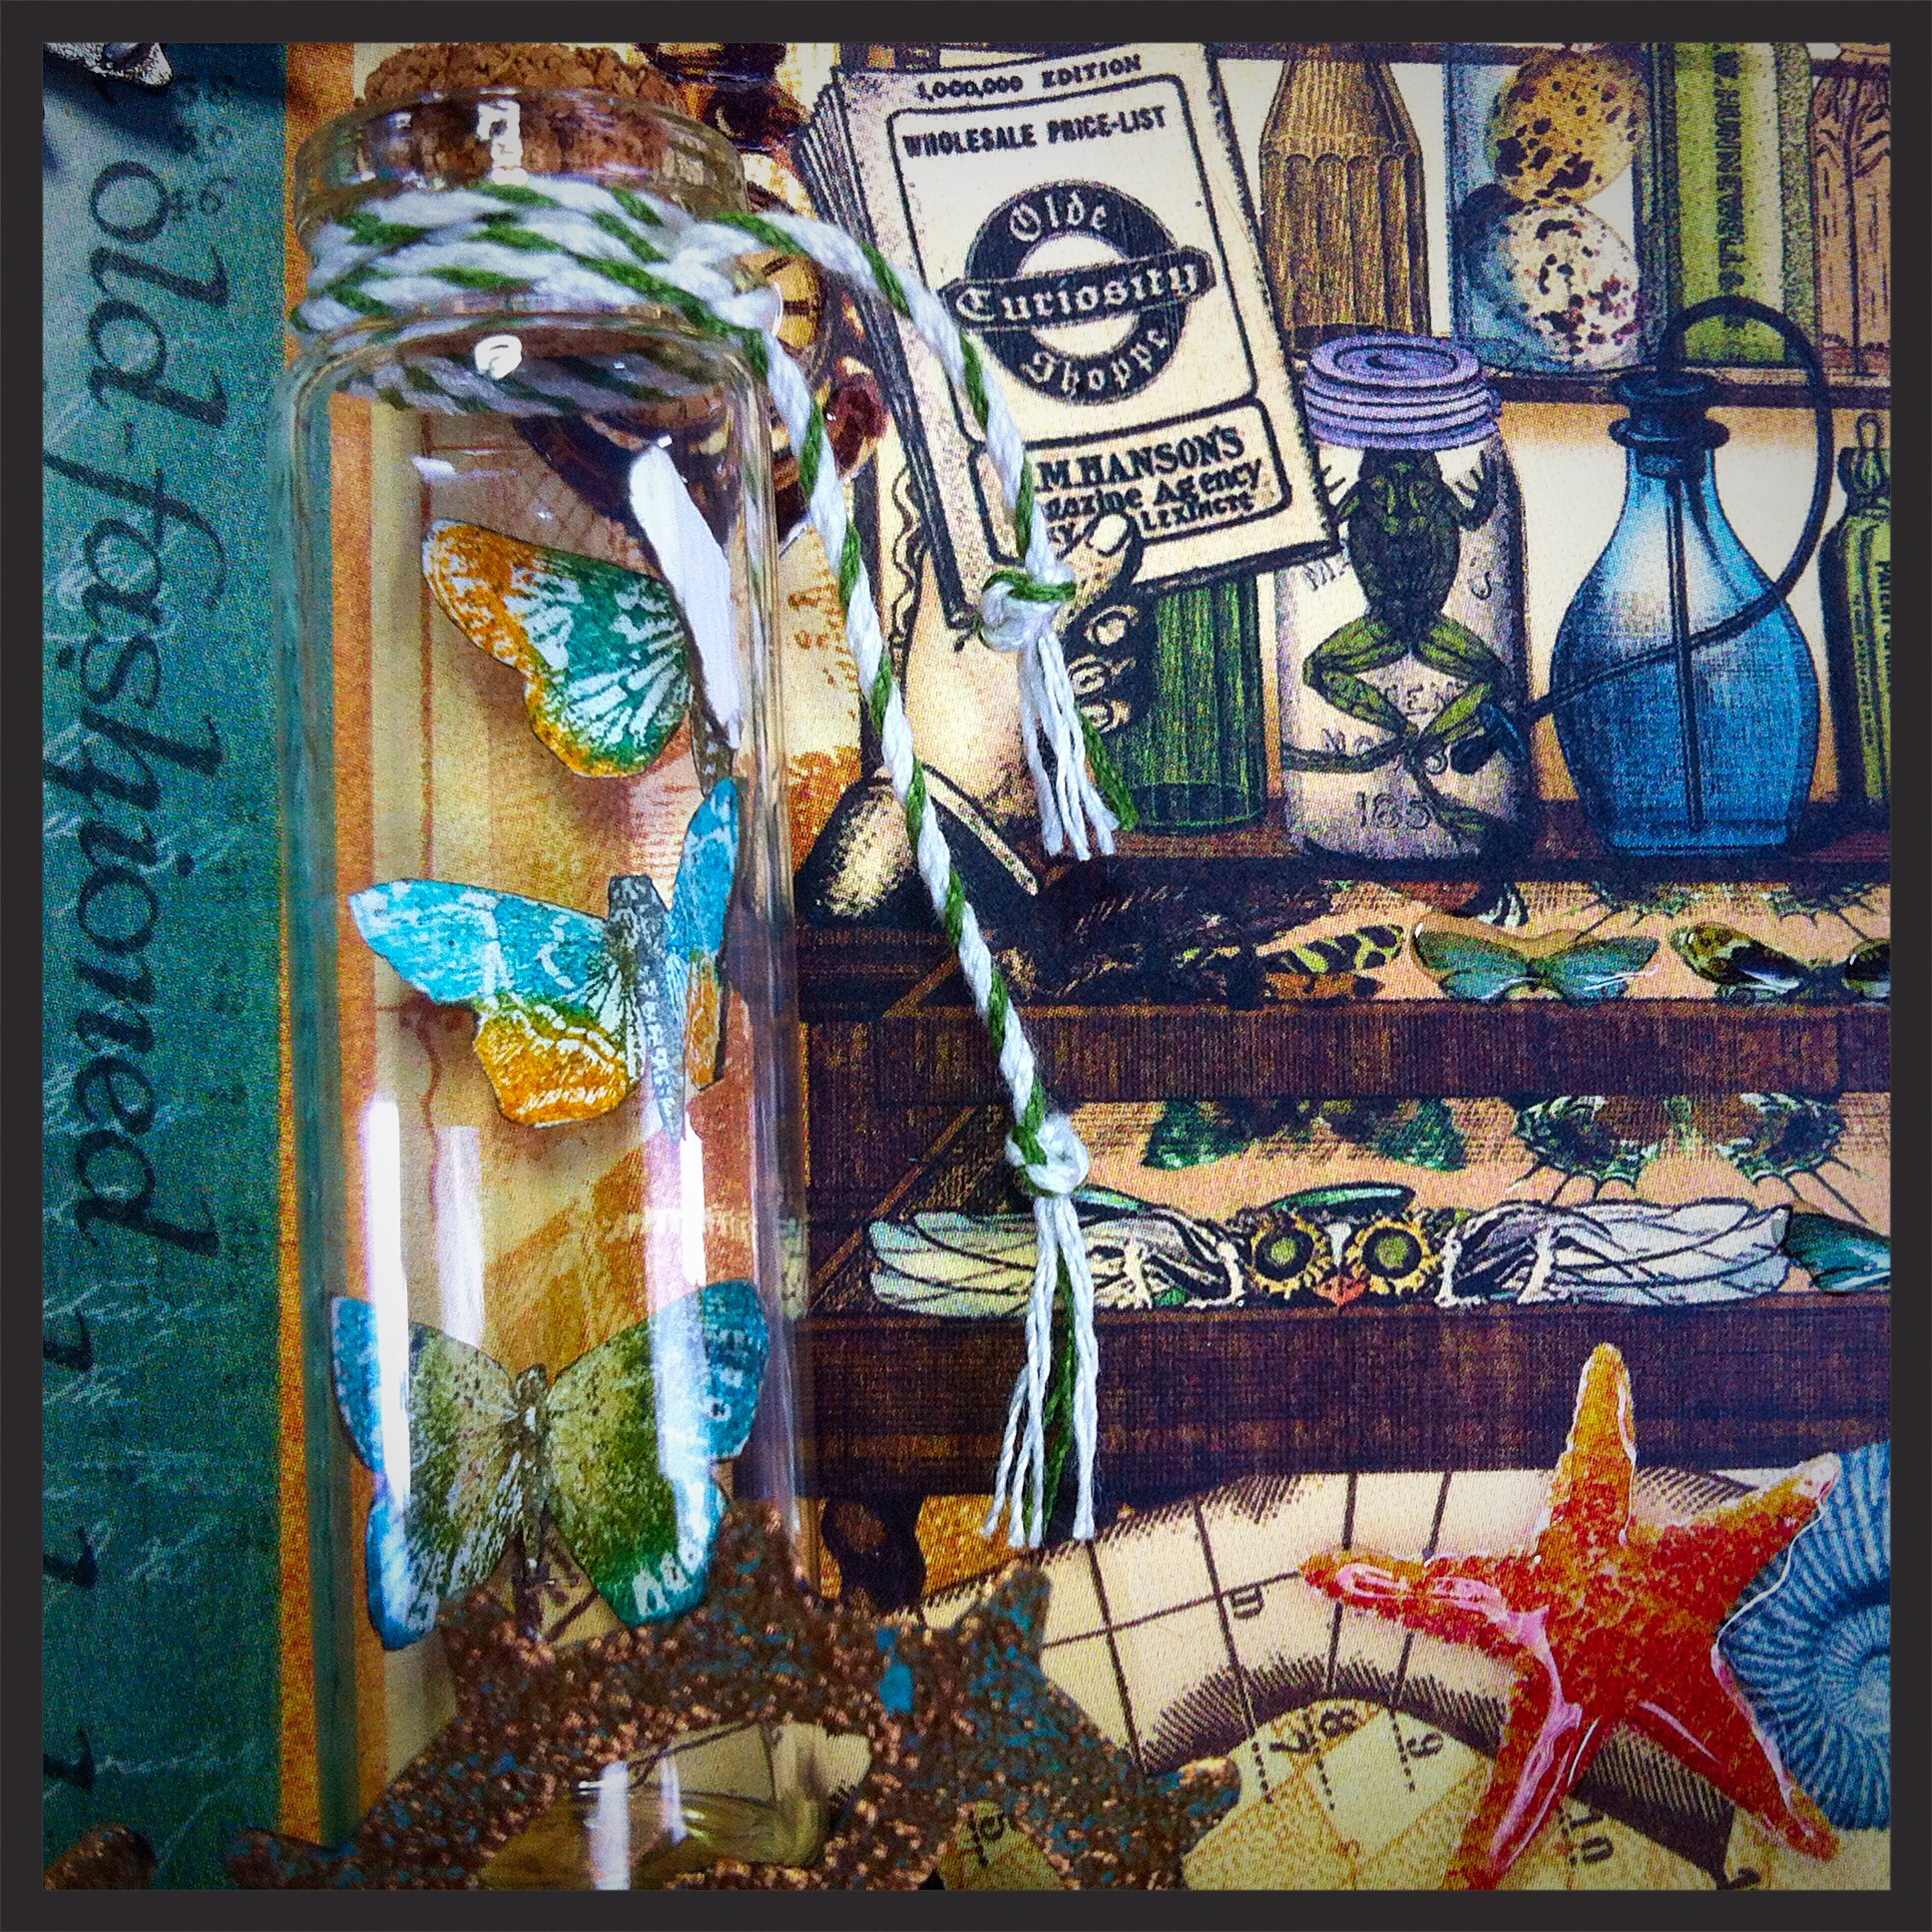
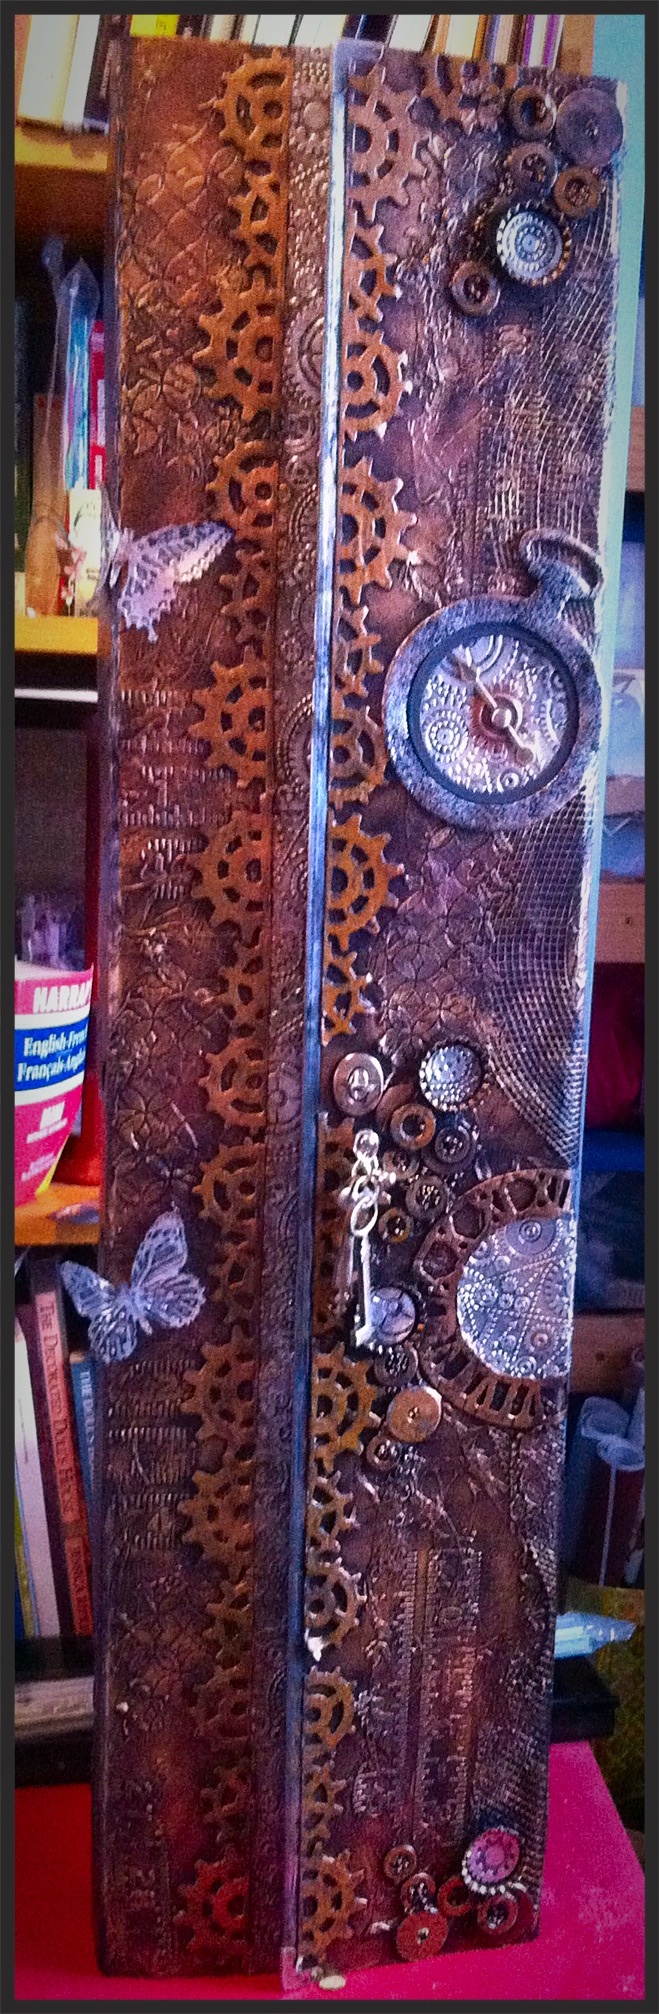
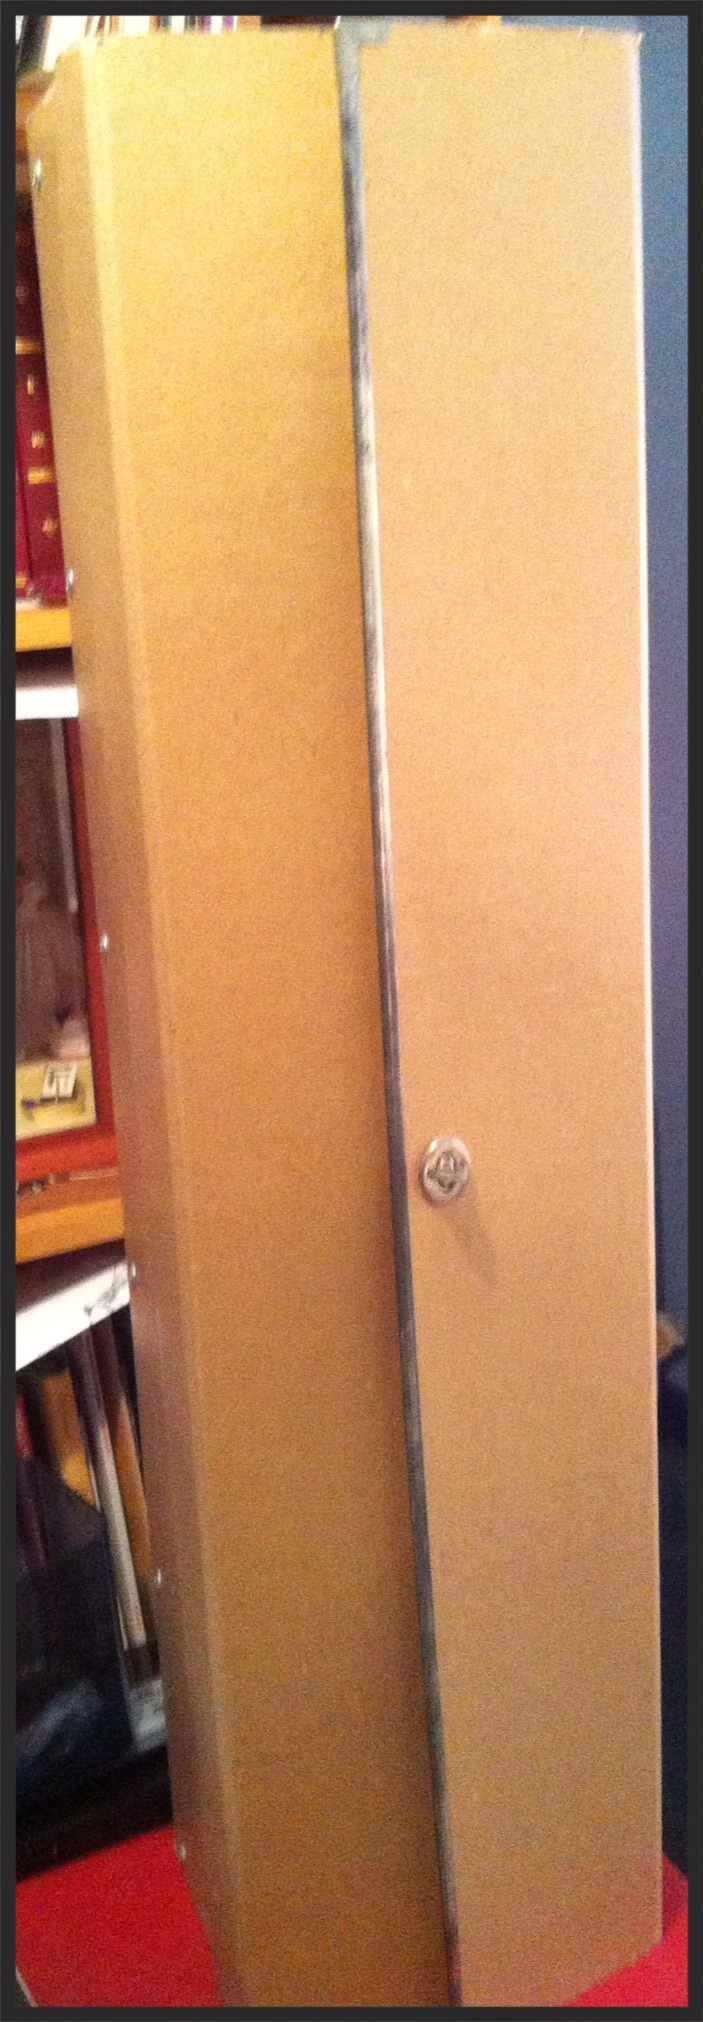
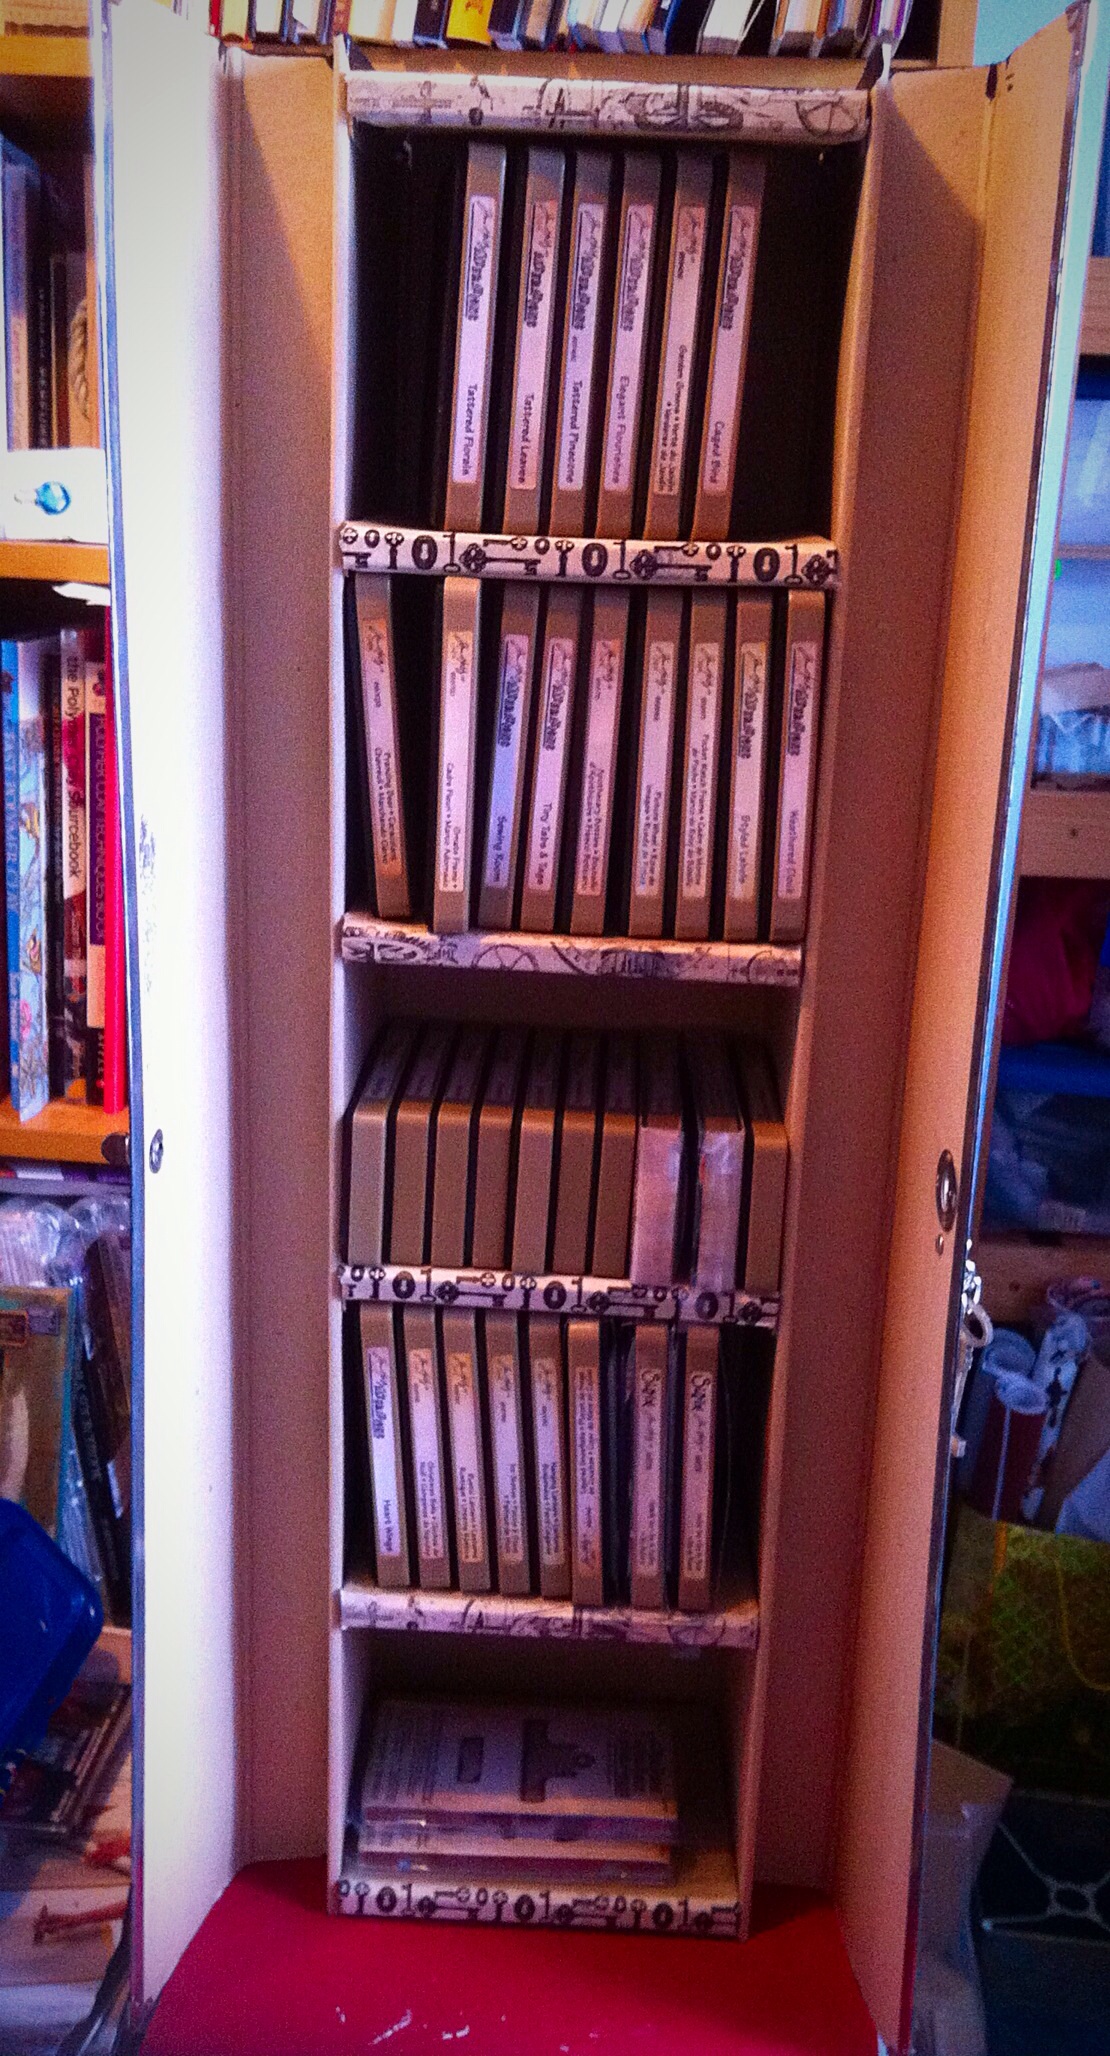
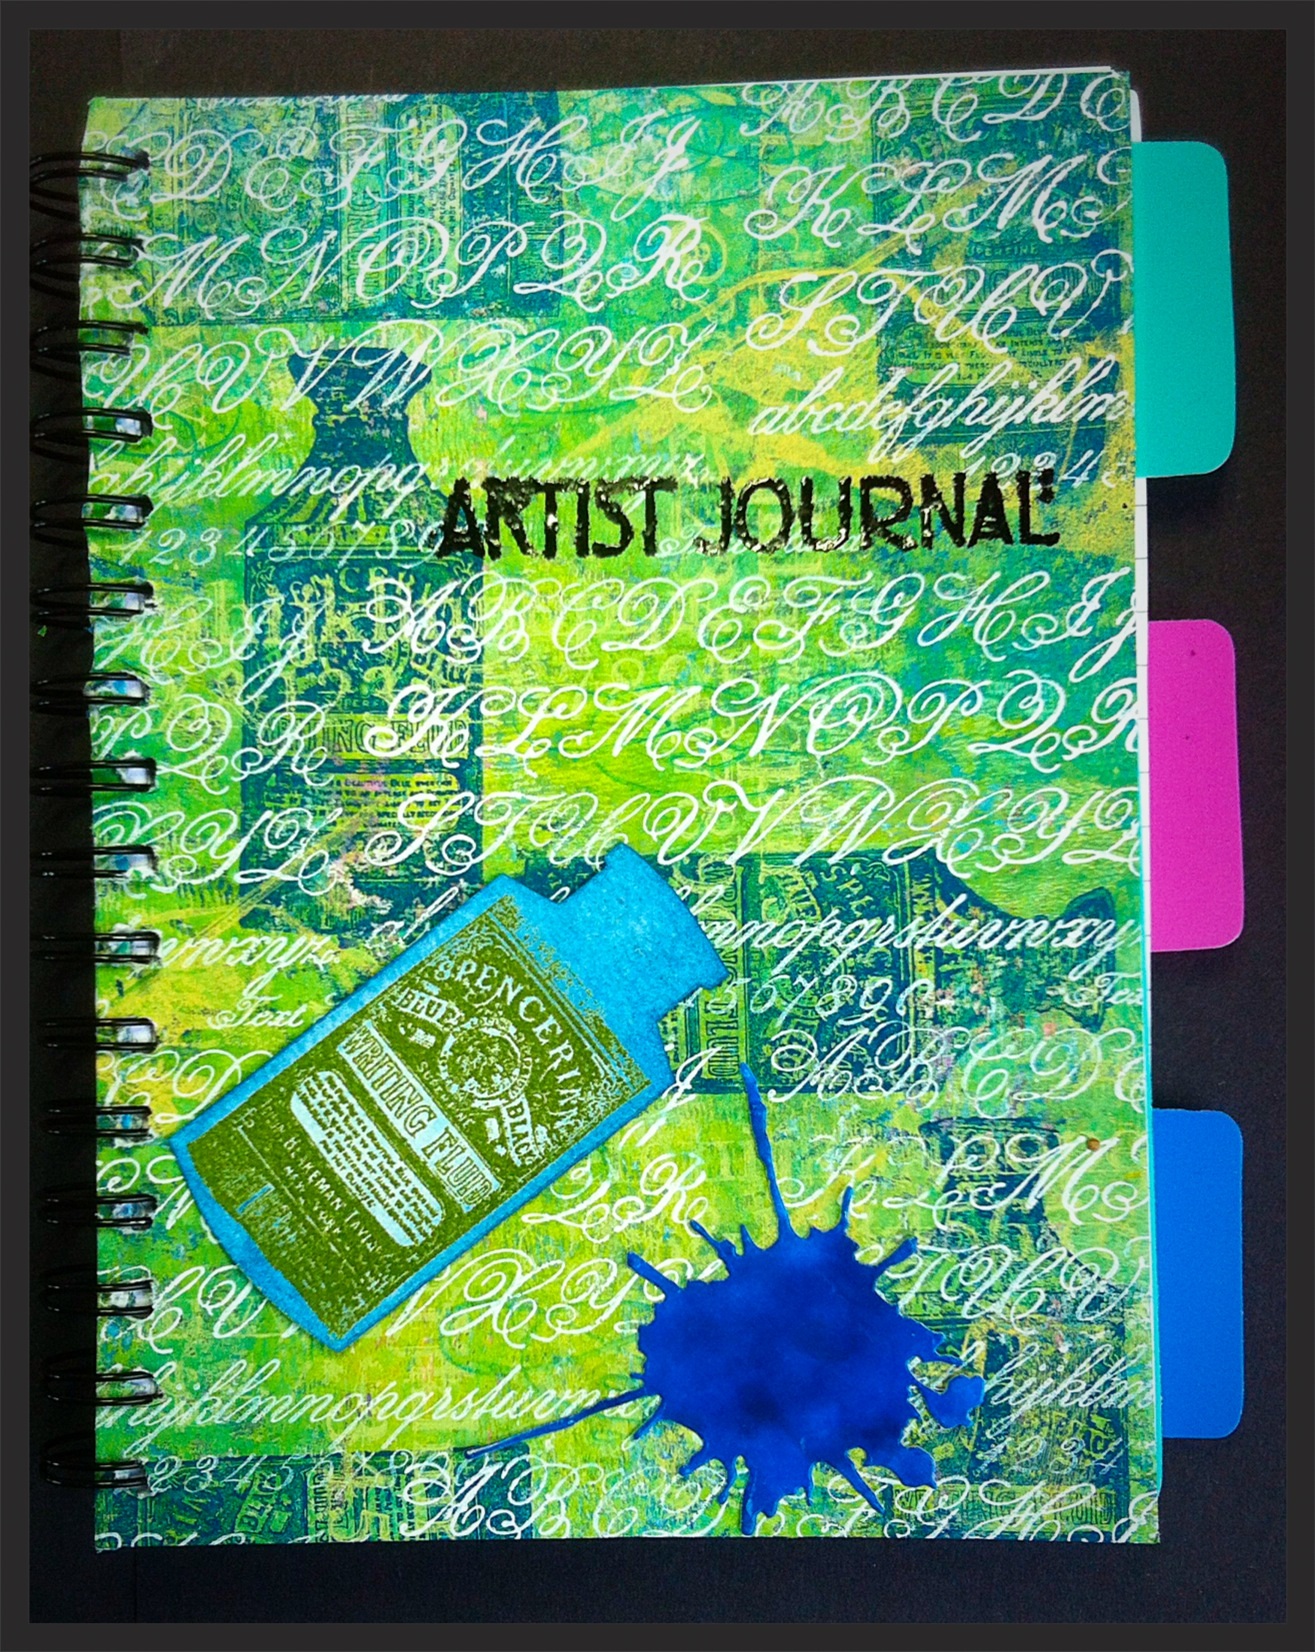
Wow this is my second DT project for The Mirror Crack’d! So exciting, I had a great welcome from the team. I was a bit nervous because previous master boards had ended up a muddy mess. However, I took some tips from Leandra at Paperartsy and used waxed tissue with Paperartsy paints. I am so pleased with the result.  The masterboard I created I used to cover a cheap notebook.

image


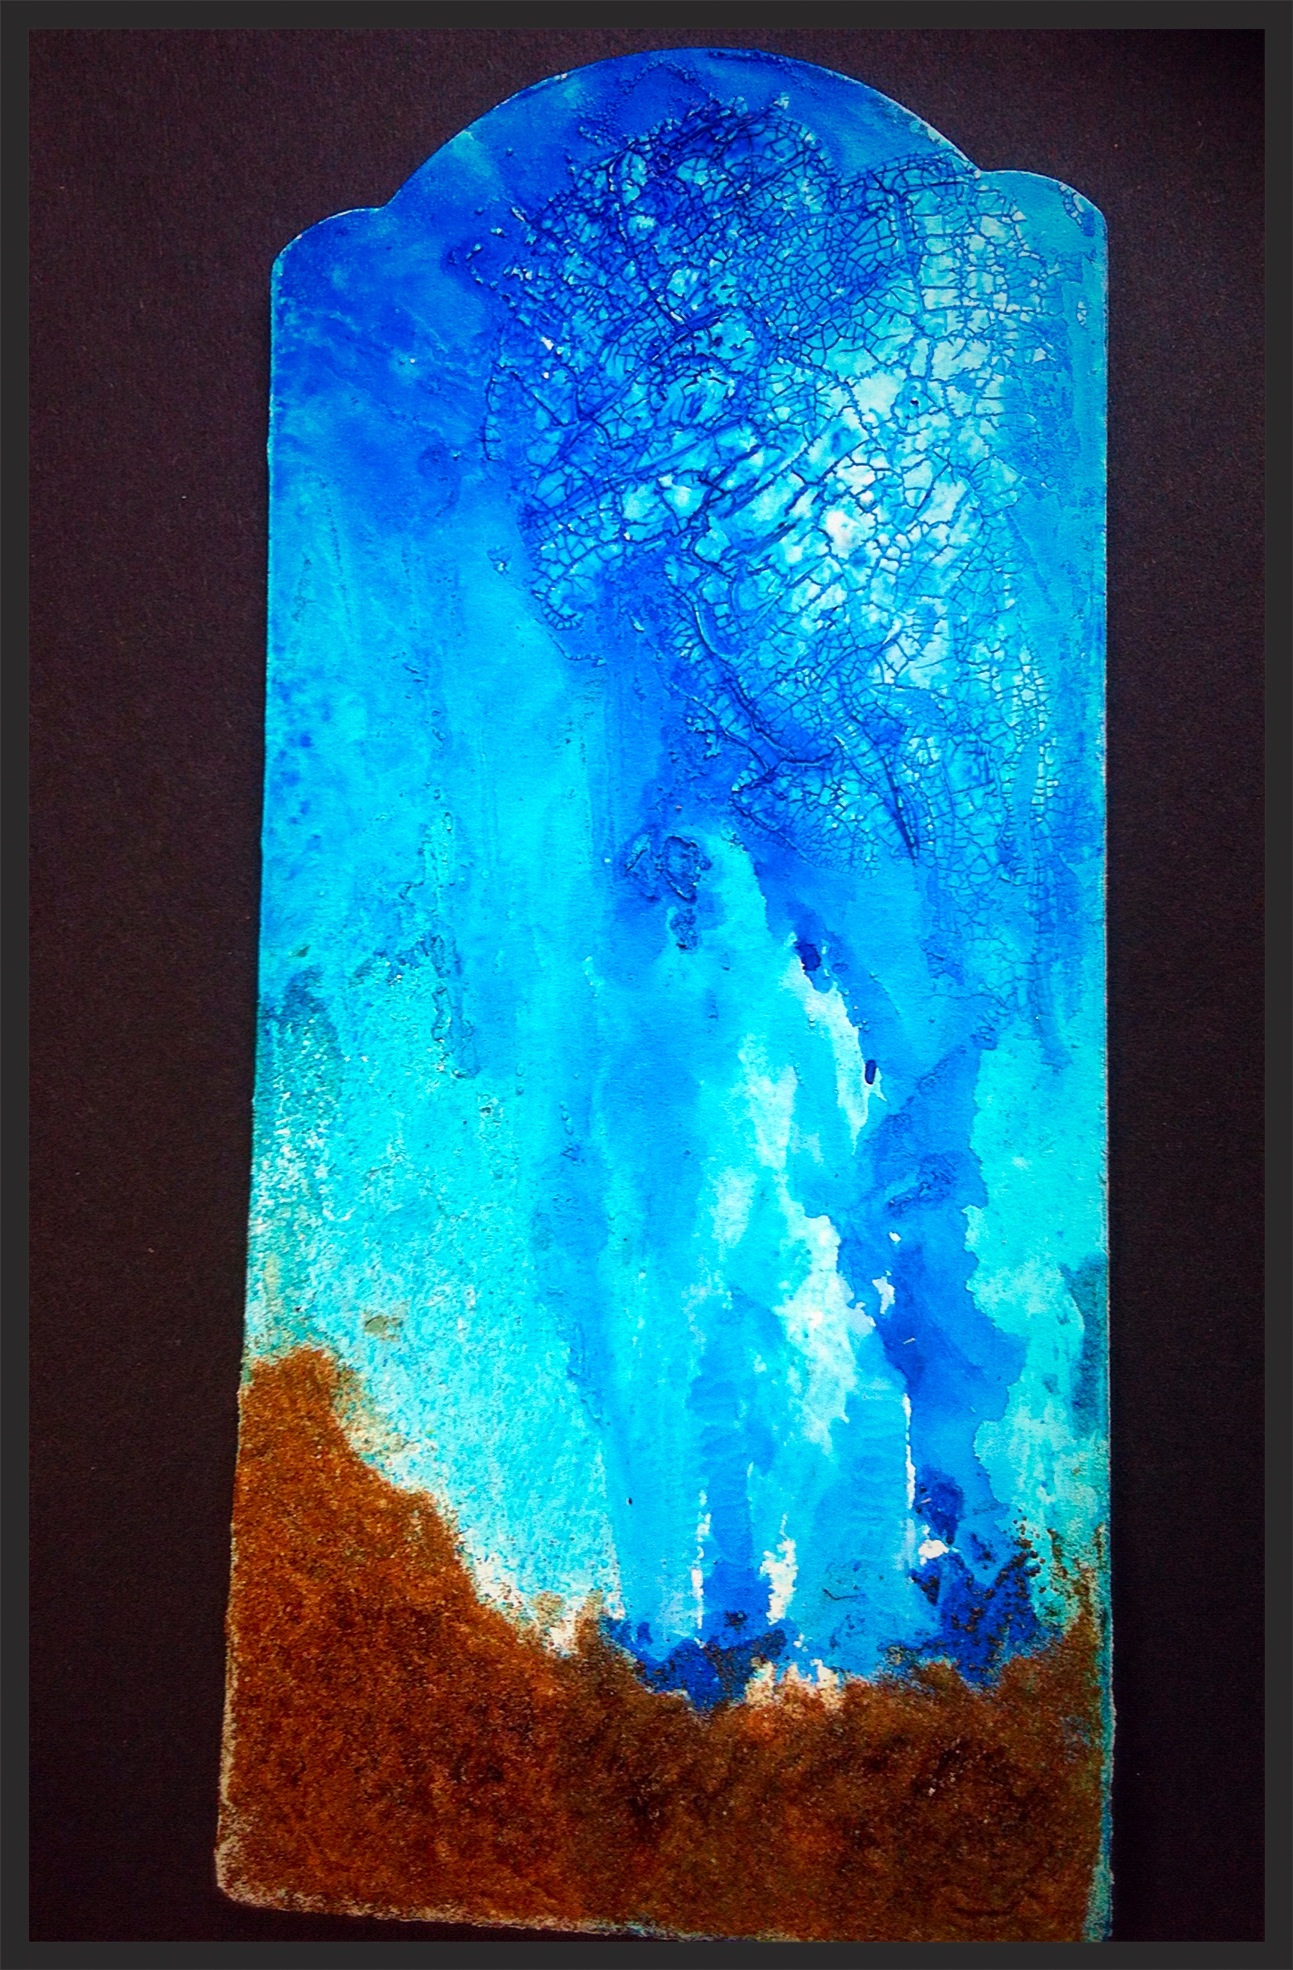
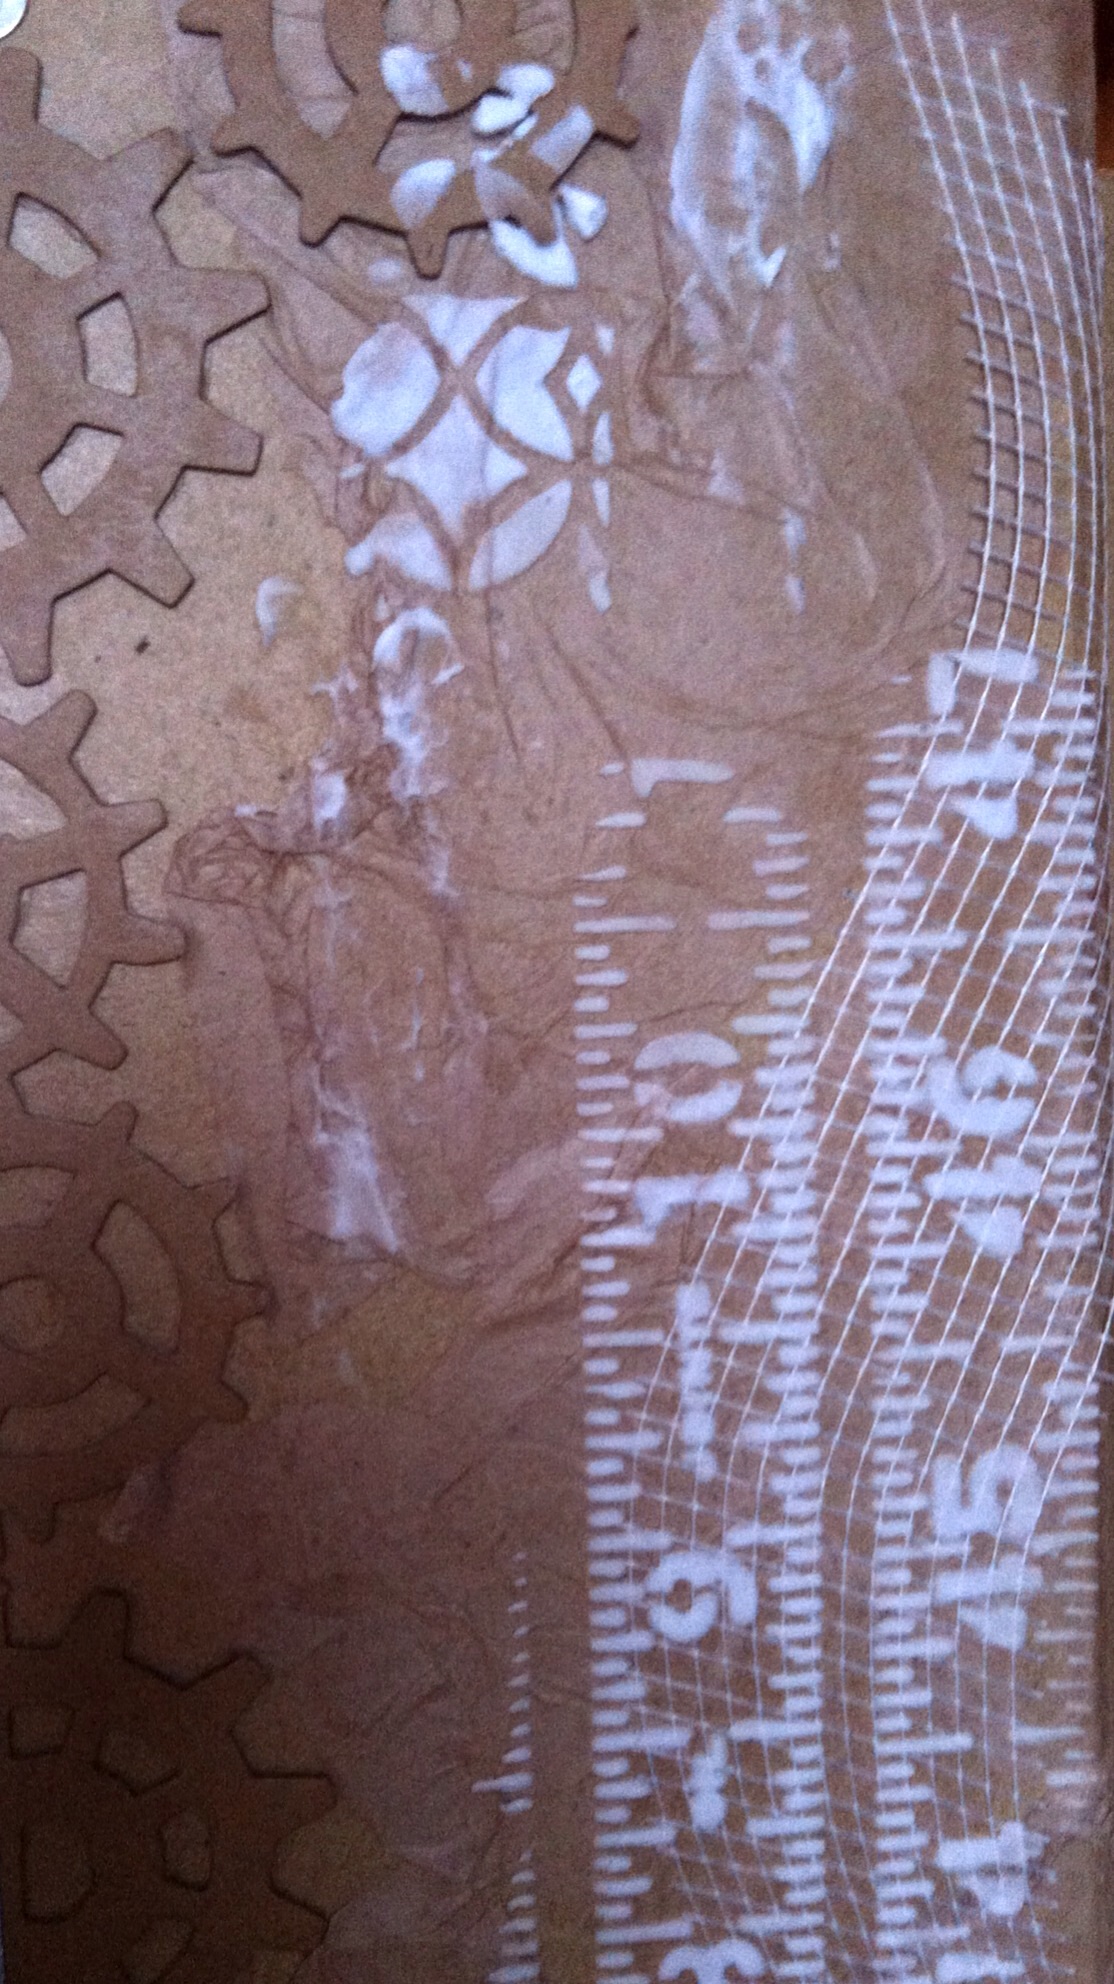
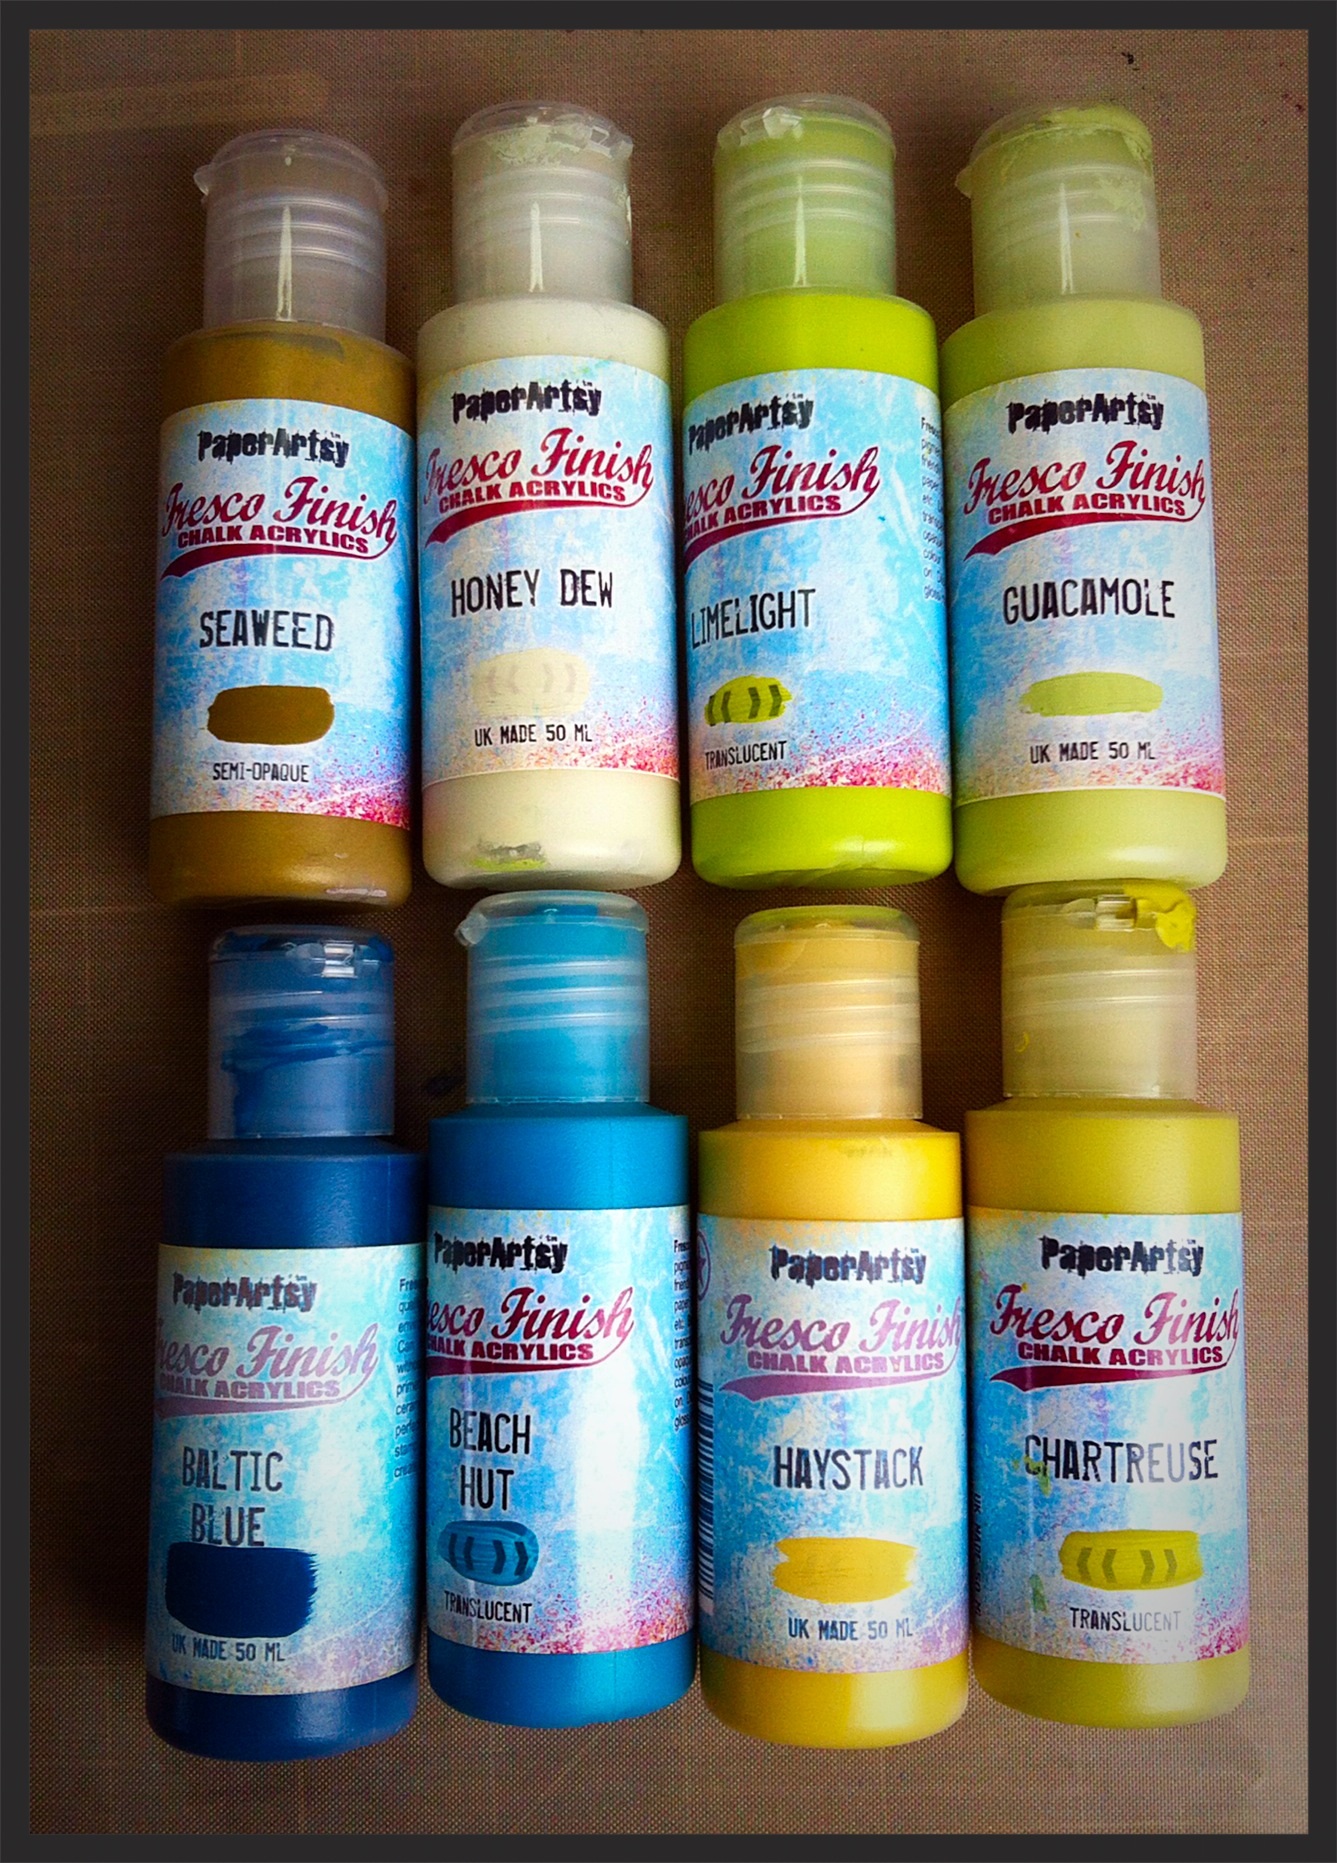
I started with with paint and brayered on shades of colours, opaque then translucent paints.

image

image
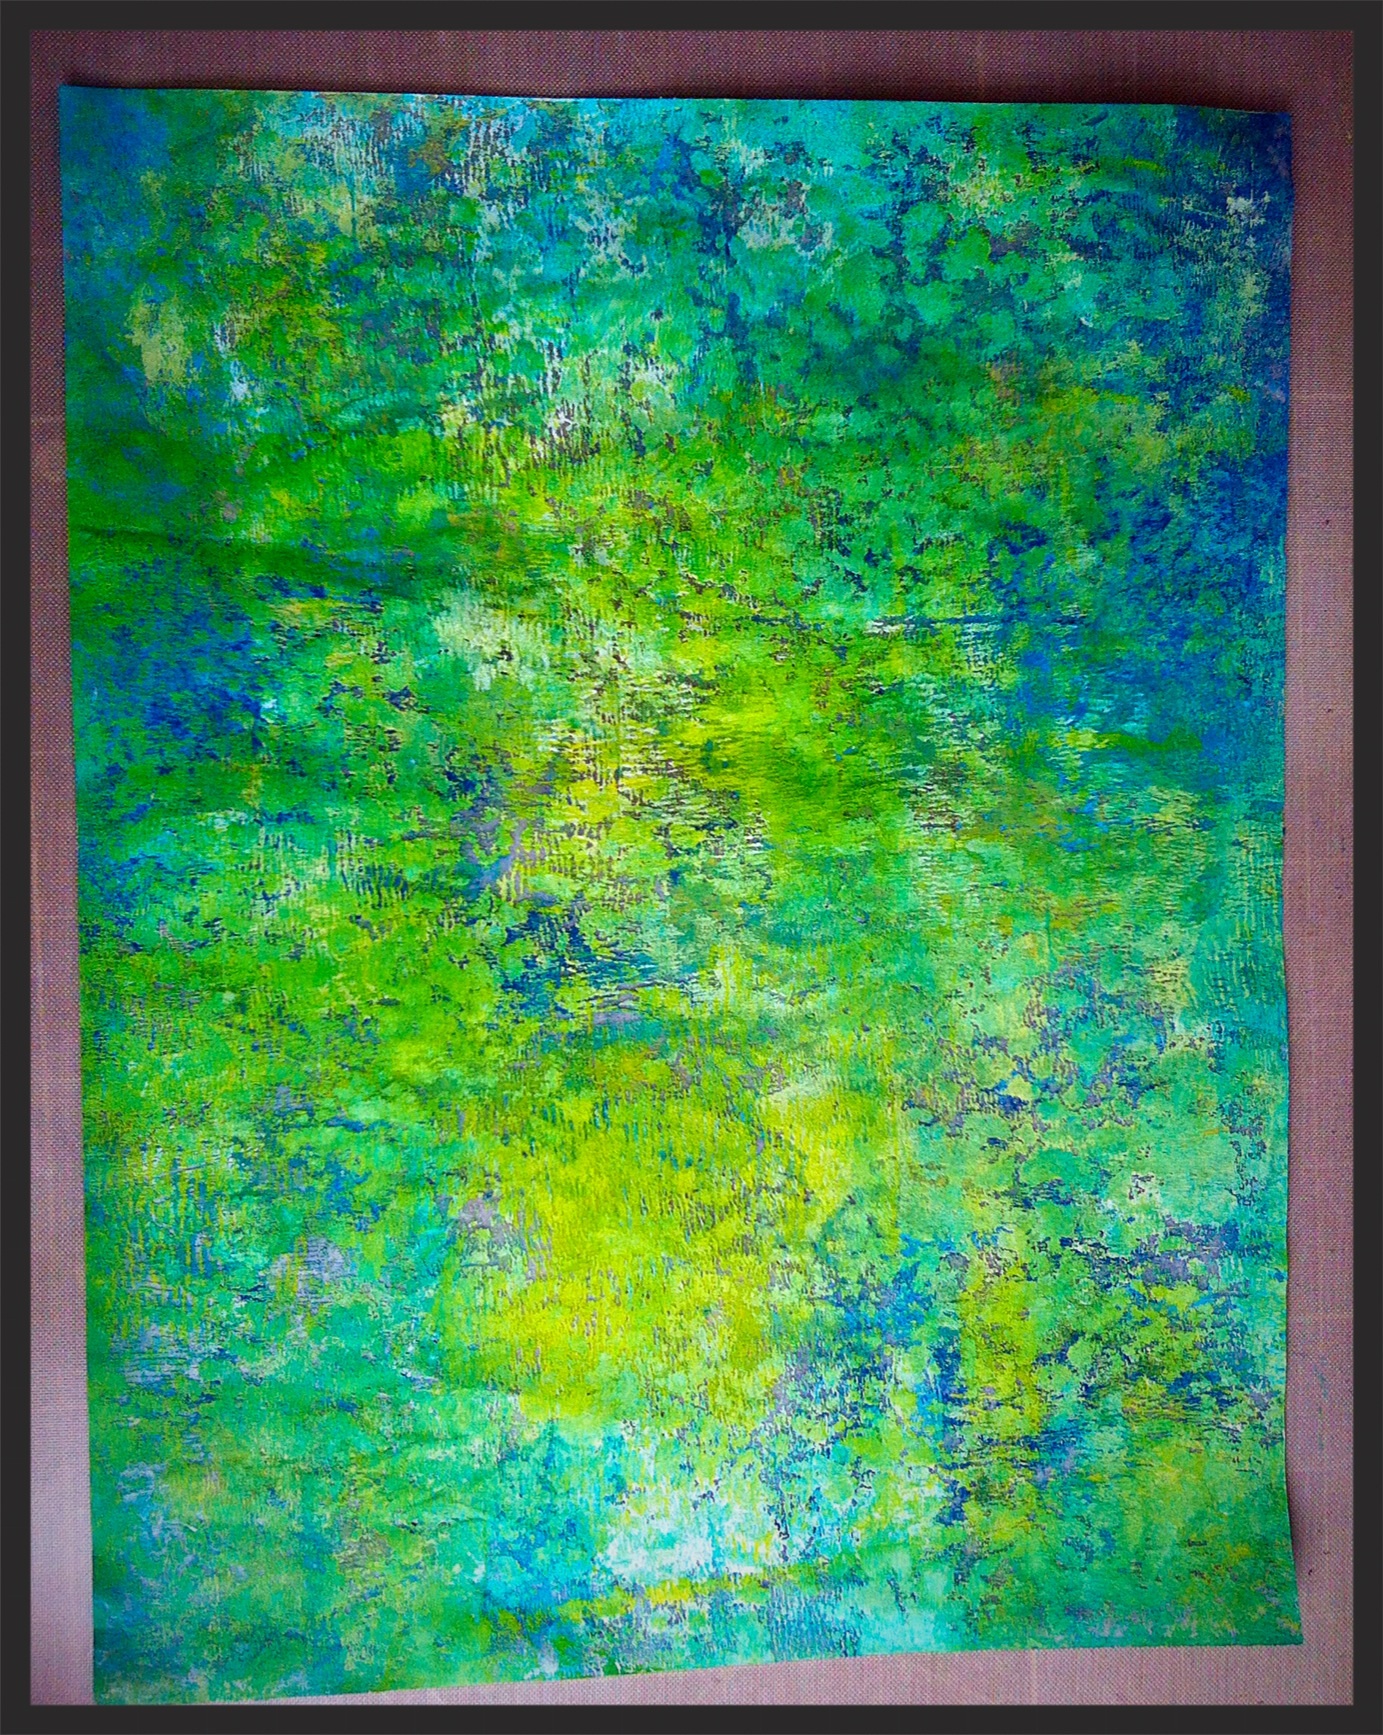
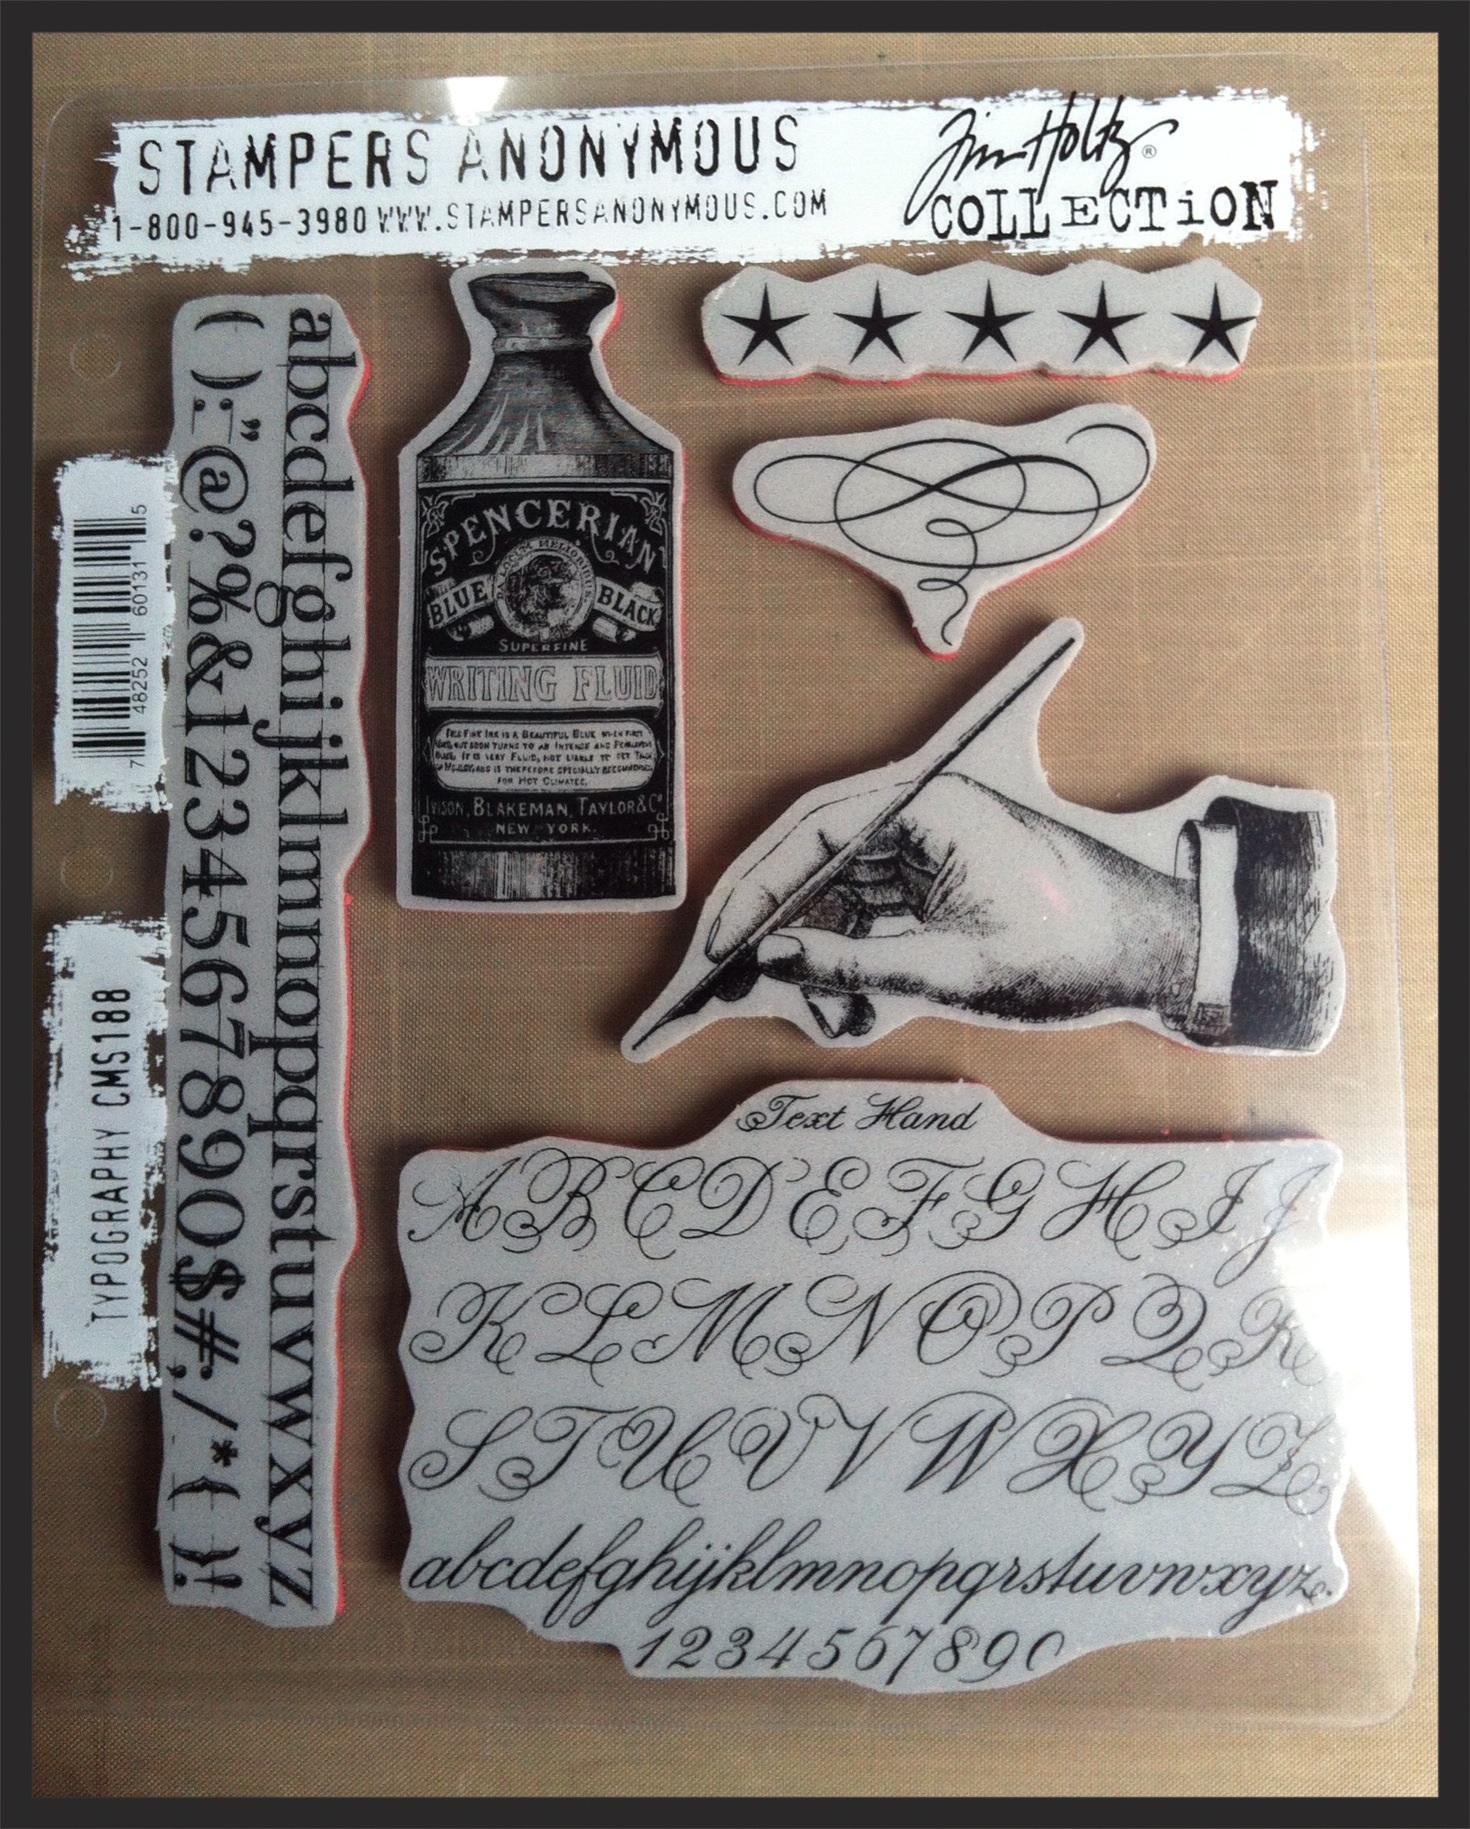
I brayered dark, medium and light shades of the same colour to create layers and depth. Then I used TH stamps with the same colour paints on top.

I used blues, greens  and yellow paint.

I used all the stamps in the set but finished with the white script over the whole sheet to unify the page.

The wax paper felt substantial with the layers of paint and could be sewn.

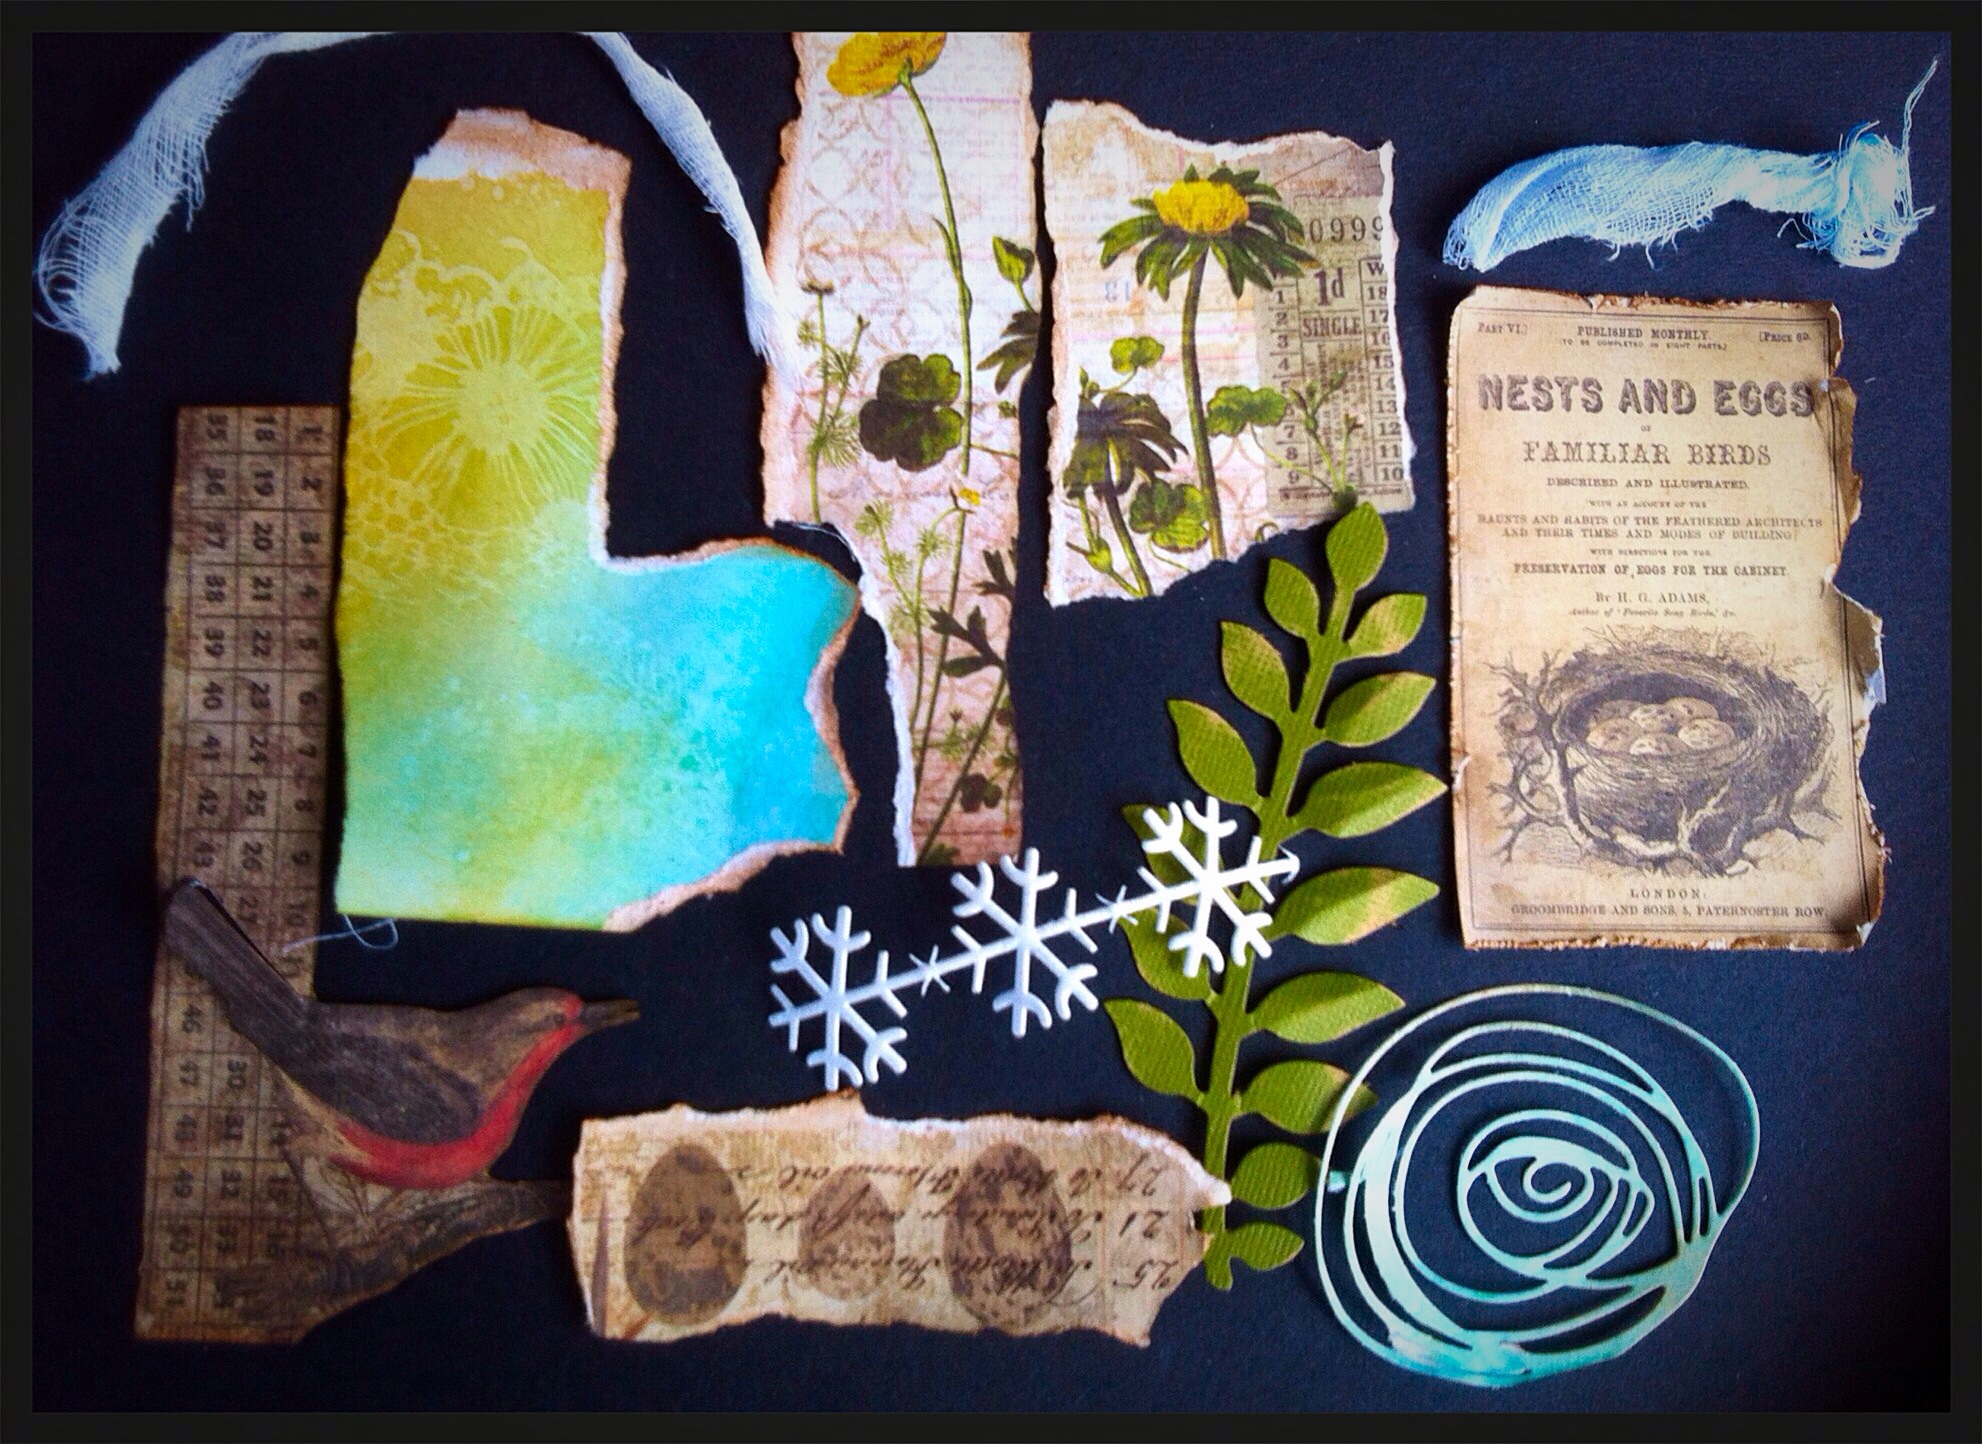
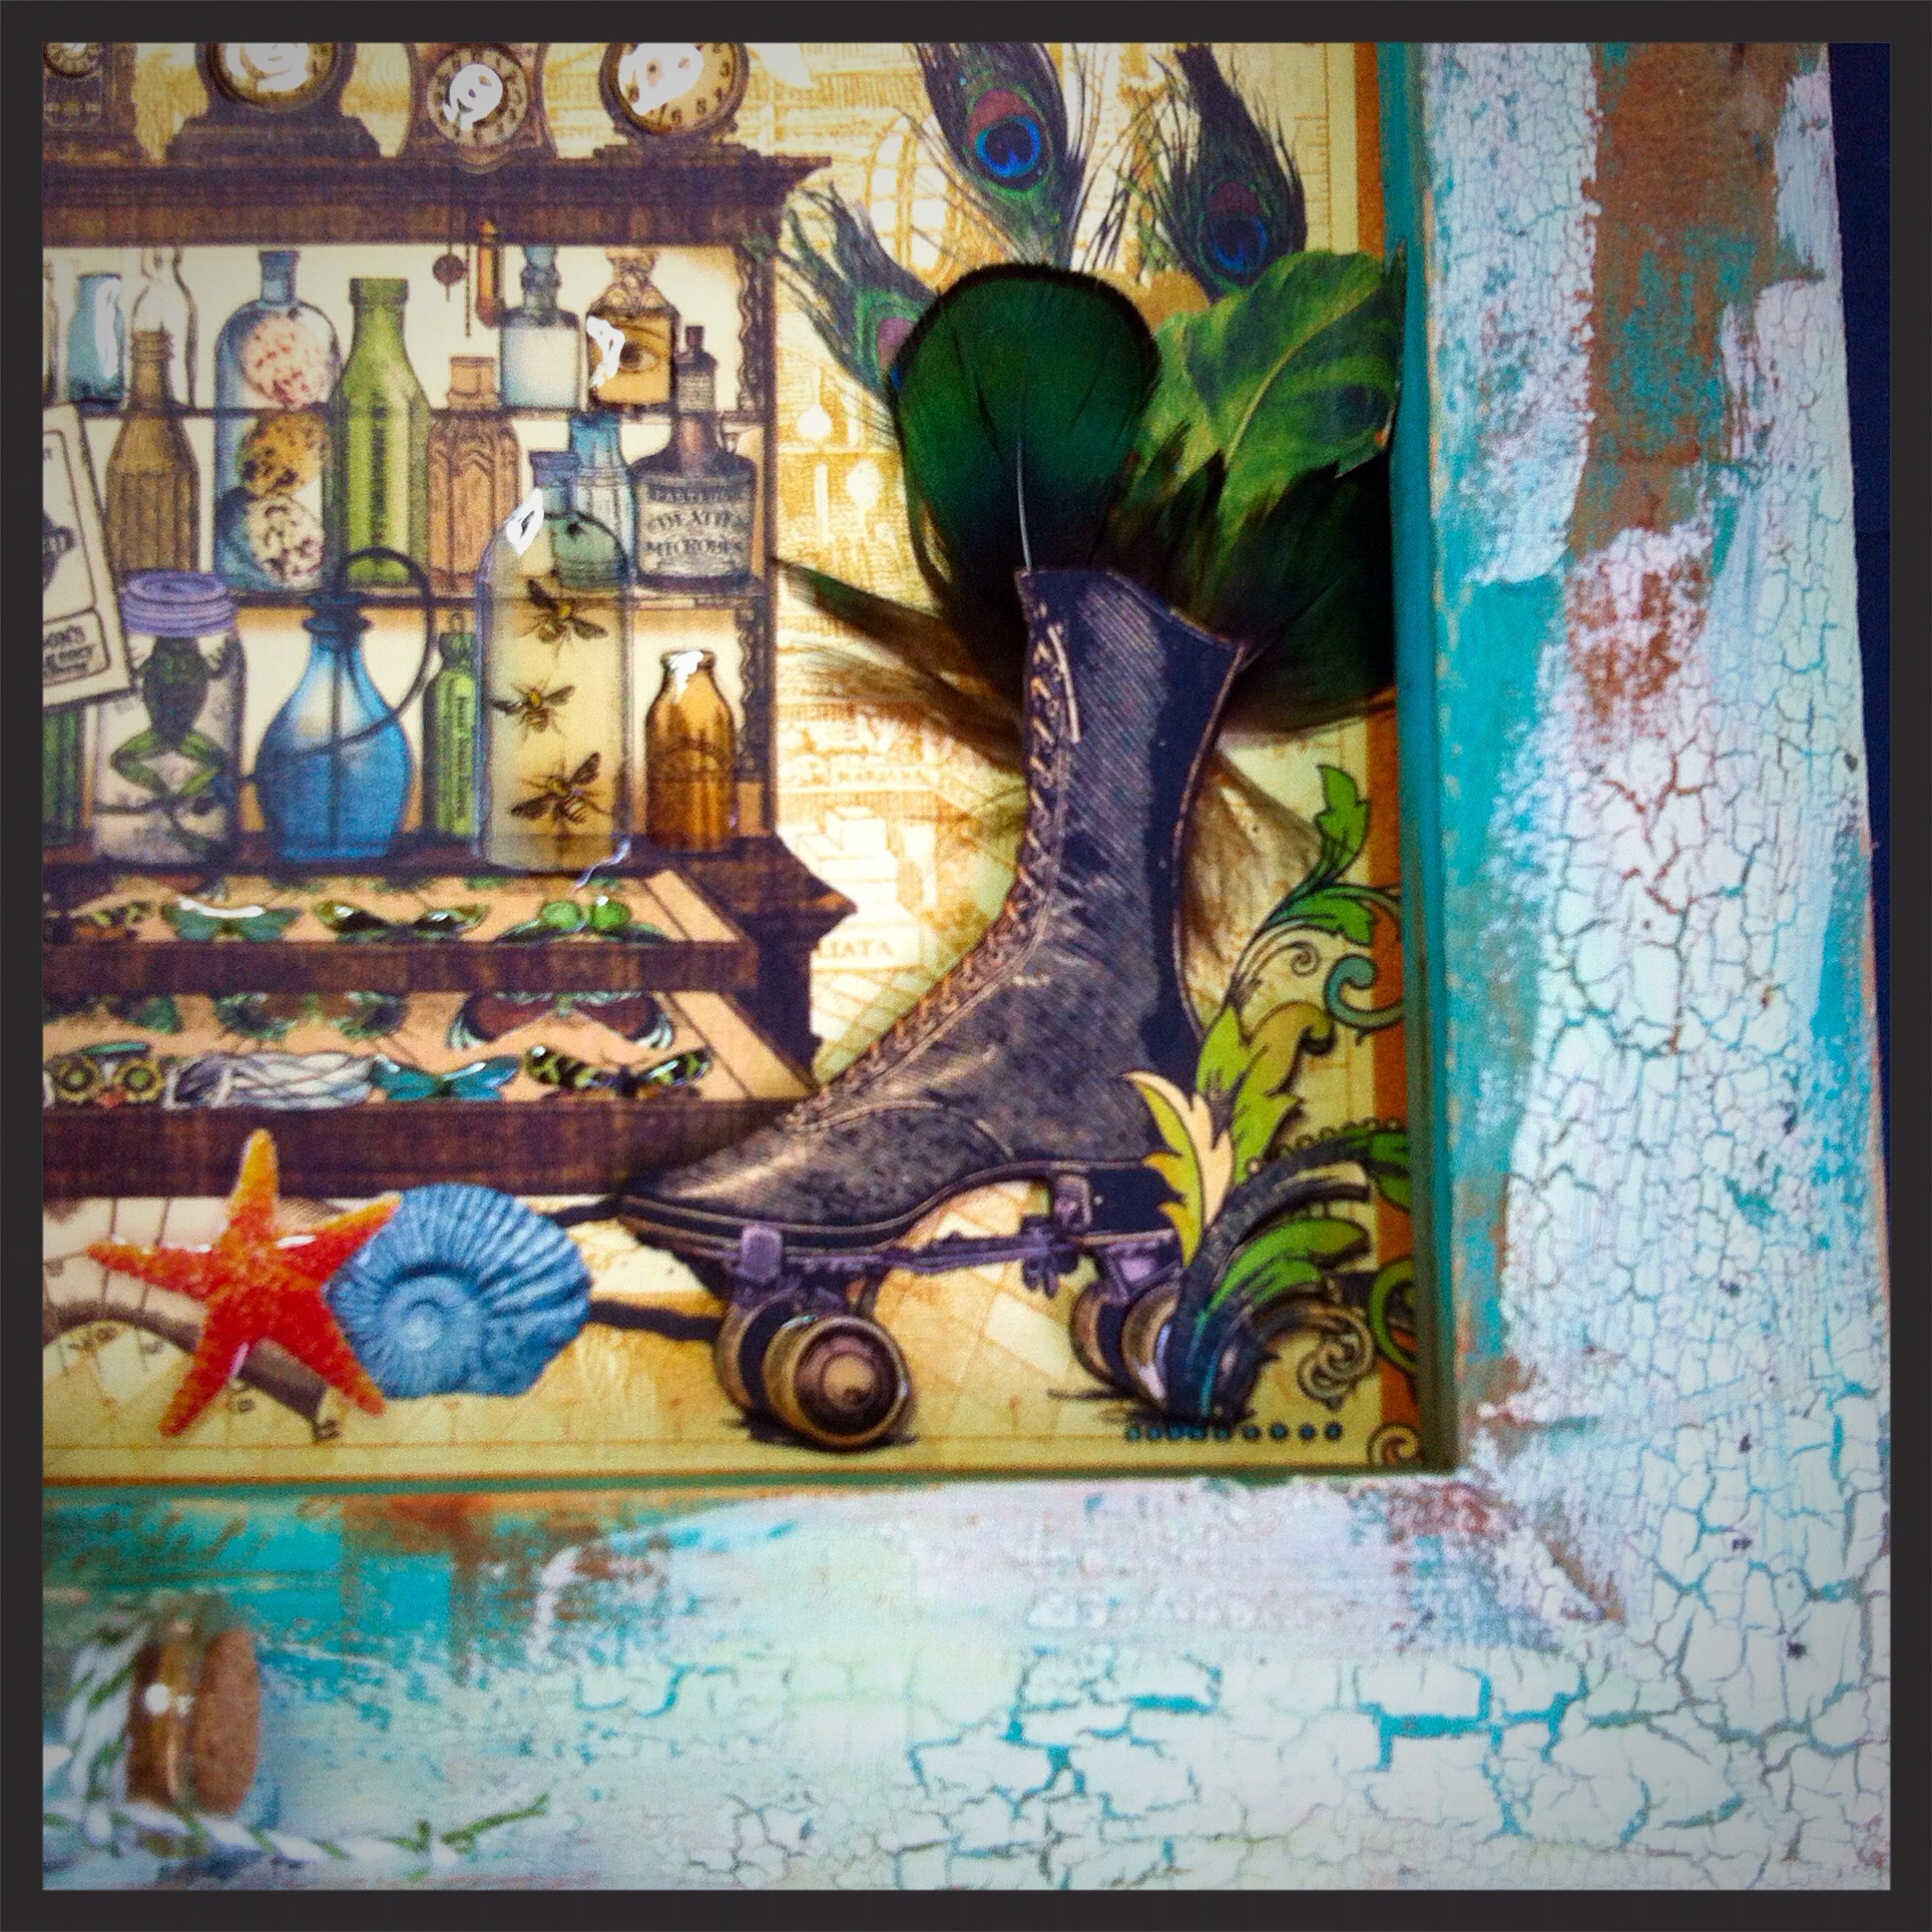
I die cut an Apothocary bottle and embossed the stamp over it then inked with blues. The splat was made with blue alcohol inks on shiny card then the shape cut from the TH new thinlets. I thought it was an amusing embellishment! I heat embossed a title with black embossing powder to complete the front.

image

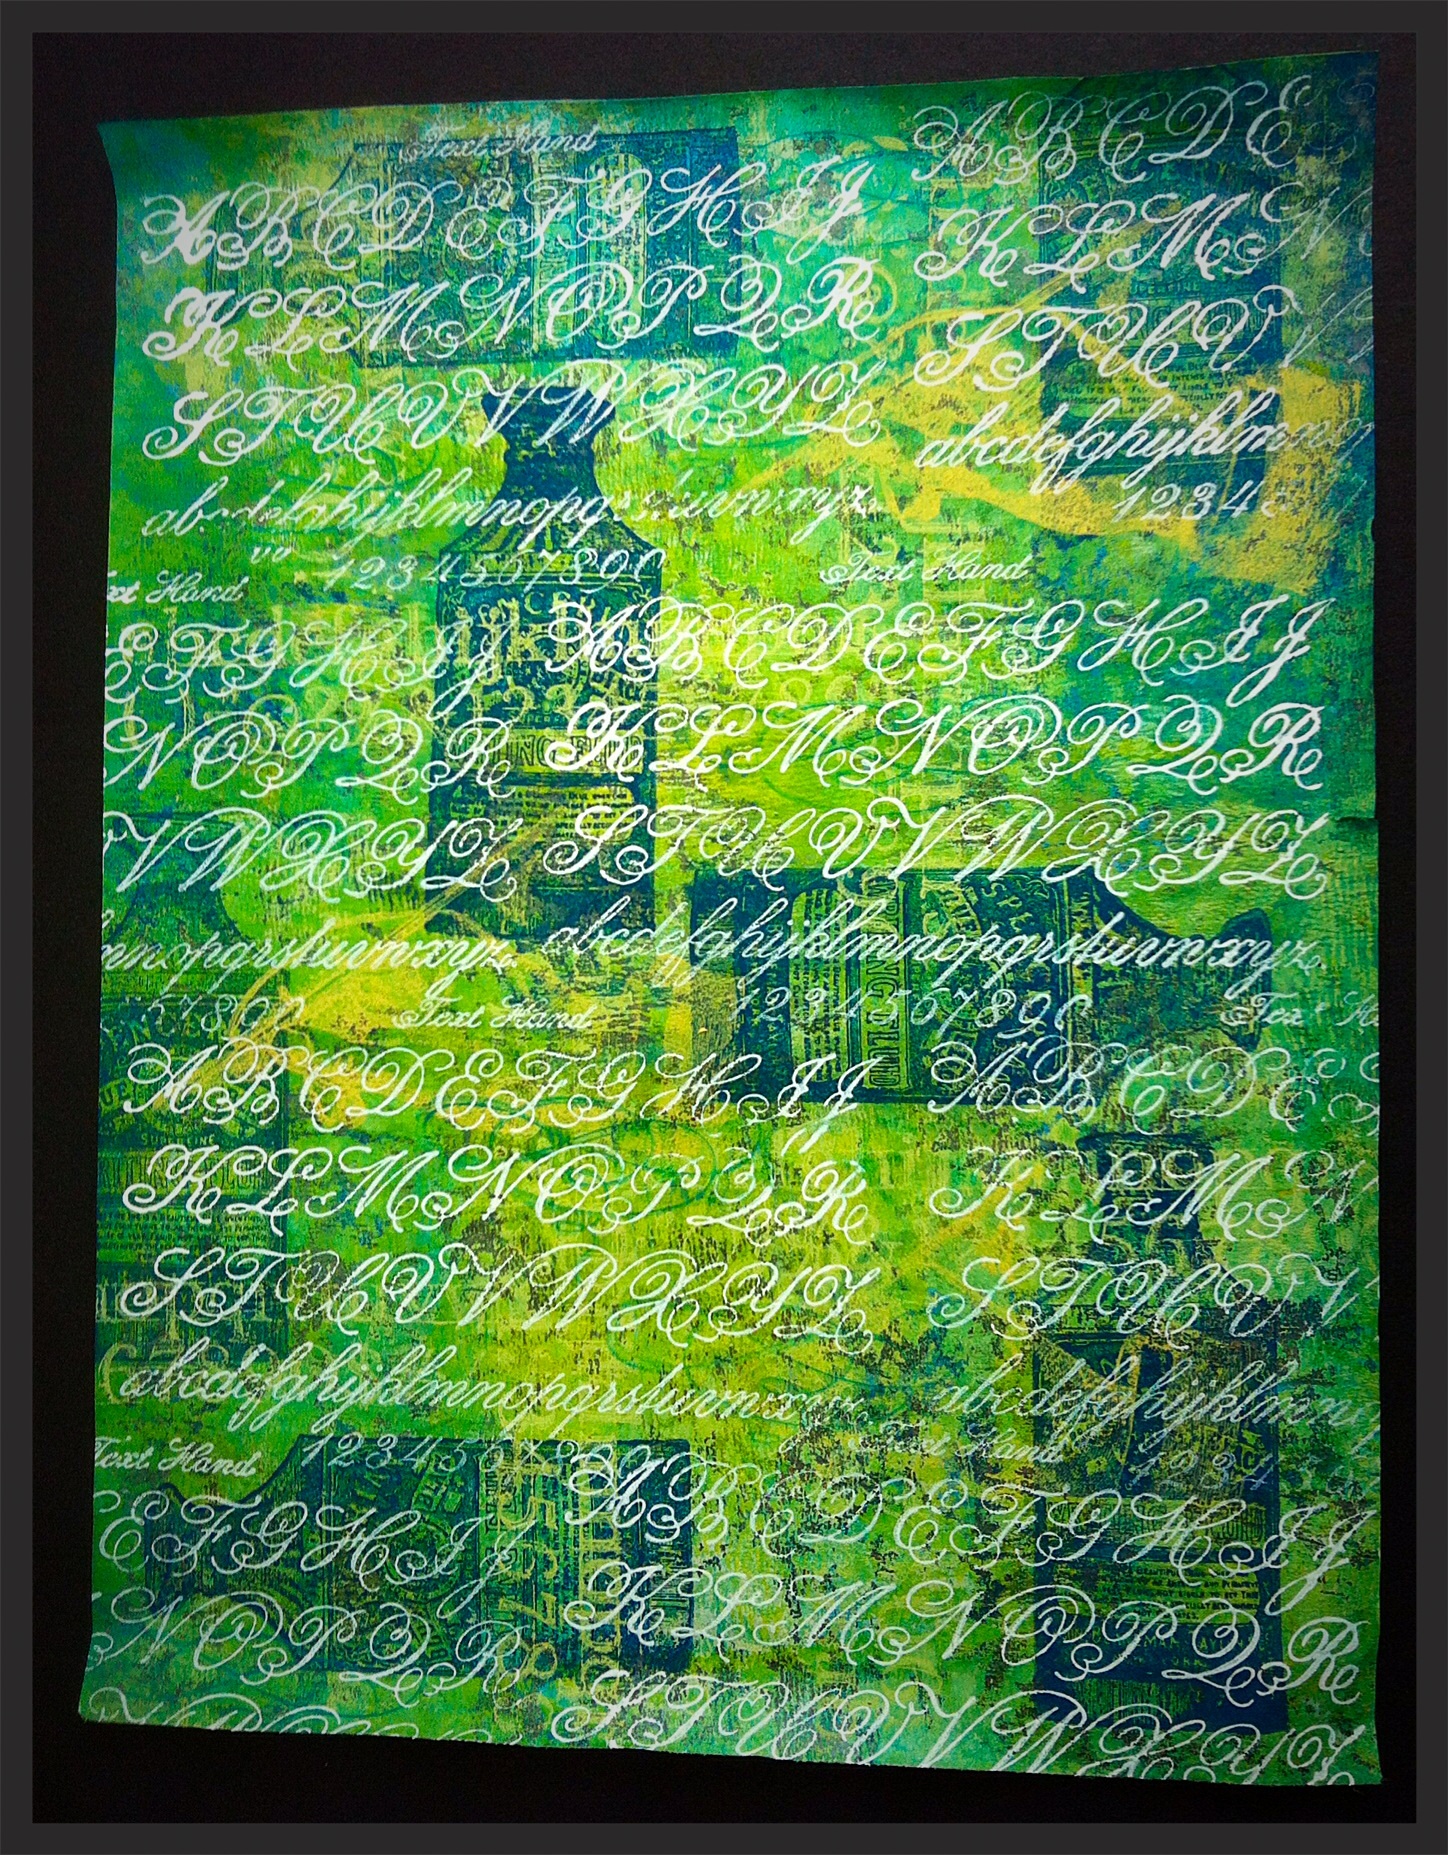
I was pleased with the final board and that I had managed to get some depth and visible layers.

I hope you are inspired to join us The Mirror Crack’d for this challenge. Check out the amazing projects the DT created with their master boards.

Jan x


Colour Your World, April Challenge at OCC

Posted on


Colour Your World

This was such a lovely challenge from Laurie! Spring is such a hopeful time, the colours are bright and fresh but there is still a hint of Winter in the air.

She said:

Here in the United States we are coming into spring – the season when nature comes forth with new life.

Soft green grasses grow in the fields and the trees bloom in glorious colors with the promise of fruit.

Tulips and daffodils emerge from the soil after a long winters nap.

The colors of spring, the sights and sounds of nature at this time of the year renews my soul.

In the spring time the colors of nature are different around the world.

For my challenge this month I want you to

Color Your World

For this challenge create a project with the colors of spring time where you live.

Show us what colors renew your soul, post your creation at Our Creative Corner, I am looking forward to see what you make.

Creative Embellishments are offering a $25 gift certificate to our randomly drawn winner!

imageI started by creating textures for a bright sparkling sky. I used Texture and Crackle pastes.

The ground had pastes and embossing powders mixed and heated to create soil.

I used Dylusions sprays when the paste was dry. I love the bright sky colours they created.

image


The layers were ripped and torn from TH Wallflower papers. I used Kraft core to die cut the leaves. Inked muslin and scrap papers from my stash were tucked in the layers and I used one of my new thinlets dies to create the swirl. I used snowflake lace for the hint of Winter.

This was the base for the layers.

image
The title was created with Fragment, I stamped some wallflower paper with the words and stuck them on with glossy accents.
I really enjoyed this challenge! Please leave me a comment.
Jan x


Sneak Peak in the attic

Posted on

image
I was inspired by S@ndy, at A Vintage Journey, to show you my work table in the Attic. I have lots of Ikea white wood storage that has been painted black then the drawers covered in Tim Holtz papers, inked and stamped. I added random drawer knobs I collected, quite a few from Tiger.
The drawers of course all hold Tim stuff!
I am joining in the challenge at A Vintage Journey, Anything Tim. Lots of inspiration there from the DT and prizes to be won.
I hope you enjoyed the Sneak Peak!
Jan x


Spring Time Tag

Posted on

image


All my friends know how much I love and use Tim Holtz products. He is so inspirational and creative. So I am joining in A Vintage Journey Challenge, “Anything Tim.”

It is the first birthday of A Vintage Journey Blog, I have enjoyed creating for their challenges, Happy Birthday and I wish you many more! I have been inspired by the DT on the blog.

I started with some Wallflower paper, I wanted a pastel Spring effect so chose a pink snippet. I used clear gesso through Lattice stencil and then covered it in Rock Candy Glitter so the original design shows through. It is difficult to see on the photo as it is quite subtle. You can just make out the stencil pattern.image
I used my new Feathers die and embossing folder and the thinlets scribble nest for the birds. The feathers were cut from vellum to continue the translucent idea from the glitter.

The little birds were fussy cut and inked. I stamped and clear embossed the sentiment using Archival Ink, Potting Soil.I used vellum again and mounted it onto a kraft card tag.

The satin ribbon was coloured with Distress Markers, Tea Rose and Shabby Shutters then spritzed with water to get a two tone effect. I found this amazing “gift ribbon” in Lidl craft section, I love the wooden butterflies. The ribbon and tag were inked with Vintage Photo, Walnut. A Tim charm highlighted with Treasure Gold finished it off.

I really enjoyed creating my tag.

I have just come accross a new blog challenge site, Mixed Media World and am going to enter my tag in their first challenge.
Hugs
Jan x


Australia Folio

Posted on
The front cover

The front cover

What a great invention this folio was! It is perfect to house collections of photos, bits and bobs, ephemera, journalling and wherever your imagination takes you. However, there is so much space it took a long time to get the pages organised and this will be an ongoing project.
I am going to enter Challenge 23 from Compendium of Curiosities on Linda Ledbetter’s blog. The challenge from Tim’s book is on page 34 of volume 3, such a great reference book.
The blog is photo heavy, hope you enjoy looking!

Inside the folio

   When you open the cover there is a map of Australia leading on to the wet tropics and lots of photos and things I collected when we visited. I did some journalling on airmail envelopes, snippets from my travel diary.

   I loved the slogans on the car number plates for the different states.

image      image


I used some Project Life photo pages cut down to make fold out flaps. The are some cards for further journalling.

image         image


image I still have room for a couple more pages!

The sponsor for the Challenge is Inspiration Emporium, there are some great prizes!

I was inspired by the amazing Design Team, they really were all inspirational, check out Lindas blog to see for yourself.

Hugs Jan x


Mothers Day card and gift box

Posted on

image

It’s March again, the year is flying by! Mothering Sunday is close and I made a card and matching gift box using G 45 Artisan papers and stickers.

image

I layered both sides of the Decorative Flourish paper with black to cover a black card. I used the buckle from Chipboard 1 and a Cardstock sticker in the center.

I love this alphabet, it reminds me of Charles Rennie Macintosh style. All the papers and letters were edged in black. The belt is a glossy black card which doesn’t show up in the photo but adds a nice contrast. I put a strip of lace underneath inked with Distress Ink Tea Dye.

image

The gift box started life as a tin of travel sweets I picked up at the airport. I cut a strip of paper to cover the side and stuck lace around the middle. Then I added a die cut circle of paper on the lid with a card label.

The rose and the leaf papers are from Artisan Style Patterns and Solids which were die cut with TH Tattered Pinecone. A couple of dots of glossy accents completed the tin.

This was a fun project, the Graphics 45 papers all mixed and matched so well.

This is my second project for Jones Design Team, hope you like it.

Hugs

Jan x


Graphic 45 Spring Night Lights!

Posted on

image

I love Christmas decorations around our home, I have lots of candles and fairy lights everywhere. The house looks so dull afterwards that I thought I would make a Spring Night Light feature for our mantelpiece.

The Graphic 45 Artisan Style papers were perfect with the G45 Window Shadow Box . A lot of fussy cutting from the first page, Artisan Style. I cut 2 of the door motif for the central recess and layered them to allow room to open the main doors. I used panels from Creative Ideal and the Ephemera pack for the sides and glossy accented the patterns.

image

I love the peacock and he seemed perfect to be strutting along the front and the colourful flowers balanced on the left. The flowers were cut from Decorative Flourish.

image


image


The flickering battery night lights looked very plastic so I made covers from paper in the Patterns and Solids. I used Martha Stewart punch round the top to give an extra pattern with the lights. I actually used green paper in the end rather than blue in the photo.


The piece needed some height so I added Tim Holtz legs!

This is my first project as a member of the Jones Design Team, I really enjoyed using the papers.

Hope you enjoyed looking, thanks for dropping in, please leave me a comment.

Hugs

Jan x


Wings – The Mirror Crack’d DT

Posted on

Wings
Our theme  at The Mirror Crack’d for this month is Wings. We want to see ANYTHING (apart from cards) you can create with wings.

Our host is Lin, and she will be choosing our Winner and Top 5.

Instead of a physical prize this month we would like to offer our Winner a Guest Designer spot for a future challenge.

imageWe hope our fabulous Design Team can inspire you. Please pop by their blogs and show them your appreciation.

I created a shadow box and used my favourite G45 paper to make the picture, I added mechanical wings to the female to let her fly, the poor thing looks so sad! I added feathers and butterflies in the bottles. The frame has lots of distress elements. It was fun to make but difficult for me to move away from butterflies, birds and dragonflies to stick to the Wings challenge!


I painted the frame with Distress Paint in shades of blue and green plus some copper. I painted Distress Crackle Paint in Old Linen over the top in areas, love this effect. Some crackle paints seem to work better than others and this is the one for me!

image

This is my favourite G45, Old Curiosity Shoppe paper, I have been saving for ages, the time has come to put it on display. I put glossy accents on different motifs to highlight them and added wings made from Plumbers Tape. The tape is stuck onto card then dry embossed with TH Cogs and Gears folder, then painted black and the paint wiped off after a couple of minutes so the black only and adheres in the recesses.

I had some irridescent  feathers in my stash which were perfect to tuck into the roller skating boot and a small bottle to continue the wings theme.


I had to get some butterflies in somewhere, so rubbed D I stress markers on my TH Pappillon stamp, stamped and cut them out and put them in a bottle.

image

I finished with cogs die cut from and on the edge die

then embossed with Vintage Photo powder and

a couple of card tags from the G45 set.

I hope you have been inspired by the team

I am looking forward to seeing your creations!

Please leave me a message, I appreciate your visit.

Hugs

Jan x


Junk in your trunk! OCC March Challenge

Posted on
image

The finished cupboard

Today is the start of the March Challenge from Our Creative Corner!

Create something out of any kind of junk and re-fashion it either into something useful, functional or beautiful for                                                        the JUNK IN YOUR TRUNK challenge this month.

Candice, our host, is leaving the challenge open to your interpretation of what constitutes “Junk”

I am leaving the challenge open to your interpretation of what constitutes “Junk”.
It may mean a set of hideously patterned china that you want to smash up and a make a mosaic…
It may mean reams of patterned paper you have lying around that you turn into a collage masterpiece…
It may mean doing something with skeins of wool that you intended to make a a sweater with…
It may mean doing something with rusty keys,nuts and bolts and random pieces of wire that you pick up off the street…
It may mean using the strings on an old harp to make a cheese-cutter…
It may mean making a robot out of Aluminium Roof Flashing!!!

You can create whatever you want to, however you want to and with whatever you want to.

The only rules are that your project MUST contain something that you have reclaimed or recycled. ”


image


I started the transformation by adding die cut cogs from TH on the edge range. I used fine corrugated card so they are quite chunky. The door was covered in glue then thin tissue paper was scrumpled on the make ridges. I used Grunge Paste through a range of stencils to make lots of texture. I added sticky mesh for a different texture.

Where the door overlapped to close a band of embossed Plumbers Tape was run between.

I started collecting metal embellishments from

image my stash, bottle tops, buttons and beads to stick on the front. I used TH clock dies with Plumbers Tape inserts which had been dry embossed with cogs and gears then painted black and baby wiped. ( My favourite technique!)

When I was happy with the arrangements I stuck it all down with Finnabair 3D Paste and added her glass beads to any excess glue around the embellishments.

It looks a real mess at this point! BUT once it is all painted with black gesso then all the highlights tickled with treasure gold WOW!


image This is how I found the CD cupboard in the loft. It had been my daughters 20 years ago! I found some old CDs of her favourites as a teenager.

I now have a place to keep my dies ( And room for more!)

I used Tissue Tape on the edge of the shelves.image

I hope you have been inspired to transform some of your own junk and play along at Our Creative Corner.

The sponsor this month is Crafty Individuals,

you could be the winner or make our top three!

I am looking forward to seeing what you create!

Please leave me a comment, I appreciate reading them,

hugs

Jan x