Winter Dawn

Posted on

Winter Dawn


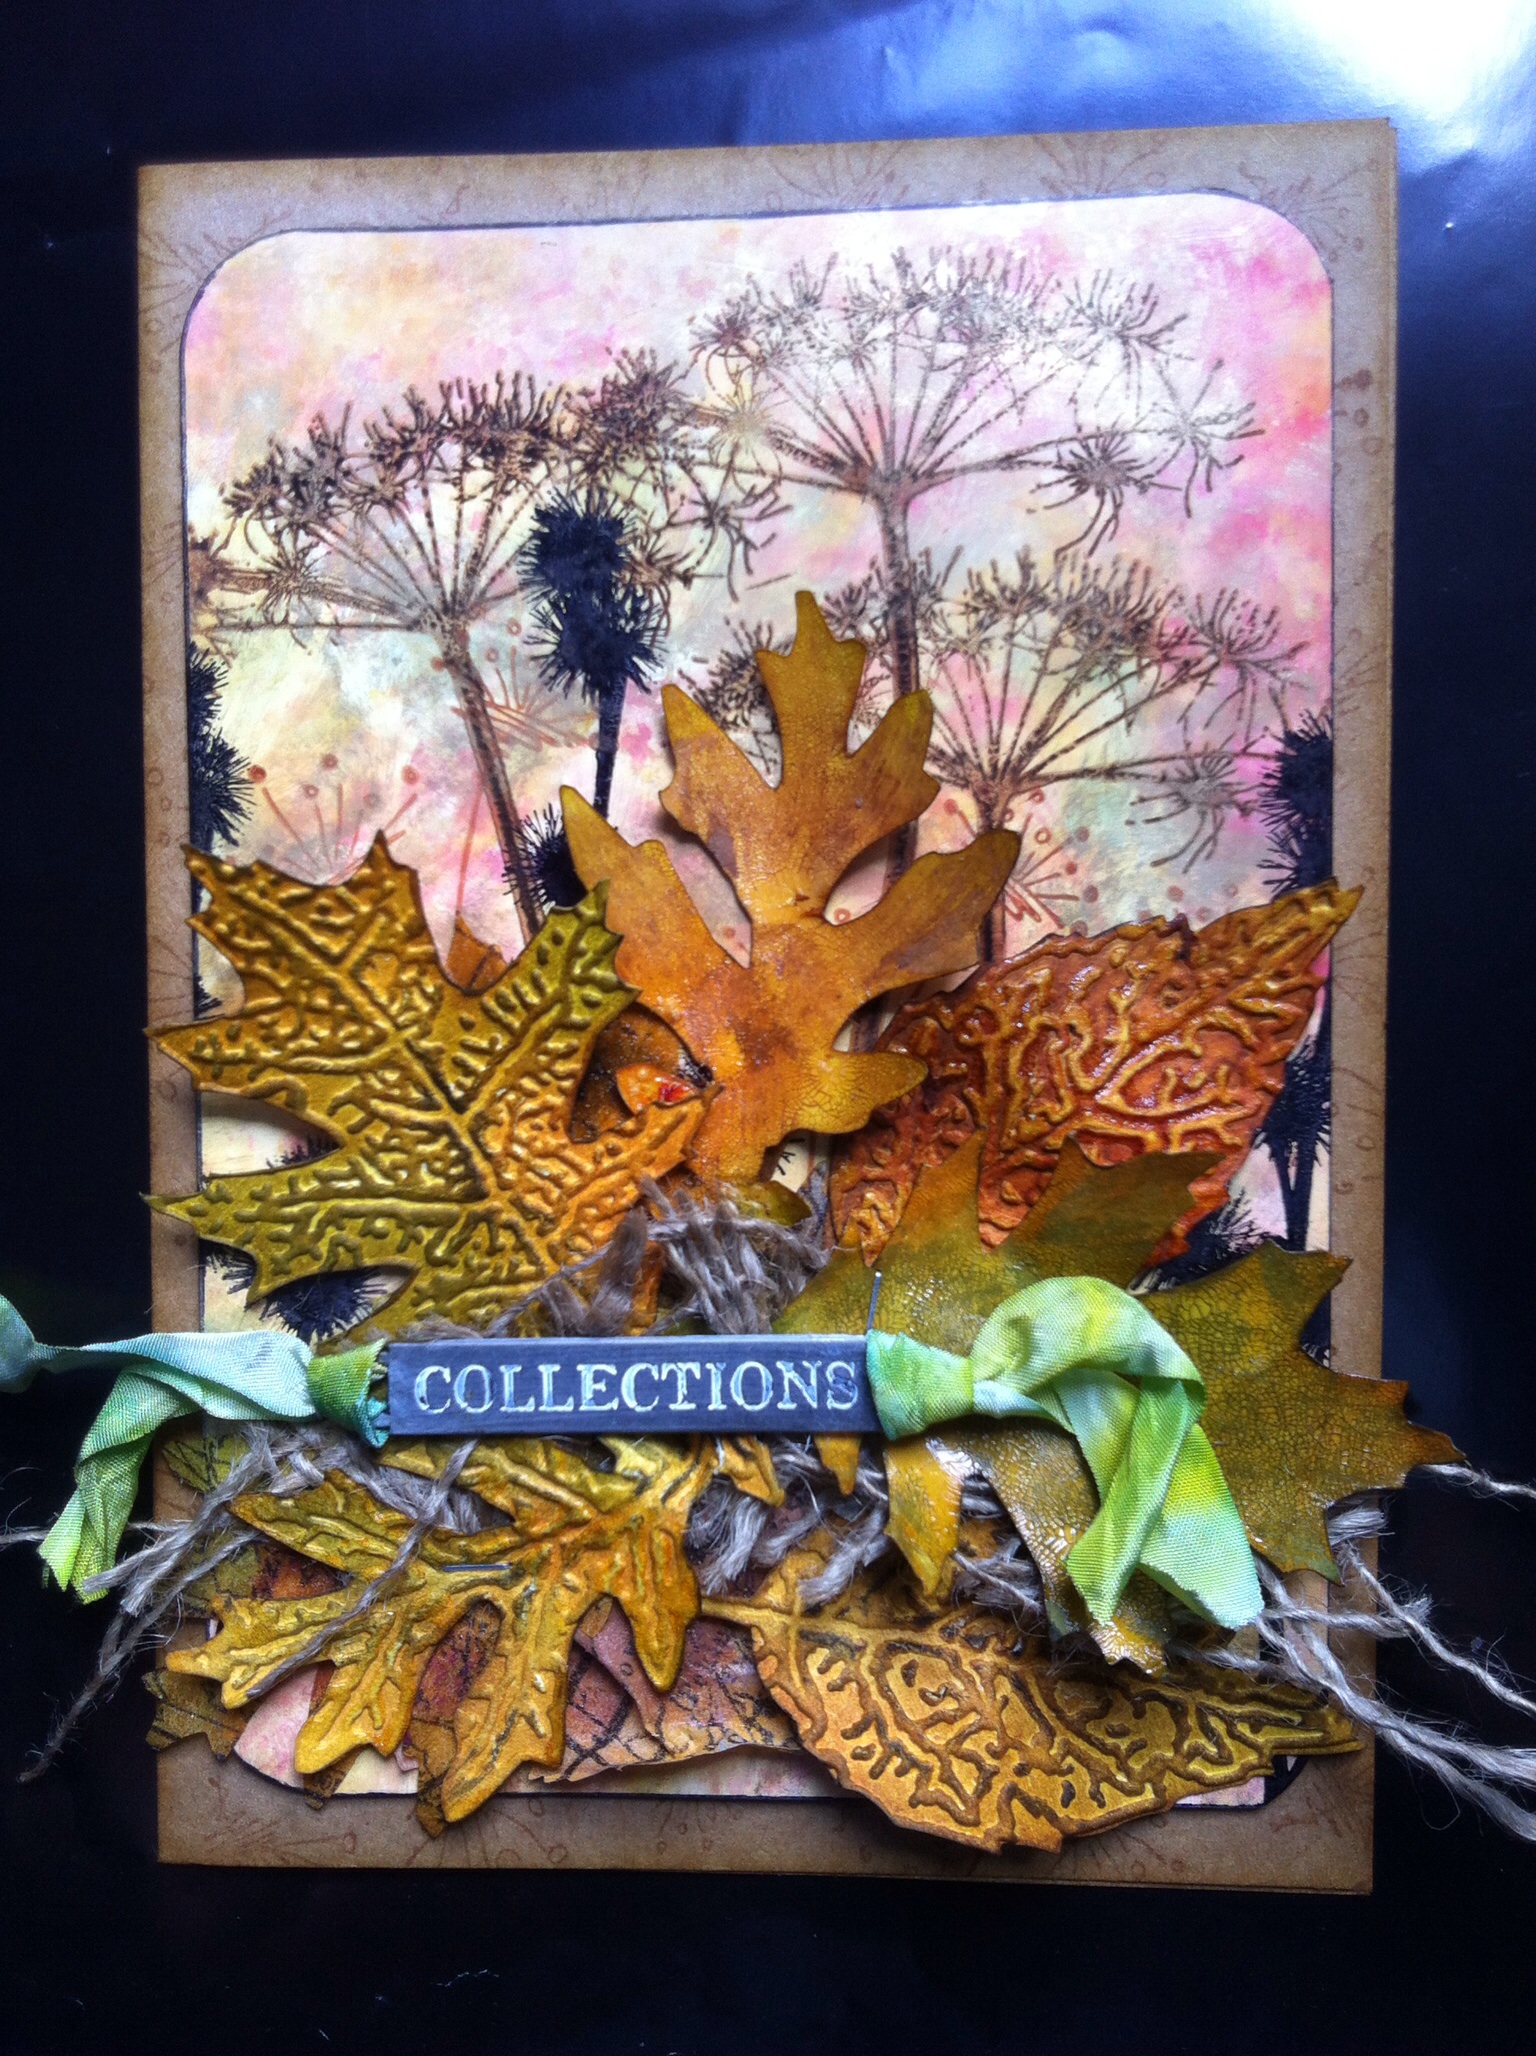
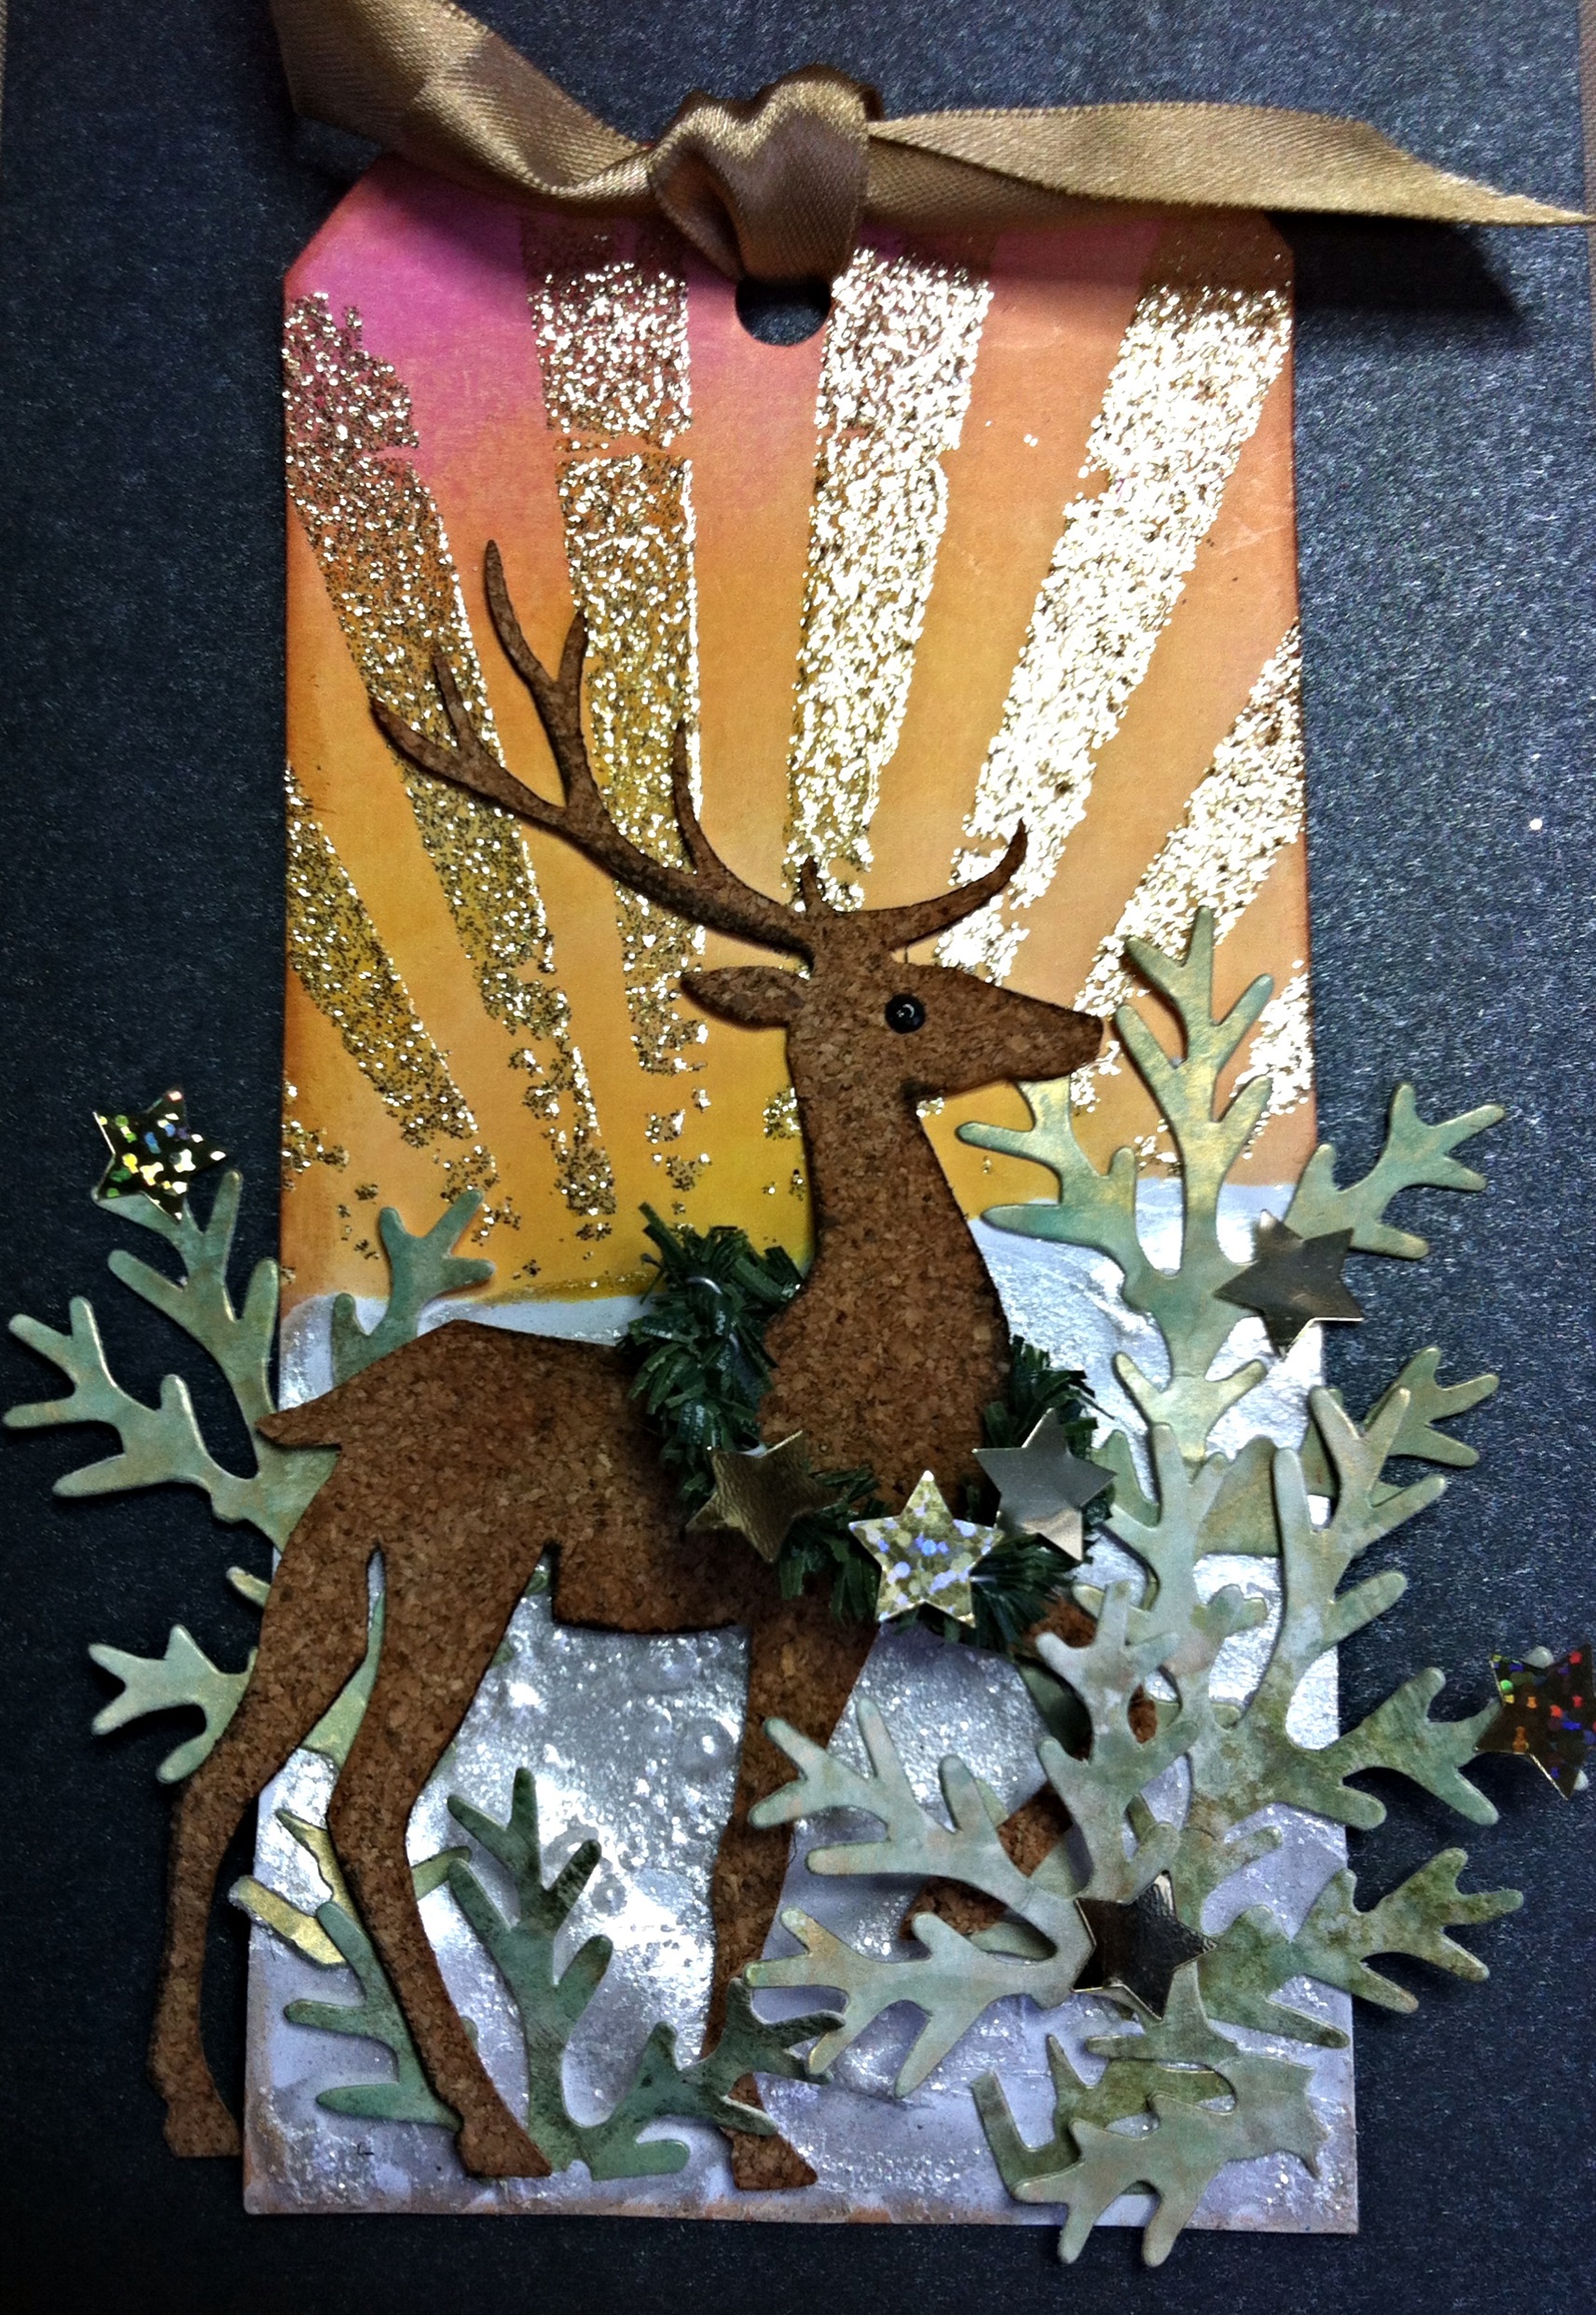
I wanted to create a backdrop for my new TH Prancing Deer die. I used Distress Inks, Mustard Seed, Scattered Straw, Spiced Marmalade and Picked Raspberry to make a sunrise effect.

Then I used Tim’s Layering Stencil Embossing technique over the top with Rays stencil and Wow Gold Highlight embossing glitter. You will need to read P50 of “A Compendium of Curiosites” yourself to recreate the technique!

I stood the stag on a Pearlescent Texture paste snow which I heated so that it bubbled. The Tattered Pinecone die cut leaves were coloured with Alcohol inks to look frosty.

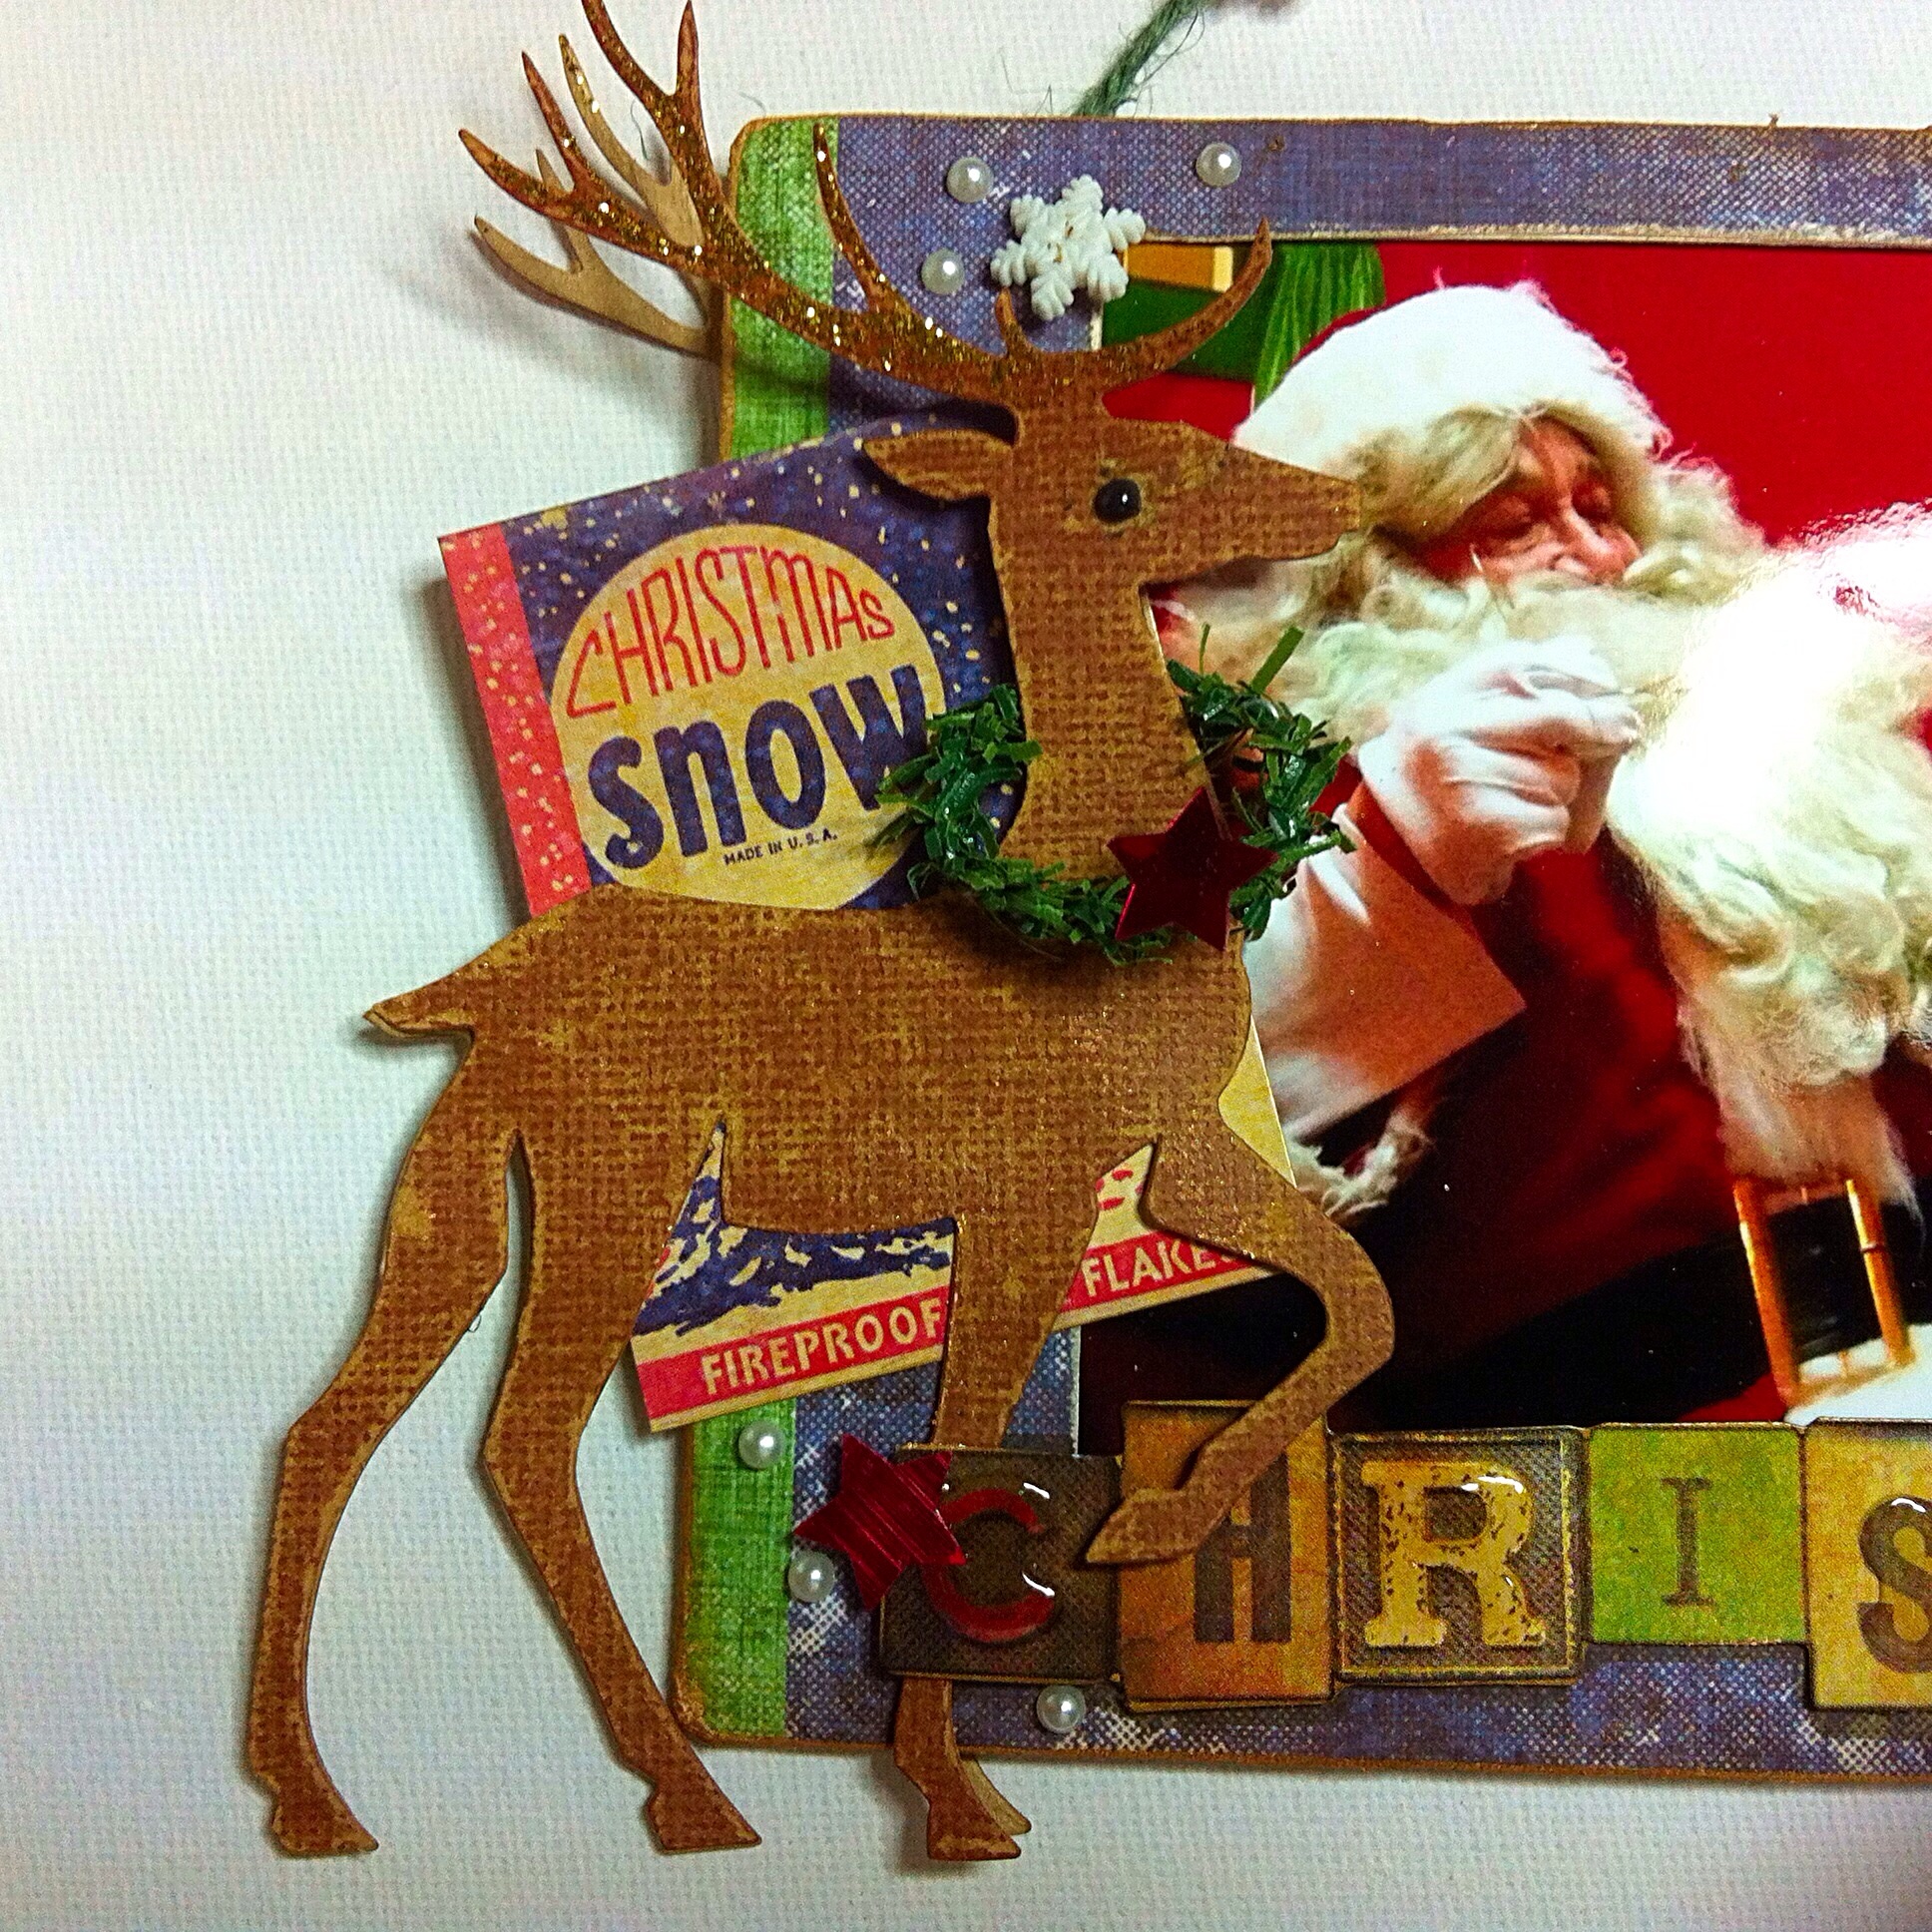
The Prancing Deer was die cut from thin self adhesive cork and inked. I made a garland out of Tim’s Pine Twine. The Deer has gathered falling stars to decorate it!image

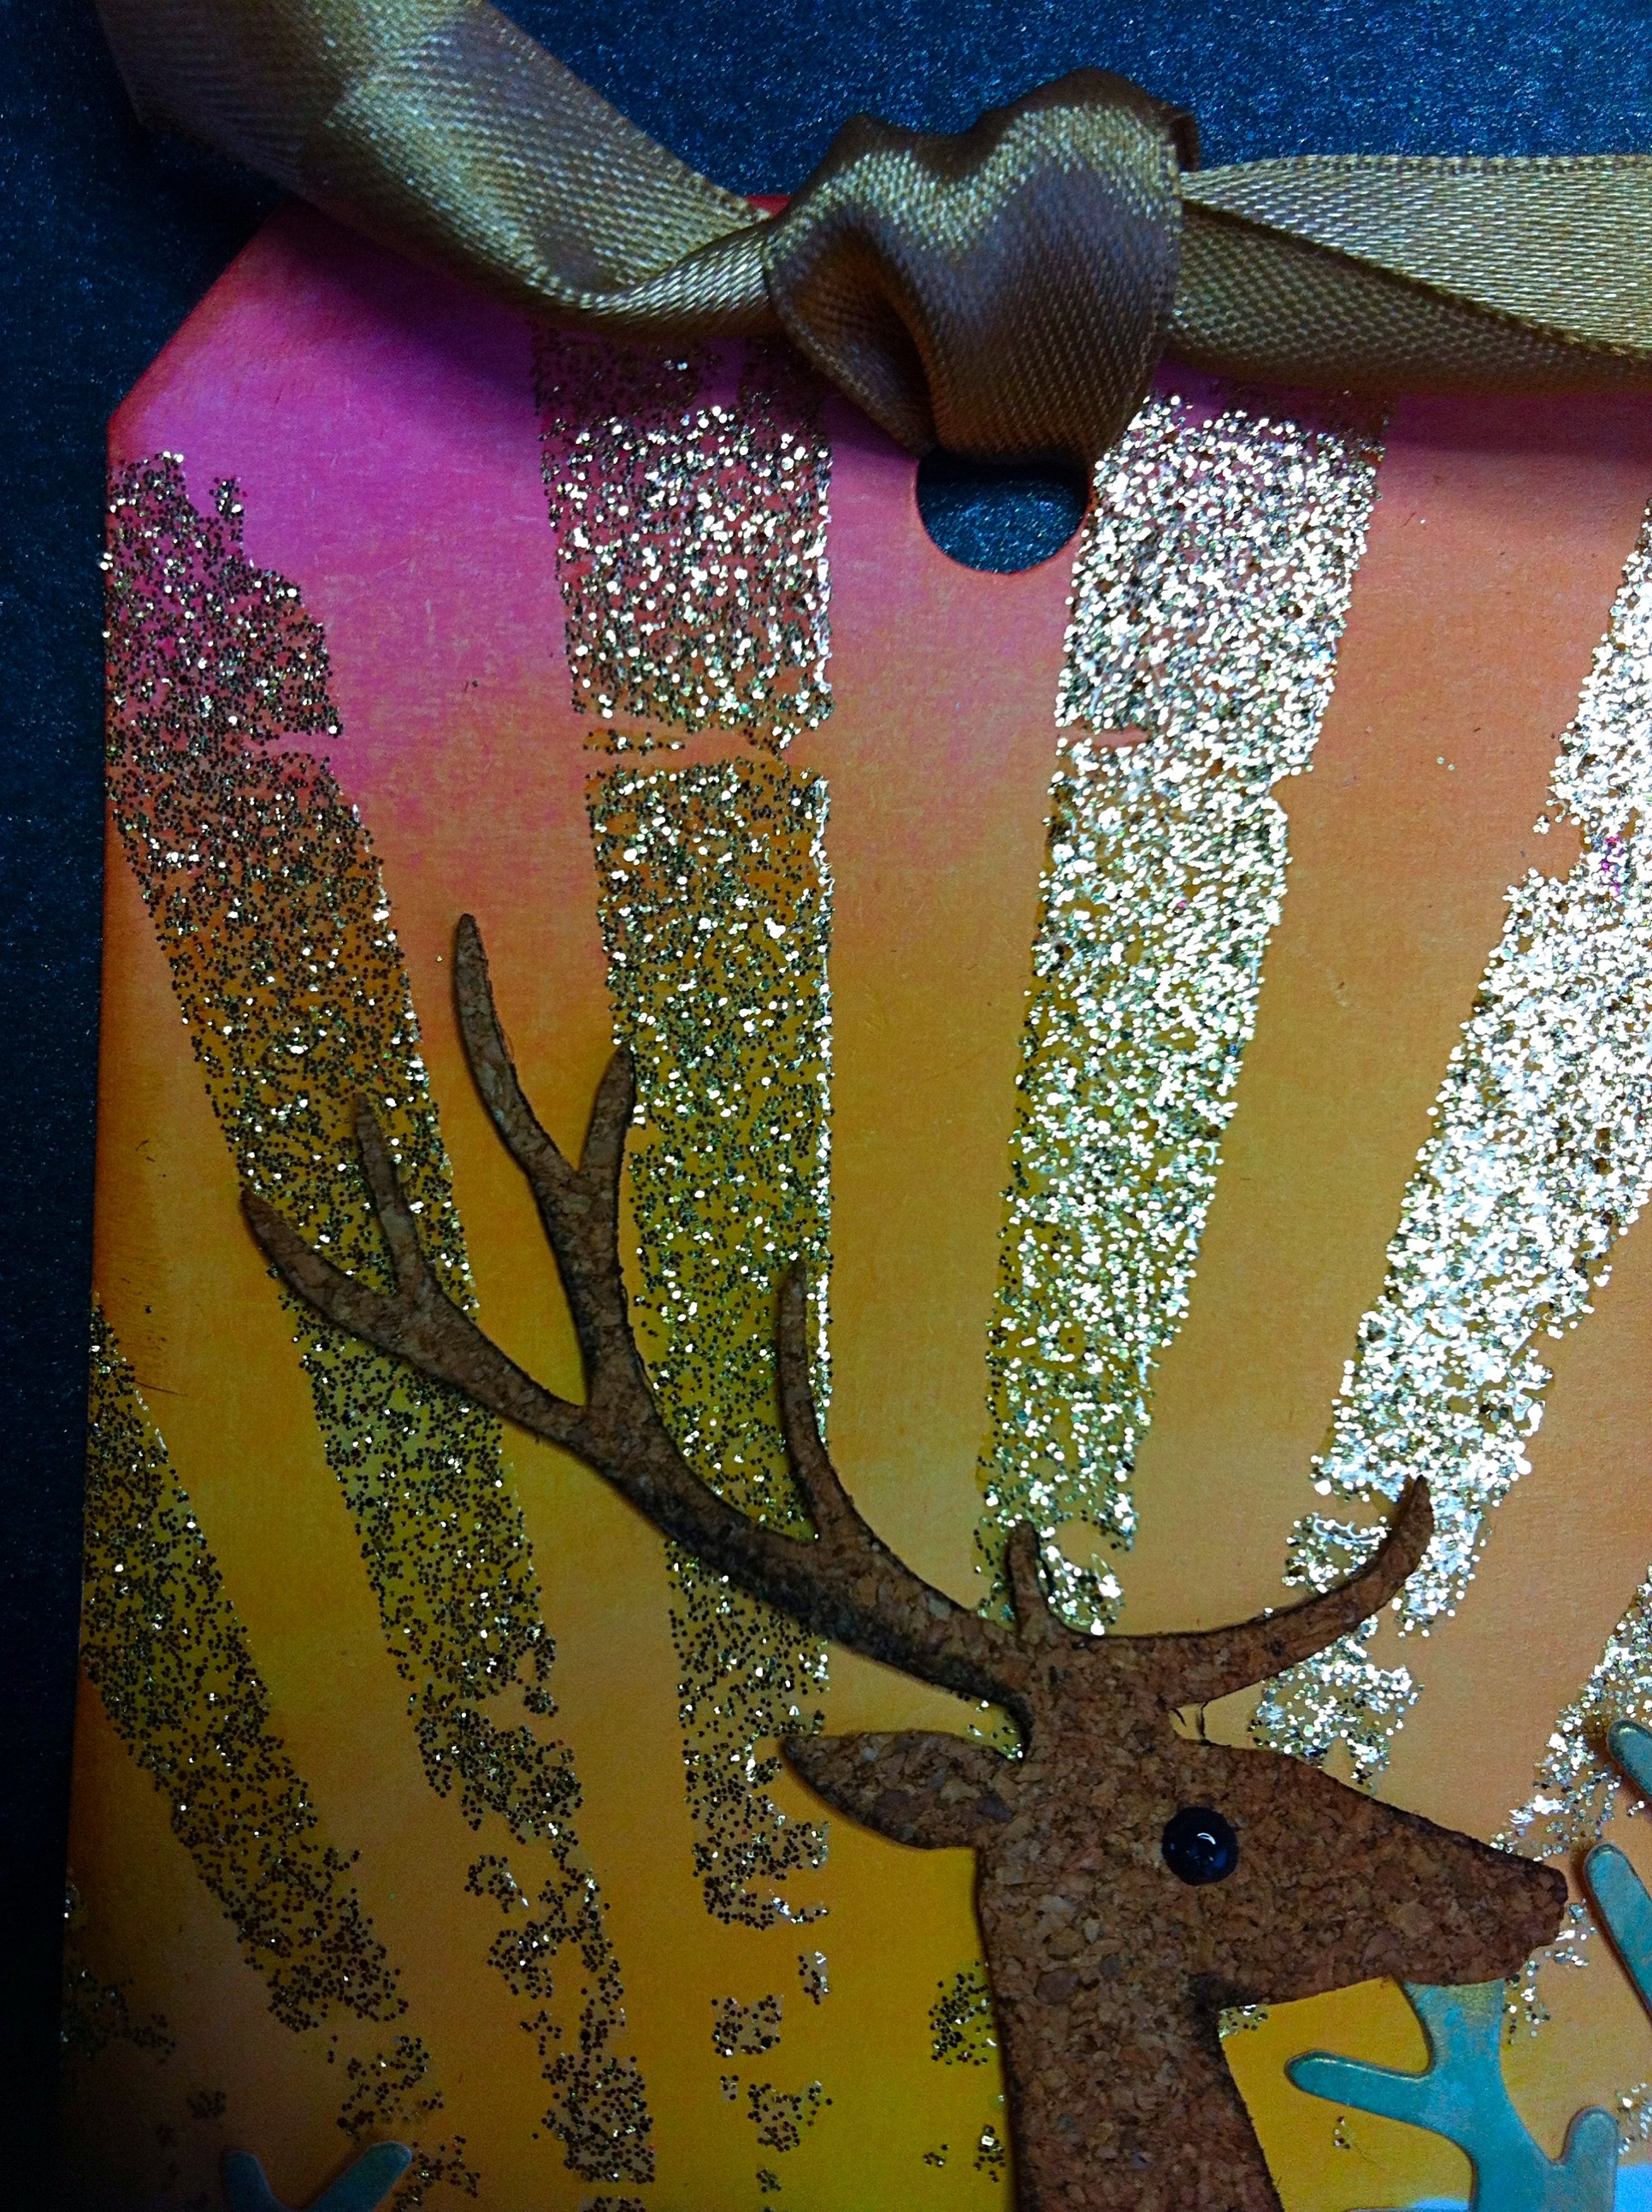
The Deer will have a page in my Tim Holtz die cuts album which has been neglected for some time now.

I am entering Challenge 16, on Linda Ledbetter’s blog, check out The Curiosity Crews work. The prizes are sponsored by Tim and Mario and The Funkie Junkie Boutique.


All Sewn Up

Posted on

image


This project grew and grew! It started off as an idea for a card, then became a scrapbook page then ended up as a canvas. I seem to have so much sewing related stuff of Tim Holtz, dies, layering stencils, embossing folders and stamps. Always an inspirational place to start.


I used Wallflower paper with a sewing image, then stencilled Measured with gloss gel paste and inked Latticework with Mown Lawn and Vintage Photo.

I hand sewed the zip to get more texture and pattern on to the project. I used Sewing Room and On the Edge dies and layered them with more paper, muslin, lace and ribbon stained with Crushed Olive, Wild Honey and Vintage Photo. I dry embossed parchment paper with Pattern and Stitches Set then inked with the same colours and used it to layer.


I added all sorts of embellishments and a definition of sewing.
The project then got too big to assemble so I painted the back of a canvas with Crackle Paint, and stencilled the canvas.
Touches of Treasure Gold were added here and there for sparkle.


image
I will enter it into A Vintage Journey Challenge, All Sewn Up. I hope you enjoyed looking at it, not sure where it will live, maybe it will be a present for a friend!
Please leave me a comment, I do appreciate it.


Christmas Cabinet Card

Posted on


image

What an interesting challenge from Linda Ledbetter on Compendium of Curiosities Challenge 15. The book is by Tim Holtz and you need your own copy to discover the techniques he uses. I had bought a packet of Cabinet Cards ( of course!) but wasn’t sure what to do with them. I was inspired by Candy Colwell’s DT creation, using the card for a tree decoration. Check out Linda’s blog for all the inspirational work.

image


My photo captures Arabella’s first visit to Santa when she managed to snatch his glasses off his nose! He was not impressed but she thought it was hilarious. She was only 7 months old, with Daddy, her first Christmas.

image


I covered the cabinet card with Holidays Past TH paper, and used my new die, the Prancing Deer and Tattered Pinecone. I used some seasonal stickers, journal ticket and then embossed Merry Christmas on core’dinations for the back. I used 2 stags to make him more sturdy and gave the front core’dinations deer a Pine Twine garland and red star. I finished it off with a few snowflake buttons and tiny pearls, Treasure Gold and gold Stickles for sparkle.


imageI made a tag to fit under the photo, covered in Holidays Past paper and stamped with Wonderful World.


I had fun making the Cabinet Card and think Arabella will treasure it in the future.

image

I am inspired by Tim and used lots of his products and techniques making my Cabinet Card.

The challenge is generously sponsored by Inspiration Emporium and there are goodies from Tim and Mario to win!

Please leave a comment, I do appreciate them x


To Die For….

Posted on

To Die Foe
I have had a roll of Tim Holtz frosted film for a while in my stash and wanted to create some Apothocary Bottles with mysterious contents for A Vintage Journey challenge.

I used Tim’s dies, Apothacary Bottles, Tags and Weathered Clock. I inked the bottles with DI in Spiced Marmalade, Peacock Feathers and Wild Honey, then stamped images from my very first Tim Holtz stamp set. I used seasonal masks for the bats and cat. The film was die cut and stuck on top. They were stuck onto a die cut tag made from packaging.

The tag was assembled on Seasonal Halloween paper with the clock, Wow Tarnished Silver embossed grunge board in skull and date shapes.

Some black ribbon and wired sparkly ribbon finished off the tags.

I had fun creating this, I love Umbrella Man!


Heavy Metal

Posted on

What a busy week! And the weather?? Still I found time to relax and make a “Heavy Metal” piece for A Vintage Journey Challenge. I have just discovered a great blog, Our Creative Corner, check it out there is some lovely work there. Their challenge is Go Rustic which fits my project too.

Heavy Metal


I love metal embellishments, steam punk and all things grunge so I was happy with the theme.

I chose a mini printers stand from Tando I found in my stash. The front is built up of layers so I thought I could sandwich things in between to create depth even though it is a tiny piece. I covered the top frame with Industrial tissue tape.Background

I built up the base using Tim’s Eroded Metallic and Painted Industrial techniques from A Compendium ofCuriosities vol 3. I wanted a contrast so used metallic embossing powders and crackle paint. I cut up the four backgrounds to fit the apertures in the frame.

Layers


The Steampunk On The Edge die was perfect to fit into the layers. I corroded the card with Vintage Photo distress embossing powder and scattering a of frantage.


I think of the Eiffel Tower as a heavy metal structure and found some Artistic Outpost stamps which featured the Parisian landscape. I stamped onto thick plastic with Archival ink and dabbed alcohol inks on the back. This was layered over the background. I added stamps and metal embellies and triple embossed key and keyhole.

There is a cute stand to put the frame onto, I painted it with bronze DP. I am quite pleased with how it turned out.

I won a Pinworthy Badge! So excited!I won a Pinworthy Badge!

Hope you like it too, I do appreciate reading comments if you have time to leave one.


Jane Evelyn Mary

Posted on

Jane Evelyn MaryWhen my beautiful Granddaughter, Arabella, was born my daughter decided to give her a middle name, a family name, Evelyn. This is a photo of my Grandmother, Jane Evelyn Mary Jones, Arabella’s Great Great Grandmother! I think was taken around 1914. She always seemed very serene to me as a child, I never heard her shout or get angry. We had fun together, she could still touch her toes in her 70’s despite severe rheumatism.

When Challenge 12 came up on Compendium of Curiosities Challenge for Tim Holtz Distress Photo Tinting Technique this seemed the perfect photo. You need to read Tim’s book, The Compendium of Curiosities Vol 3, page 41 to find out details. There are some great inspiration pieces from the design team on the blog. The Funkie Junkie is sponsoring prizes too.

I used Tim’s embossing folder, French Script , I DI with Vintage a Photo, Tattered Rose, Tea Dye, Picked Raspberry and Victorian Velvet, then highlighted with Treasure Gold. The lace and ribbon was stained with Victorian Velvet, Spun Sugar and antique Linen.
The roses were made from Cor’dinations cut from The Pine Cone die ( she loved roses). The ornate frame was heat embossed and inked with Black Soot. I used computer generated words for her name.

Making this new page for my album brought back lots of happy memories.


Paperartsy September Challenge

Posted on

I wanted to make a birthday card for a friend who is very crafty and try something new. I spotted the metal art Lin Brown had made a demo for and thought I would try it. I love her bullrush stencil so I used that with Paperartsy metal and tools I bought from them a few years ago. They were very forlorn in a cupboard!
I enjoyed making the image, covered it with Little Black dress paint and then put different colours of Treasure Gold on top to create the moon and grasses round the bulrushes.
I will enter it into the September change at Paperartsy Blog.
I had fun creating the card, hope you like it x


The Colours of Autumn

Posted on

I got a Pinworthy mention!

I got a Pinworthy mention!

I love Autumn colours, especially the leaves on our Acer trees. We usually take a trip to an Arboretum to take photos. This inspired the pile of leaves.

Tim Holtz products are great for the colours I needed, plus the die and Texture Fade, my piece is totally Tim apart from the stamps!

I used Alcohol Ink to create a background of swirling Autumn colours with gold. I stamped some Paperartsy and Jofy seed heads on top with Archival ink.

The leaves were cut out using Tattered Leaves die. I used card and Postale Tissue Wrap. The Tissue was painted with Distress paint ( Wild Honey, Mahogany, Pine Needles and Vintage Photo)and then embossed with Frosted Crystal Antiquities. The card was DI inked using a variety of colours, Spiced Marmalade, Crushed Olive, Peeled Paint, Vintage Photo and Scattered Straw.
The leaves were either embossed with Textured Leaves Texture Fade or painted with Distress Crackle and then stained.

I assembled the piece with some hessian ribbon and a word band.
It evokes the Autumnal feel for me, the Autumn chill in the mornings, mist and then the sun breaking through.

I am entering Challenge 15, The Colours of Autumn on A Vintage Journey.

So excited to get a Pinworthy badge!


Gift Bag

Posted on

Gift BagI wanted to make a small gift bag for a present and the Marion Smith papers were ideal. I worked out the size and used ” Off the wall” 12×12 paper. I scored 4, 10, 4 and 10cms down and then 16 and 7cms across. This gives you a flap to stick down at the side. You need to fold the box shape then fold a triangle shape at the bottom, front and back then stick together. (Sorry, should have taken photos!)
I fussy cut the butterfly frame from an “Off the wall” paper and glued it to the front. I punched a hole and threaded through some ribbon inked with a China Blue DI.image
I like how the papers mix and match pattern and colour.
This is a project for Jones Craft.


ATC’s for friends

Posted on

ATC's
My first venture into making ATC (Artist Trading Card) was inspired by A Vintage Journey Challenge 13, particularly Richele Christensen’s creations.

I had some friends in mind when I was thinking about the designs and I wanted to reflect their interests.


Embossed backgrounds
I Covered card with foil tape and then dry embossed each card. I chose a TH embossing folder for each friend, I had steampunk, Ruth had American journey, Carol had butterflies and Marilyn had Autumn leaves because she likes countryside walking.

I used Distress Paints to create Tim’s Industrial background technique. The colours are meant to reflect the themes. I discovered that each colour has to be painted and wiped off individually otherwise the colours mix!


image
My ATC with the Steampunk theme had a Paperartsy stamp and TH film ribbon stapled on. I stamped Adventure onto the band and added a metal tag to the knot.

image


image

Ruth is going on holiday to America soon and I selected USA and holiday stamps. Her husband is a vintage car fan, the jalopy is travelling along a film strip ribbon road.


I chose butterflies for Carol, one of Tim’s stamps. I love inking with Distress Markers and then huffing on the stamp! I dyed the crinkle ribbon with Distress Stain and added a key. I stamped a C on the brad holding the key. I changed the background from the original embossing folder, choosing one which matched the butterfly stamps.

image
The last ATC had Autumn Leaves and acorns from a TH die cut from cor’dinations paper, sanded and inked. I embossed orange cor’dinations with the background die and frayed ribbon for texture. I added some chit chat stickers with tiny brads.

I really enjoyed making my first ATC’s and maybe they won’t be the last. I used some Tim techniques and lots of his products. I hope my friends like their cards!